Home maintenance can be daunting, but tackling small repairs yourself can save you money and provide a sense of accomplishment. One versatile product that simplifies many common exterior fixes is Henry Wet Patch 208, a durable, rubberized asphalt patching compound. This remarkable material offers a surprisingly effective solution for a range of DIY projects, from patching damaged roofing shingles and repairing leaky flashing to sealing gaps in fences and mending other weather-related damage around your home. Its ease of use makes it perfect for the weekend warrior tackling minor repairs.
Henry Wet Patch 208's unique properties allow for application even in wet conditions, eliminating the need to wait for ideal weather. This significantly speeds up the repair process and minimizes disruption. This guide will take you through a step-by-step process demonstrating how to effectively use Henry Wet Patch 208 to repair your roof, shingles, fence, and flashing, ensuring a watertight and long-lasting solution.
Preparation and Safety Guidelines
- Henry Wet Patch 208
- Putty knife
- Always prioritize safety. Wear appropriate safety gear, including gloves, eye protection, and a safety harness when working at heights.
- Before starting any repair, inspect the damaged area thoroughly to assess the extent of the problem and determine if a professional is needed. Attempting repairs beyond your skill level can be dangerous and ineffective.
- Ensure proper ventilation when working with Henry Wet Patch 208 or any other sealant. Follow the manufacturer's instructions carefully for application and drying times.
Step-by-Step Instructions
Inspection and Preparation
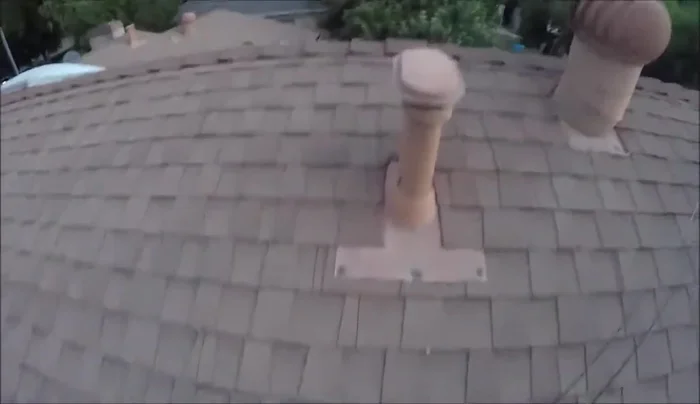
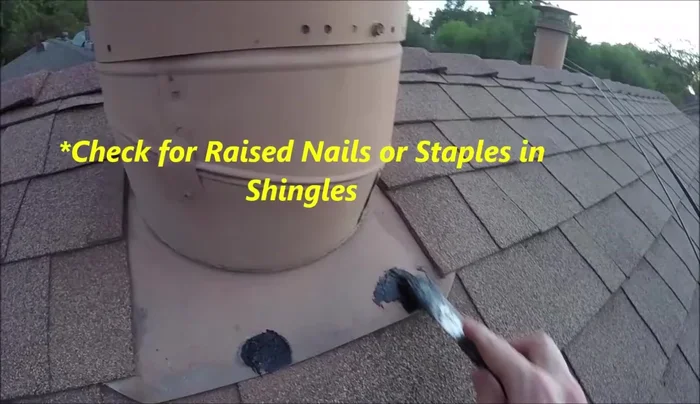
- Inspect your roof, shingles, fence, and flashing for damage, especially before the rainy season. Check for nail holes, cracks, and damaged seals around vents and pipes.
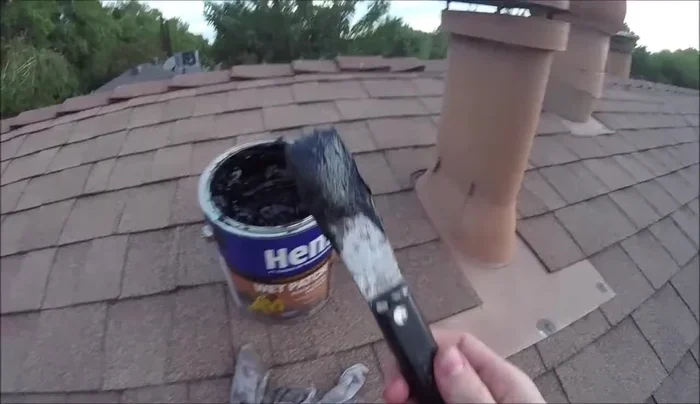
- Use a putty knife to carefully clean around the damaged area. Ensure nail holes are properly addressed and not covered over.

Inspection and Preparation Application of Henry Wet Patch 208
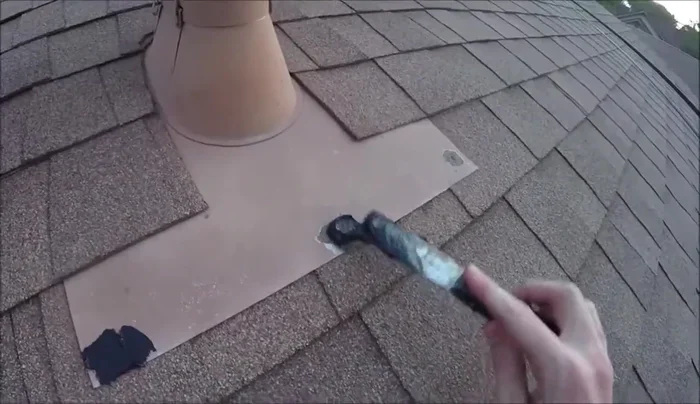
- Apply Henry Wet Patch 208 to the damaged areas, including nail holes, cracks in shingles, and damaged flashing around vents and pipes. A small dab is sufficient for nail holes.
- Taper the application to allow water to run off smoothly. Focus on areas prone to water damage.
- Pay close attention to flashing around vents, whirlybirds, and vent pipes. Make sure to check the rubber seals around newer vent pipes for cracks.
Application of Henry Wet Patch 208 Drying and Completion
- Allow the sealant to dry completely.

Tips
- Regular roof inspections (every season) can help prevent leaks.
- Henry Wet Patch 208 can be applied even when it's wet.
- The caulking tube makes it easy for small repairs.
- Preventative maintenance is best, but repairs can be done even in wet conditions.