Is your child's bedroom feeling a little…blah? Tired of the same old walls and cramped storage? Transforming your child's space doesn't require a fortune or a professional renovation crew. With a little creativity, elbow grease, and the right DIY techniques, you can create a stunning, personalized haven that reflects your child's unique personality and fosters a sense of calm and wonder. Imagine crisp, clean paint lines accentuating carefully chosen colors, and custom-built furniture maximizing every inch of available space. This isn't just a makeover; it's an opportunity to bond with your child while creating something truly special.
This article will guide you through a step-by-step process of achieving this fantastic room transformation, from selecting the perfect paint and prepping the walls to designing and building functional, stylish built-in furniture. Get ready to roll up your sleeves and unleash your inner designer – let's get started!
Preparation and Safety Guidelines
- Paint Sprayer
- Paintable Caulk
- Painter's Tape
- Shiplap Panels
- Plywood (various thicknesses)
- Pocket Hole Jig
- Clamps (various types)
- Planer
- Router
- Biscuit Joiner
- Edge Banding
- Rubio Monocoat
- Pin Nails
- Adult supervision is crucial at all times when using paint, tools, or working near power outlets. Children should be kept away from the work area entirely.
- Ensure proper ventilation when using paints and other potentially harmful chemicals. Wear a respirator mask if necessary and open windows.
- Secure all built-in furniture firmly to the wall to prevent tipping accidents. Use appropriate anchors and fasteners suitable for your wall type.
Step-by-Step Instructions
Room Preparation
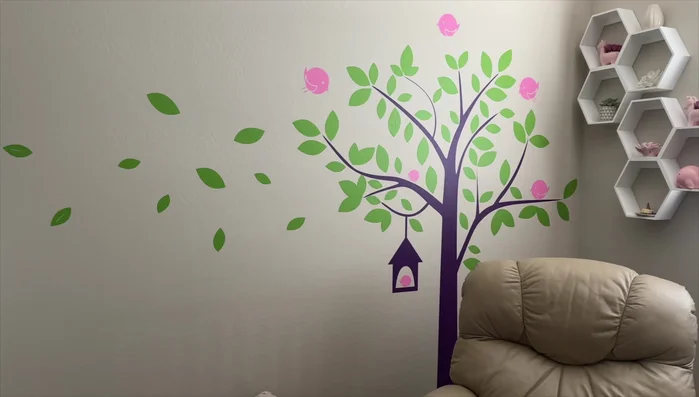
- Clear the room and remove existing decals.

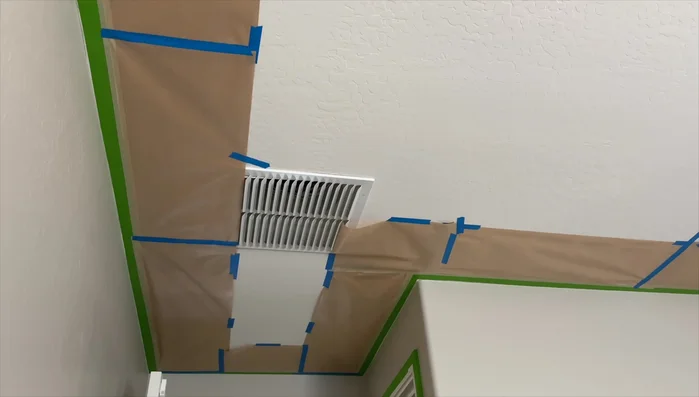
Room Preparation Wall Painting
- Prep and spray paint the walls with Ibis White (HGTV Home by Sharon Williams).
- Create clean paint lines on textured walls using paintable caulk along tape lines, then immediately remove the tape after painting.
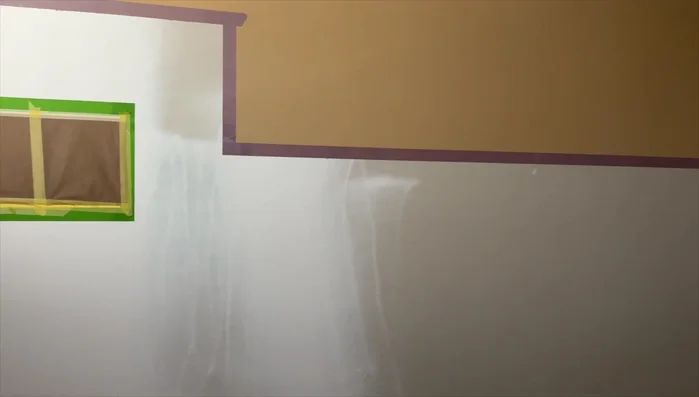
- Add a second accent wall using color blocking technique with Dromedary Camel and Sache Sand (HGTV Home by Sharon Williams).
- Install smooth vinyl panels on the first accent wall, spray painting them with Sache Sand for a cohesive look.
Wall Painting Custom Bed Construction
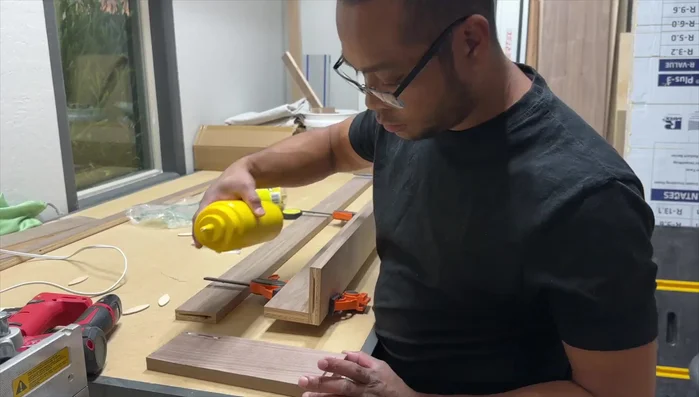
- Build a custom twin bed using walnut plywood, assembling with pocket screws and clamps.
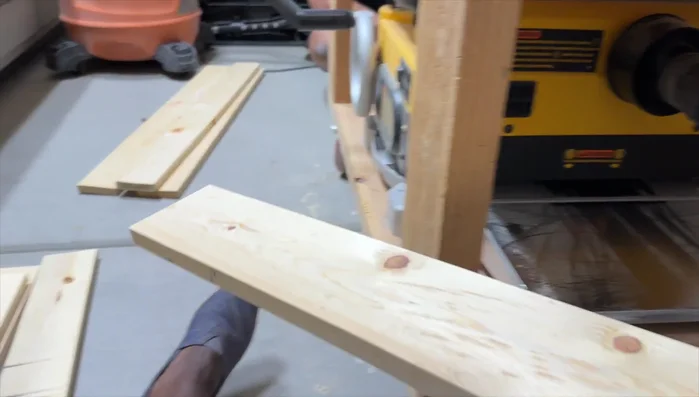
- Create slat supports for the mattress using 1x4 common boards, planed and routed for a smooth finish.
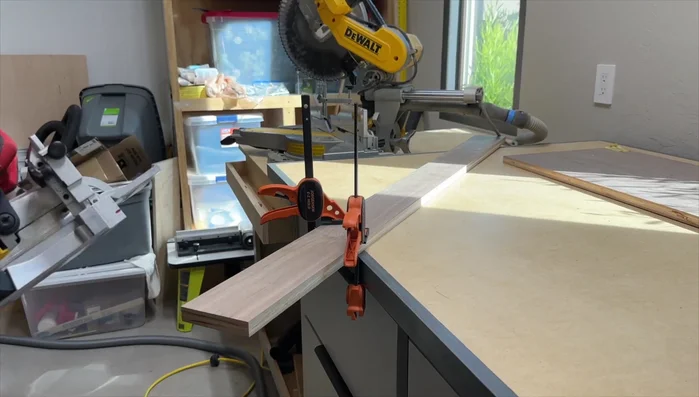
- Assemble the headboard using biscuits and glue, and add edge banding for a professional finish.
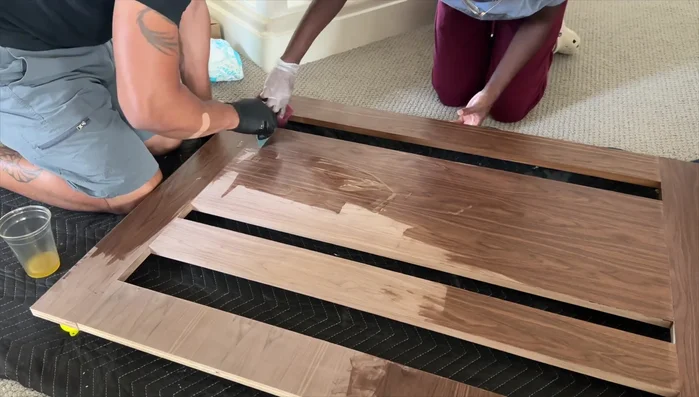
- Apply Rubio Monocoat to visible parts of the bed for protection and to enhance the walnut's natural beauty.
Custom Bed Construction Bookshelf Construction and Installation
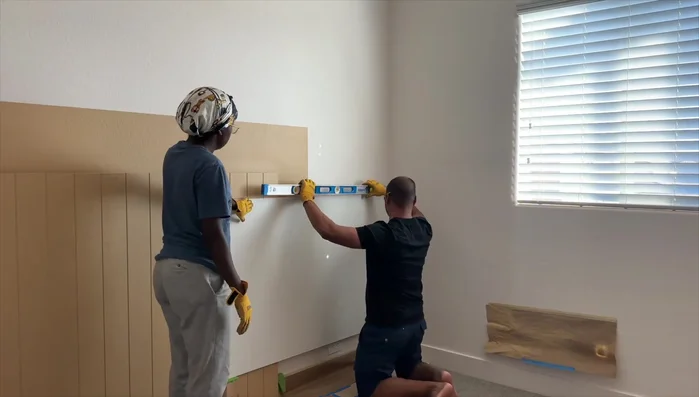
- Build custom walnut bookshelves using biscuits, glue, and pin nails. Apply Rubio Monocoat and install under the window.
Bookshelf Construction and Installation
Read more: Ultimate Guide to Harmonious Bedroom Furniture Arrangement
Tips
- Use a paint sprayer for even coverage and efficient painting.
- For clean paint lines on textured walls, apply paintable caulk along tape lines and remove tape immediately after painting.
- Use clamps to ensure proper alignment and secure joints during furniture construction.
- Use a planer and router to smooth and soften the edges of wood pieces.
- Use biscuits and glue for strong and clean joints in furniture construction.