Transforming discarded materials into beautiful and functional home décor is a rewarding experience, and this DIY project proves just that. Pallet wood, often destined for the landfill, offers a surprisingly versatile material for crafting unique and stylish additions to your garden or home. With its rustic charm and inherent texture, reclaimed pallet wood lends itself perfectly to creating a modern planter box, adding a touch of industrial chic to any space. This project is surprisingly accessible, requiring minimal tools and costing next to nothing, making it an ideal weekend project for even the most novice DIY enthusiast.
This guide provides a comprehensive step-by-step process for building your own stunning modern pallet planter box. From selecting the right pallet to finishing touches, we'll walk you through each stage ensuring a beautiful and functional result. Prepare to be amazed at how easily you can upgrade your outdoor space with this eco-friendly and stylish project!
Preparation and Safety Guidelines
- Pallets
- Miter saw
- 1x2s (or 2x4s)
- Nail gun or screws
- Drill
- Wood
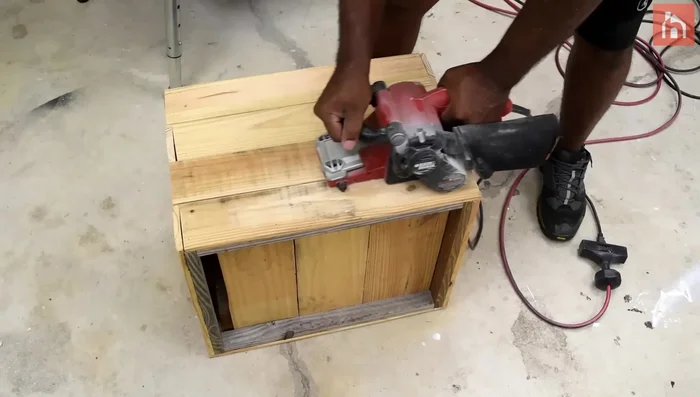
- Belt sander
- Paint
- Caulk
- Clear polyurethane
- Plastic lid
- Weed barrier
- Rocks
- Always wear safety glasses and gloves when handling pallets. Splinters and hidden nails are common hazards.
- Ensure pallets are free from chemical treatments before use. Some treated wood contains harmful substances.
- Use appropriate sealant or paint designed for outdoor use to protect the wood and prevent rot.
Step-by-Step Instructions
Prepare the Pallet Wood
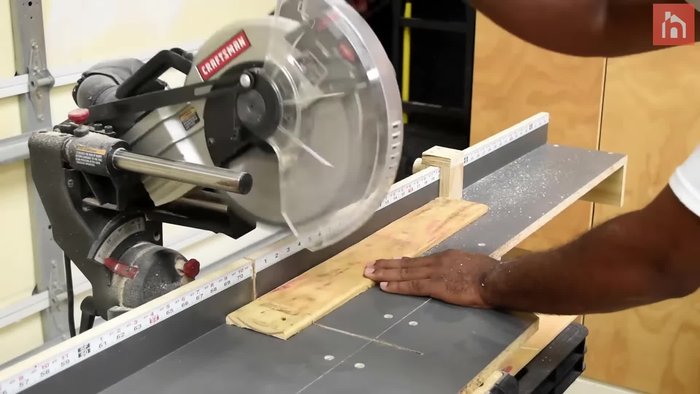
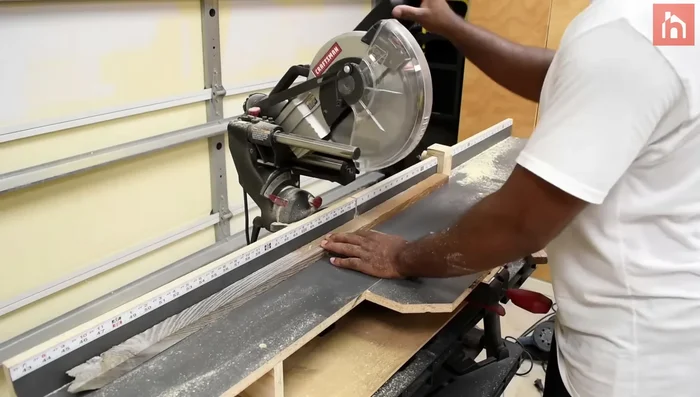
- Cut pallets down to size (16in x 20in).
- Sand the rough pallet surfaces.

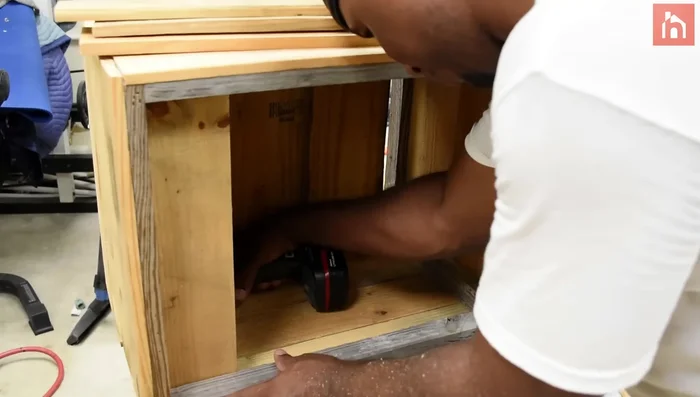
Prepare the Pallet Wood Build the Frame
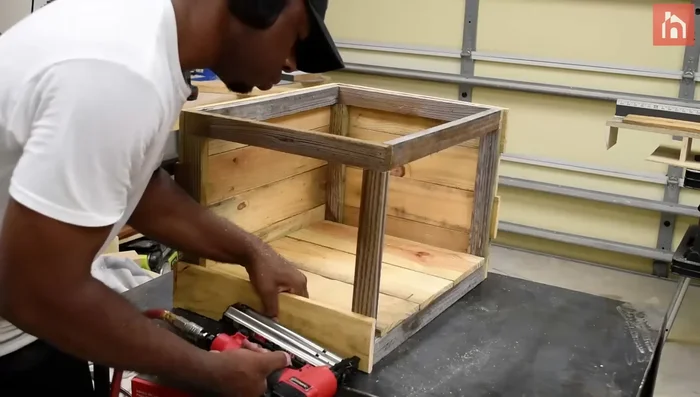
- Cut 1x2s for the frame and assemble using a nail gun or screws (pre-drill holes for screws).
- Attach pieces of wood in the corners to determine the planter box's height.
Build the Frame Attach Pallets to Frame
- Attach pallets to the frame, offsetting every other board for interlocking strength.
Attach Pallets to Frame Install Bottom and Interior Trim
- leave space for a flower pot).
- Create an interior trim using pallet pieces to support rocks.
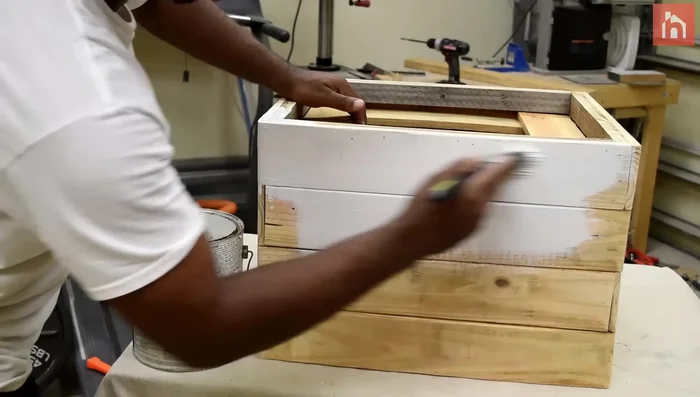
Install Bottom and Interior Trim Finish and Paint
- Paint the planter box, caulk and fill nail holes and cracks.
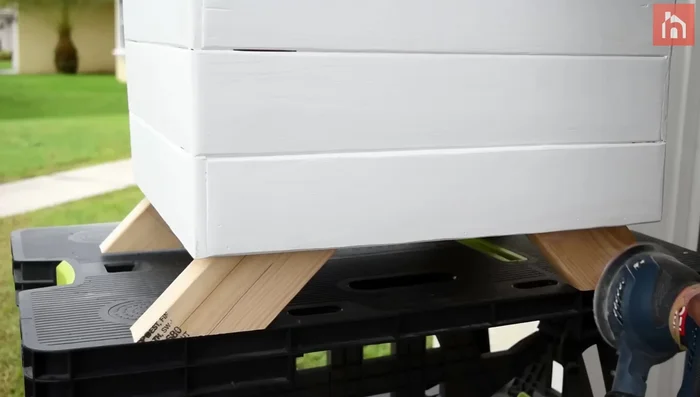
Finish and Paint Add Legs
- Construct legs using 2x4s, cutting 45-degree angles and attaching with screws.
- Sand the legs and apply a coat of clear polyurethane.
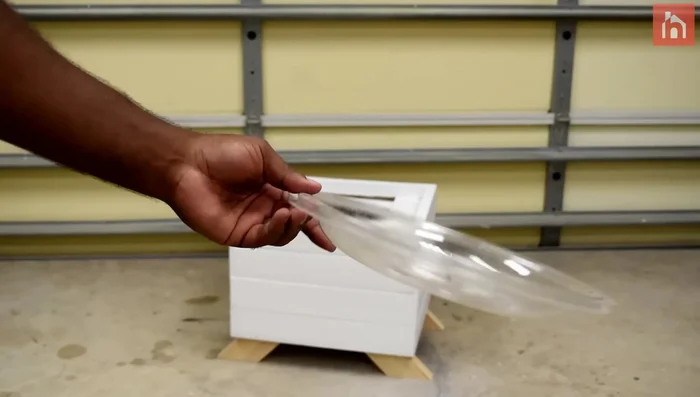
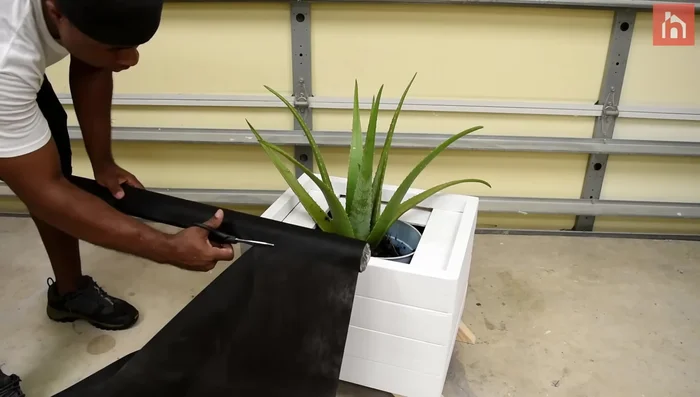
Add Legs Drainage and Planting
- Add a plastic lid for drainage.
- Insert the flower pot, add weed barrier and rocks.
Drainage and Planting


Read more: Build a Sag-Proof Wood Fence Gate: The Ultimate DIY Guide
Tips
- Pre-drilling holes prevents wood splitting when using screws.
- Offsetting pallet boards creates interlocking strength.
- Using a belt sander smooths rough pallet surfaces for better paint adhesion.