A garage door opener is a modern convenience that drastically improves home security and ease of access. However, for those comfortable with basic electrical work, installing your own opener can be a rewarding and cost-effective project. This eliminates the need for expensive professional installation, allowing you to take control of your home's security system and potentially save significant money. Incorrect wiring, however, can lead to malfunction or even safety hazards, so careful attention to detail is crucial. This is why understanding the wiring process is paramount.
This step-by-step guide will walk you through the entire process of wiring your garage door opener, from preparing the components to securing the final connections. We'll cover essential safety precautions, clear identification of wires, and troubleshooting common issues, ensuring a smooth and successful installation. Let's begin!
Preparation and Safety Guidelines
- Screwdriver
- Wire strippers
- Hammer
- Drill
- Always disconnect the power to your garage door opener and the garage door itself before beginning any wiring work. This prevents electric shock and accidental operation.
- Use only wire nuts appropriate for the gauge of wire being used. Improperly connected wires can lead to overheating and fire hazards.
- If you are uncomfortable working with electricity or are unsure about any step, consult a qualified electrician. Improper wiring can damage your opener or create safety risks.
Step-by-Step Instructions
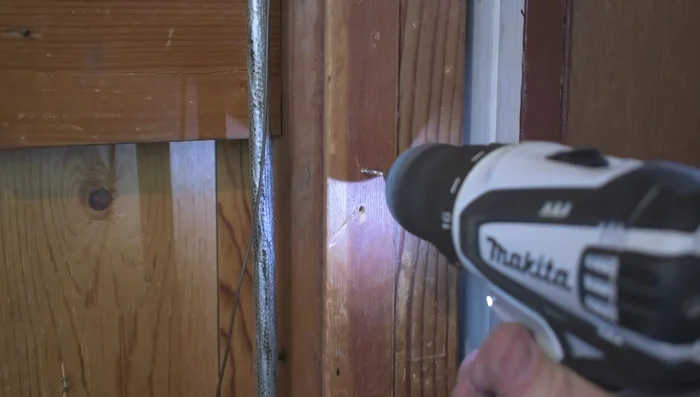
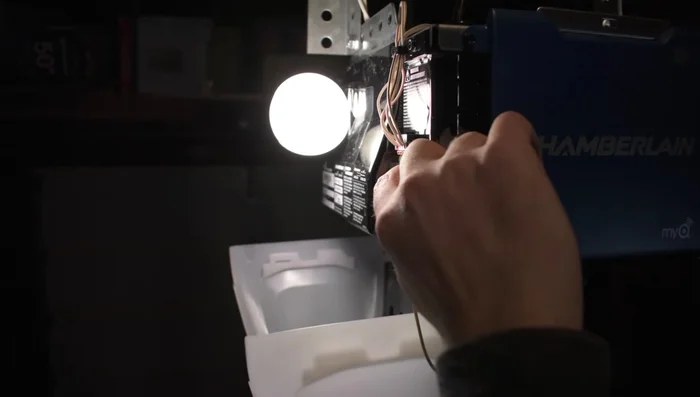
Replace Old Wiring
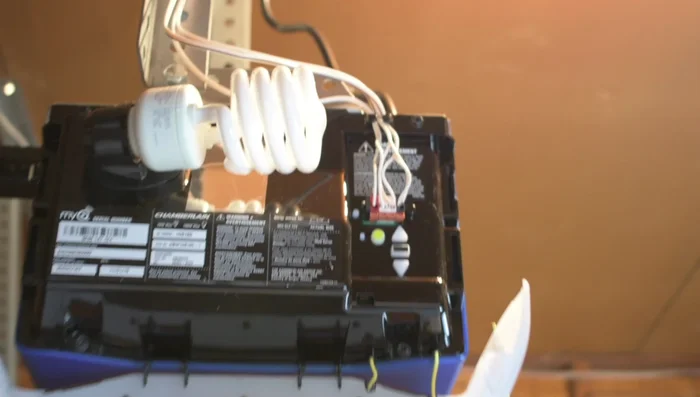
- Remove the old wiring from the wall and replace it with new wire provided with your garage door opener kit. Split the wire, strip the ends, and attach the red wire to the red terminal and the white wire to the white terminal on the garage door opener.

Replace Old Wiring Mount Garage Door Opener
- Drill pilot holes in the wall for mounting the garage door opener. Secure the opener to the wall using the provided bolts.
Mount Garage Door Opener Route and Secure Wiring
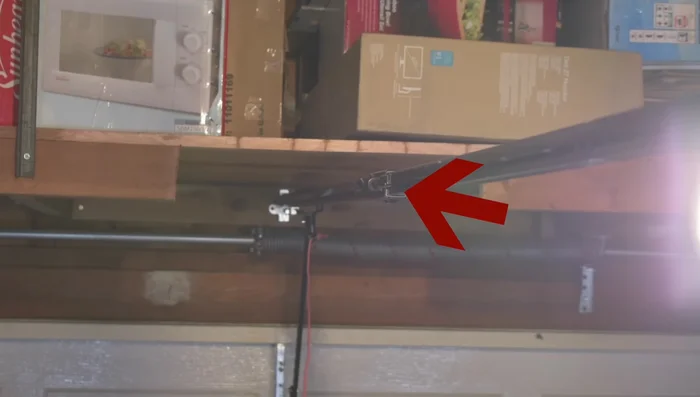
- Route the new wiring from the garage door opener to the garage door using staples.
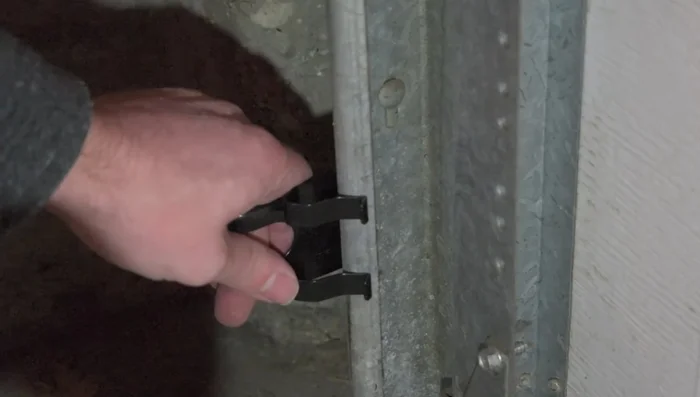
Route and Secure Wiring Install Sensor Brackets
- Attach the garage door sensor laser holder brackets to the garage door using pressure; no bolts needed. Ensure the prongs don't extend beyond the track.
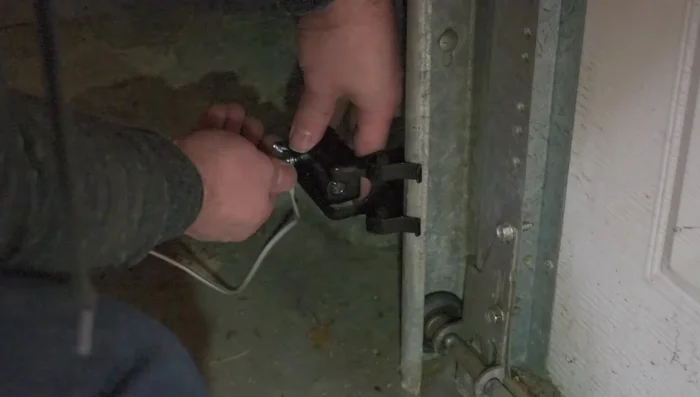
Install Sensor Brackets Install Sensors
- Attach the garage door sensors to their brackets using the provided bolts and wing nuts.
Install Sensors Connect Sensor Wires
- Connect the sensor wires (black and white) to the garage door opener. Join the black wires together and the white wires together, then insert them into their respective color-coded terminals on the opener.
Connect Sensor Wires Power Up and Test Sensors
- Plug in the garage door opener. Verify power by checking for green and amber lights on the sensors.
Power Up and Test Sensors Initiate Programming
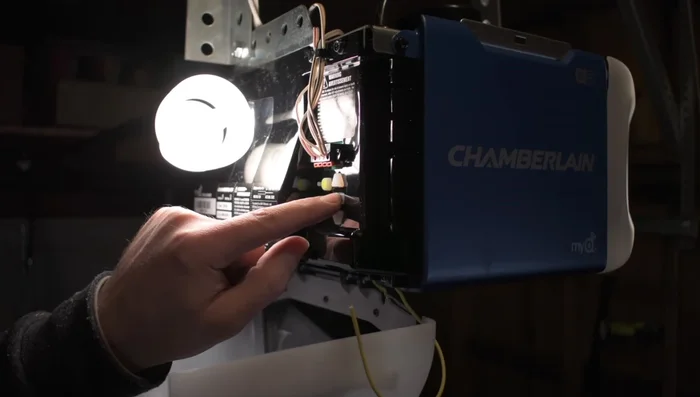
- Press the middle learn button on the garage door opener once to initiate programming. The opener will beep.
Initiate Programming Program Opening Limit
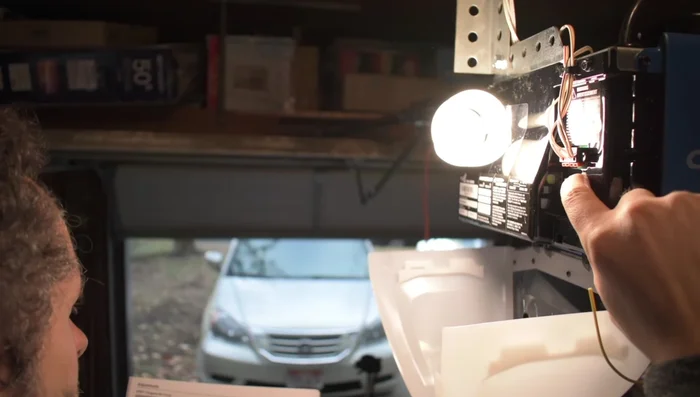
- Attach the garage door track to your garage door. Press and hold the down button until the garage door clicks into place and the emergency release is horizontal, with the arrow blinking orange/red.
- Press and hold the down button until the garage door reaches your desired opening point. Press the middle learn button again. The down arrow will blink orange/red.
Program Opening Limit Program Closing Limit and Test
- Repeat the process for closing the garage door using the up arrow. Test the up and down buttons to ensure the door stops where programmed.
Program Closing Limit and Test


Read more: Installing an Outdoor GFCI Receptacle: A Step-by-Step Guide
Tips
- When replacing old garage door wiring, it's best to use new wire for optimal performance and safety.
- Use staples to neatly secure the wiring along the garage door track.
- Ensure the sensor prongs don't extend beyond the track to avoid interference with garage door operation.