Upgrading your home's lighting control can significantly enhance both its functionality and aesthetic appeal. Three-way switches, like the Leviton 1453 Decorah 50 603 and Renew RE 153, offer versatile control, allowing you to manage lights from two different locations. Installing these switches, however, requires a certain level of electrical knowledge and careful attention to safety procedures. Whether you're a seasoned DIY enthusiast or a curious homeowner tackling your first electrical project, understanding the proper installation process is crucial for achieving a successful and safe outcome.
This comprehensive guide provides a clear and detailed step-by-step approach to installing both the Leviton and Renew three-way switches, ensuring you can confidently complete the project without compromising safety. From turning off the power and identifying wires to connecting the switches and testing the installation, we’ll walk you through every stage of the process, leaving you with perfectly functioning and stylish light switches. Let's get started with the detailed instructions below!
Safety Guidelines
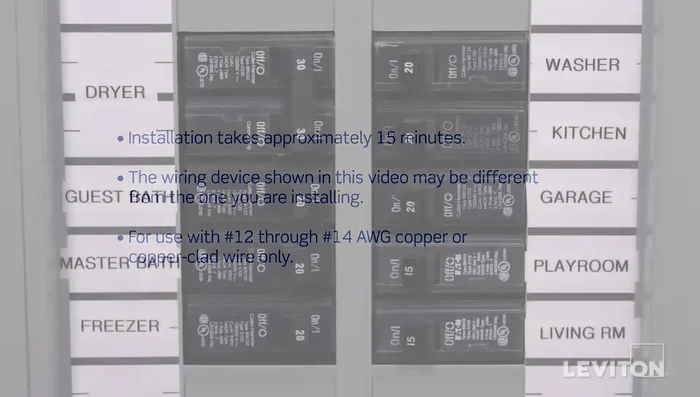
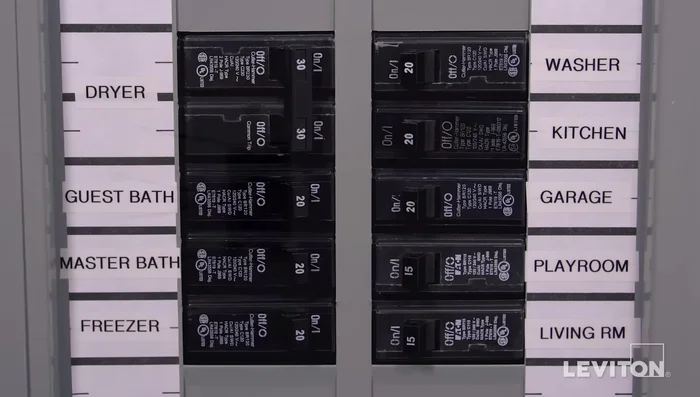
- Always turn off the power at the breaker box before working with any electrical wiring. Failure to do so can result in serious injury or death.
- Verify the power is off using a non-contact voltage tester before touching any wires. The breaker may be faulty.
- If you are uncomfortable working with electrical wiring, consult a qualified electrician. Improper wiring can lead to fire hazards and electrical shock.
Methods: Wiring Leviton 3-Way Switches
Tools Needed
- Flathead screwdriver
- Philips head screwdriver
- Electrician's pliers
- Wire stripper
- Electrical tape
- Handheld voltage tester
Step-by-Step Instructions
Safety First: Power Off and Verification
- Turn off the power at the circuit breaker and verify with a voltage tester.

Safety First: Power Off and Verification Identify and Label Hot Wire
- Identify the hot wire using the voltage tester with the breaker ON. Label the hot wire with electrical tape.
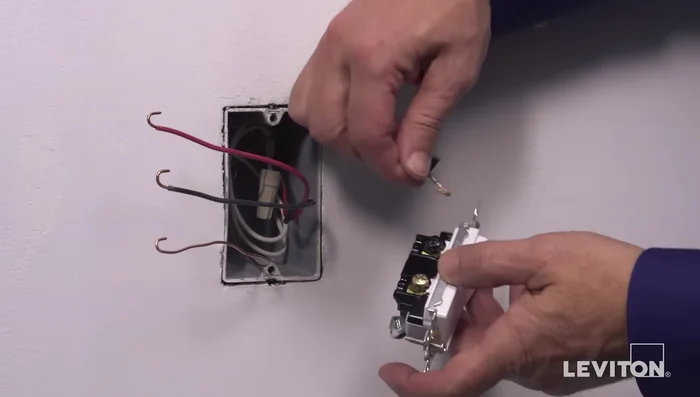
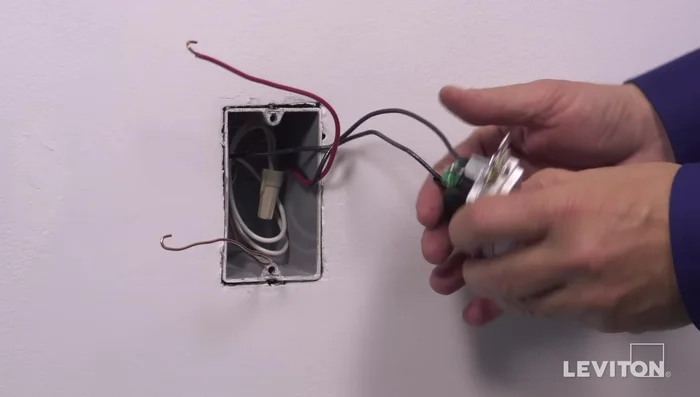
Identify and Label Hot Wire Prepare Wiring
- Prepare the wires; ensure they are straight and stripped according to the gauge on the device.
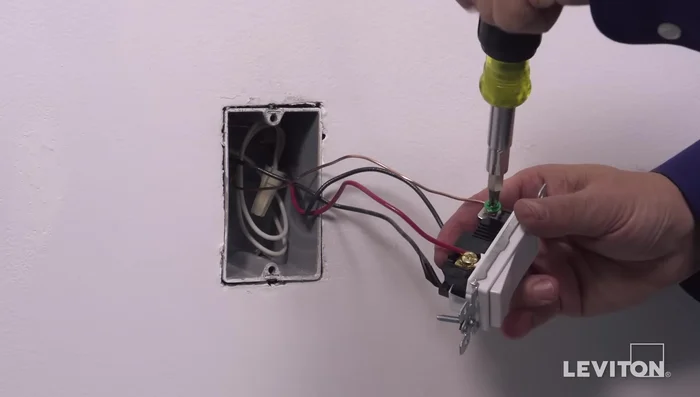
Prepare Wiring Wire the Switch (Loop Method)
- Loop the hot wire clockwise 3/4 turn around the black terminal screw. Tighten firmly.
- Loop one traveler wire clockwise 3/4 turn around one brass terminal screw. Tighten firmly.
- Loop the remaining traveler wire clockwise 3/4 turn around the other brass terminal screw. Tighten firmly.
- Loop the ground wire clockwise 3/4 turn around the green screw. Tighten firmly.
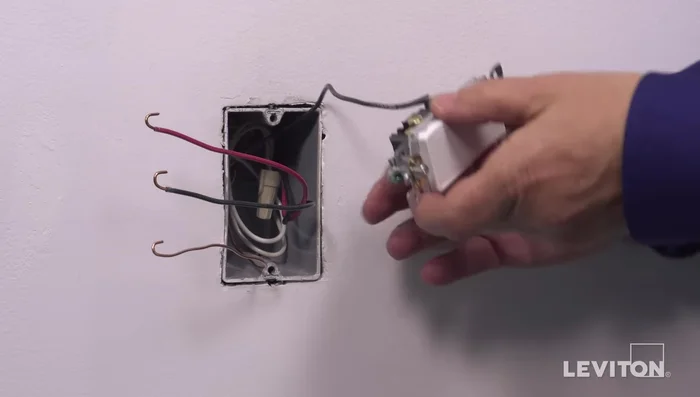
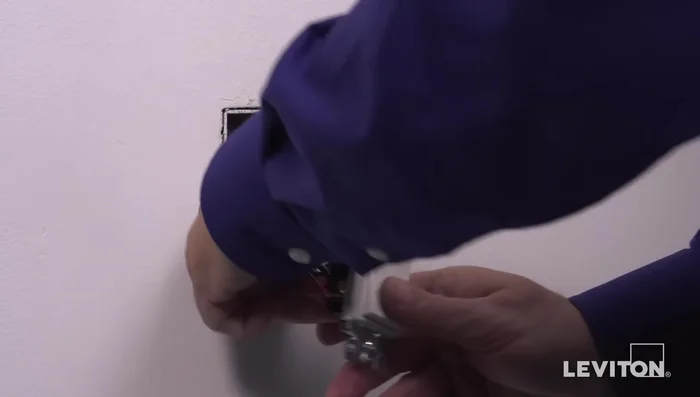
Wire the Switch (Loop Method) Install the Switch
- Mount the device in the wall box using the provided mounting screws.
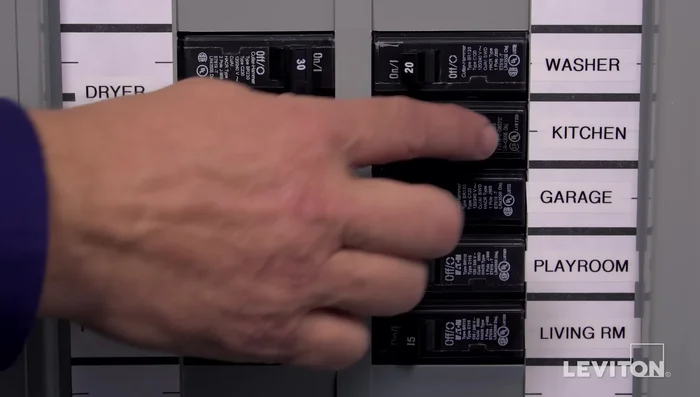
Install the Switch Restore Power and Test
- Restore power at the circuit breaker.
- Test the switches by operating them several times at both locations to ensure the lights turn on and off correctly.
Restore Power and Test


Tips
- If unsure about any part of the installation, contact an electrician.
- Wire colors may vary; the hot wire may be black or red, and the ground wire may be green or bare copper.
- For circuits with 12-gauge solid copper or copper-clad wires, use terminal screws instead of quick wire terminals.
Read more: How to Repair Damaged Power Cords: The Ultimate Guide