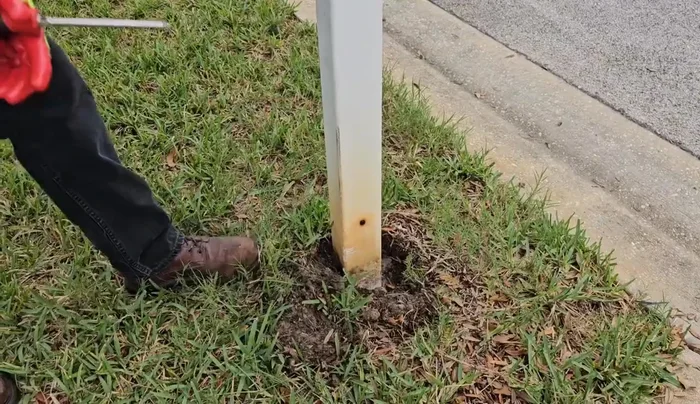
Is your mailbox post leaning precariously, threatening to succumb to the next strong gust of wind? A wobbly mailbox is more than just an eyesore; it represents a potential security risk and could even damage your vehicle. Replacing a broken mailbox post can be surprisingly expensive, but thankfully, there's a cost-effective and surprisingly simple solution: DIY repair! Forget expensive contractors and frustrating waiting times; with a few readily available tools and materials, you can restore your mailbox post to its former glory, ensuring years of reliable service.
This guide provides a rock-solid approach to mailbox post repair, offering a durable and aesthetically pleasing solution that will withstand even the harshest weather conditions. Forget flimsy fixes that only last a few weeks; we'll show you how to create a repair that’s built to last. Ready to get started? Let's dive into the step-by-step process outlined below.
Preparation and Safety Guidelines
- 4Runner (or strong vehicle)
- Chain
- Screwdrivers
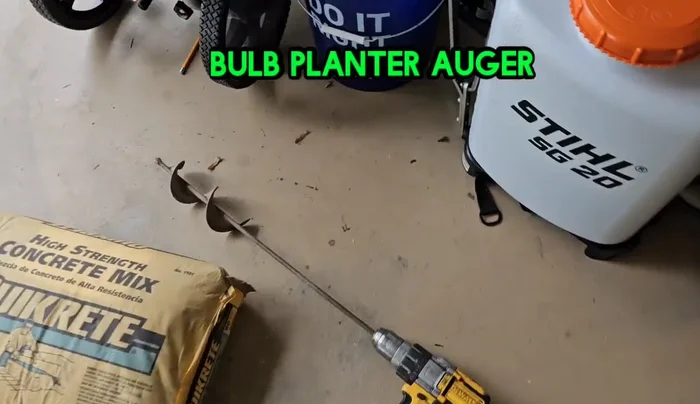
- Auger Drill Bit
- 4x4 Treated Wood Post (or Untreated)
- Circular Saw
- Grinder with Flap Disc
- Concrete Mix
- Measuring Tape
- Level
- Paint (optional)
- Weed Barrier Fabric (optional)
- Mulch (optional)
- Always disconnect the power to any electrical components near the mailbox post before starting any repairs. Failure to do so could result in serious injury or death.
- Wear appropriate safety gear, including gloves and safety glasses, to protect yourself from sharp edges, splinters, and potential debris.
- If you are unsure about any aspect of the repair, especially if it involves structural work or electrical components, consult a qualified professional. Improper repairs can compromise the stability and safety of your mailbox.
Step-by-Step Instructions
Post Removal
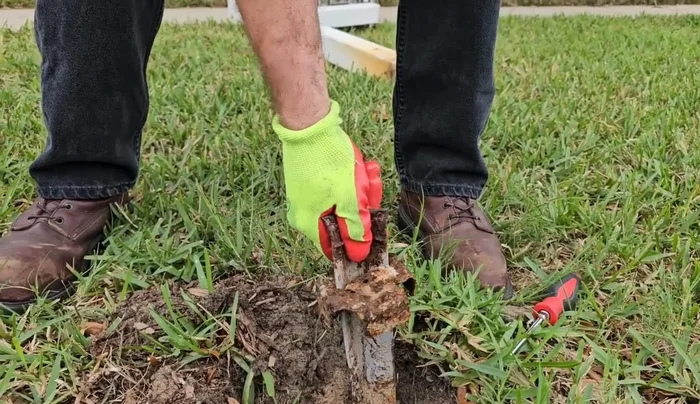
- Remove the old mailbox post.
- Remove the rusted angle iron and old bracket.

Post Removal Prepare the New Post
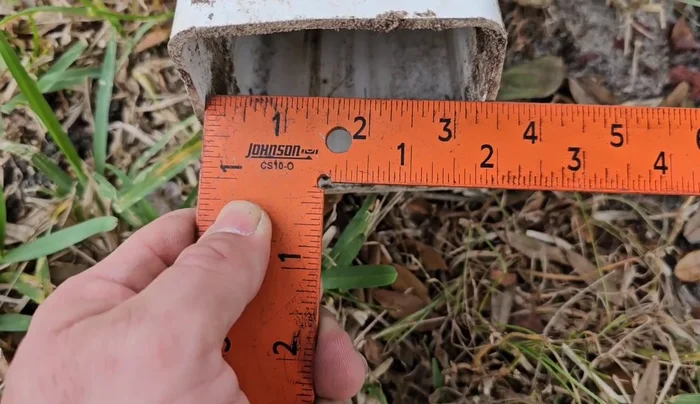
- Obtain a 4x4 treated wood post of appropriate length (approx. 4 feet).
- Cut and shape the 4x4 post to fit snugly within the mailbox. This may involve using a circular saw to cut to length and a grinder to shape the edges for a better fit.
Prepare the New Post Set the New Post
- Auger a hole approximately 2 feet deep in the ground.
- Mix concrete and pour it into the hole.
- Place the prepared 4x4 post into the hole, ensuring it's level, and allow the concrete to set.
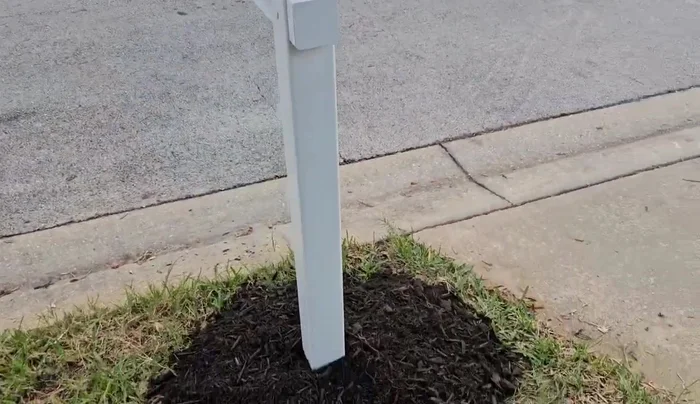
Set the New Post Finishing Touches
- Once the concrete sets, optionally paint the post and add weed barrier and mulch around the base.
Finishing Touches

Read more: Reinforce Wobbly Deck Railings: The Lag Bolt Method
Tips
- Use a strong vehicle and chain to pull out the old post if necessary.
- Untreated wood can work, but treated wood offers better protection against moisture.
- Bevel the edges of the 4x4 post to ease insertion into the mailbox housing.
- A garden auger bit is useful for creating the hole and mixing concrete.
- Mix the concrete to a pourable consistency, not too wet.