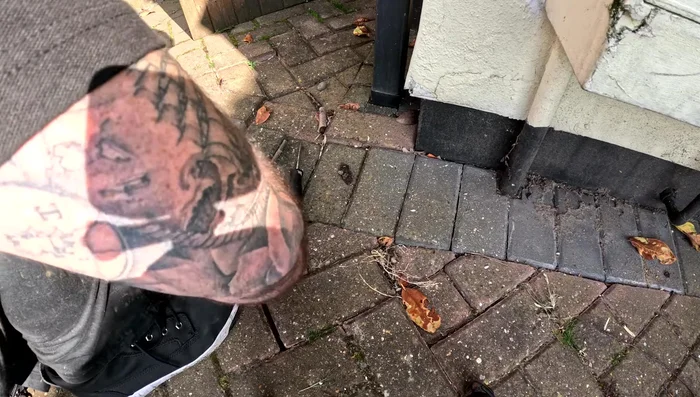
Sunken block paving is an unsightly and potentially dangerous problem, turning a once-attractive driveway or patio into a tripping hazard. Uneven paving stones not only detract from the aesthetic appeal of your outdoor space but can also damage your lawnmower wheels and cause discomfort when walking. Thankfully, re-levelling sunken paving is a manageable DIY project, saving you the expense of hiring professional landscapers. This often involves a little bit of elbow grease but requires no specialist tools and can be accomplished within a weekend for smaller areas.
This guide provides a comprehensive, step-by-step approach to successfully lifting and re-levelling your sunken paving blocks. We'll cover everything from assessing the damage and selecting the right materials to ensuring a long-lasting, even finish. Let's get started with the first step in transforming your uneven paving back into a smooth, safe surface.
Preparation and Safety Guidelines
- Sharps
- Rubber mallet
- Plank of wood
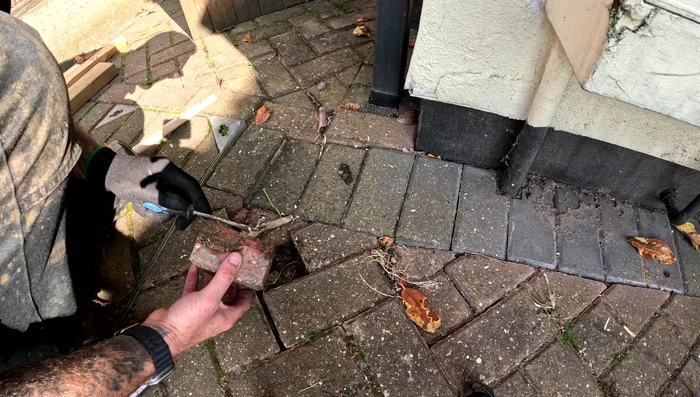
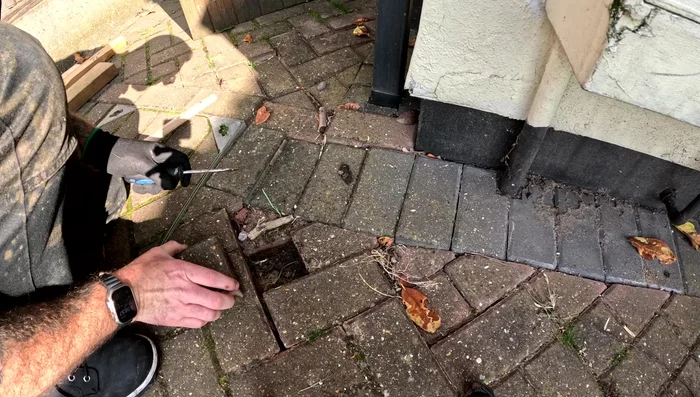
- Thick screwdriver
- Sand
- Always wear appropriate safety gear, including safety glasses, gloves, and sturdy footwear. Working with heavy materials and tools requires caution to prevent injuries.
- Before starting any work, mark out the affected area clearly and ensure you have the necessary tools and materials to hand. This avoids unnecessary interruptions and potential hazards.
- If you're unsure about any aspect of the process, consult a professional. Improperly leveling paving can cause further damage and safety risks.
Step-by-Step Instructions
Preparation
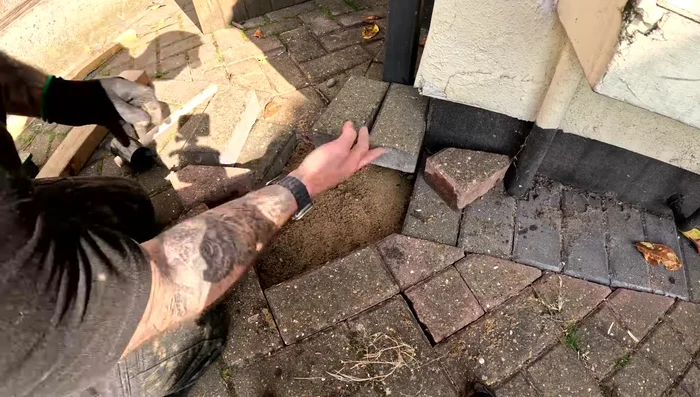
- Take a picture of the block layout.
- Remove one block; the rest are easier to remove after the first one.

Preparation Block Removal
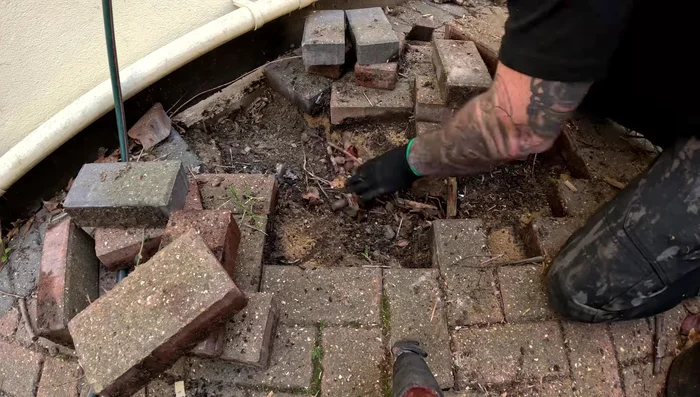
- Identify the sunken area and remove the blocks needing re-leveling.
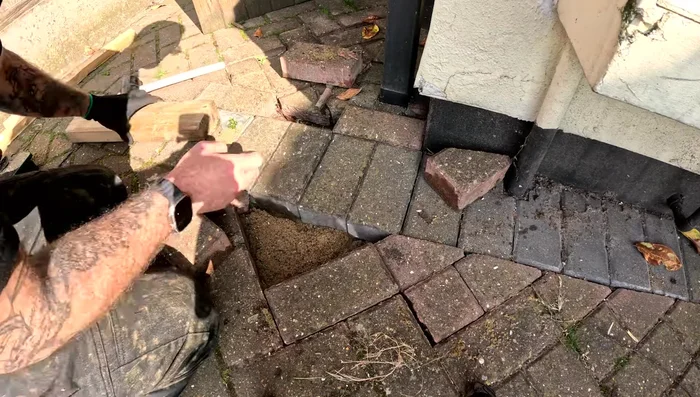
- Scrape off debris and sand from the removed blocks.
Block Removal Sanding and Leveling
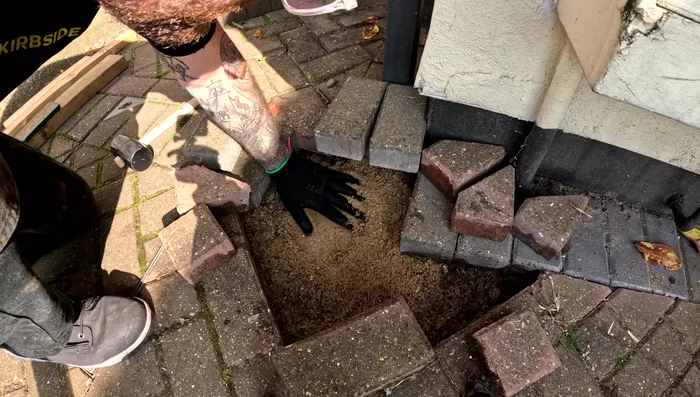
- Add sand to the sunken area. (The video used a bag and a half of sand for the shown area).
- Level the sand; ensure the blocks sit a couple of millimeters higher than the surrounding level blocks once placed.
Sanding and Leveling Block Replacement
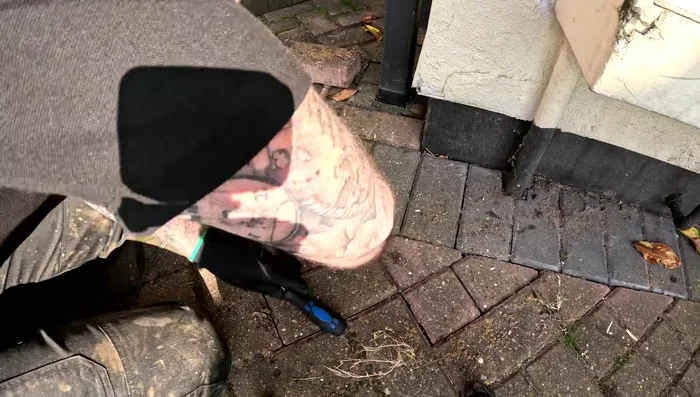
- Place the blocks back in, using a plank of wood and rubber mallet to level and compact them. Avoid hitting the blocks directly with the mallet.
- Ensure all blocks are secure and level to prevent further sinking.
Block Replacement Addressing Multiple Sunken Areas
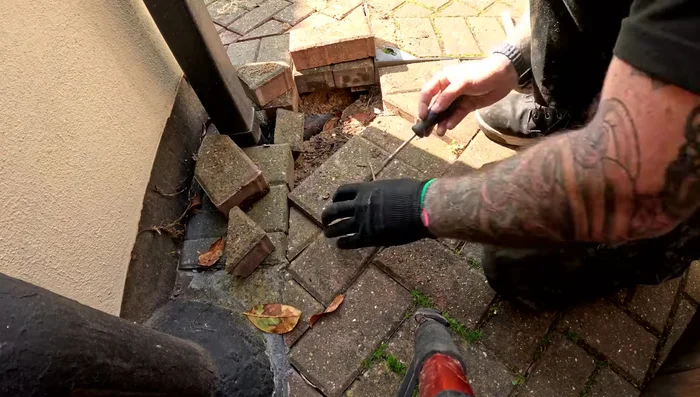
- Repeat the process for any additional sunken areas, potentially working in smaller sections for easier reassembly.
- Use the reference photo to ensure correct block placement.
Addressing Multiple Sunken Areas Severe Sunken Area Repair
- For severely sunken areas with significant gaps, consider adding a sub-base of bricks before adding sand and blocks.
Severe Sunken Area Repair


Read more: Reinforce Wobbly Deck Railings: The Lag Bolt Method
Tips
- Take a picture of the original layout before removing any blocks.
- Work in smaller sections if dealing with a large area to simplify reassembly.
- Use a plank of wood and rubber mallet to avoid damaging the blocks during compaction.
- Add sand gradually as needed rather than removing excess sand.