A sagging gate is more than just an eyesore; it's a security risk and a potential source of frustration. That annoying creak, the difficulty in opening and closing, and the feeling that it's about to fall apart are all telltale signs of a gate in need of repair. Instead of replacing the entire gate, which can be costly and time-consuming, consider a simpler, more affordable solution: an anti-sag kit. This ingenious device provides a straightforward method to restore your gate to its former glory, eliminating those bothersome problems and enhancing the curb appeal of your property.
This article will guide you through a step-by-step process to fix your sagging gate using an anti-sag kit. We’ll cover everything from identifying the type of kit you need to the tools required and the precise installation steps, ensuring even a novice DIY enthusiast can achieve a professional-looking repair. Prepare to reclaim the smooth operation and elegant appearance of your gate with this easy-to-follow guide.
Preparation and Safety Guidelines
- Anti-sag gate kit
- Drill
- 7/64" drill bit
- Screwdriver
- Turnbuckle
- Cable clamps
- Carriage bolt
- Lock washer
- Nut
- Always disconnect the gate from its hinges before starting any repairs. This prevents accidental injury and damage.
- Ensure the gate is properly supported while working on it to prevent it from falling and causing injury or damage. Use a sturdy support or have a helper hold it.
- Wear appropriate safety gear, including gloves, eye protection, and potentially a dust mask, when working with tools or handling materials.
Step-by-Step Instructions
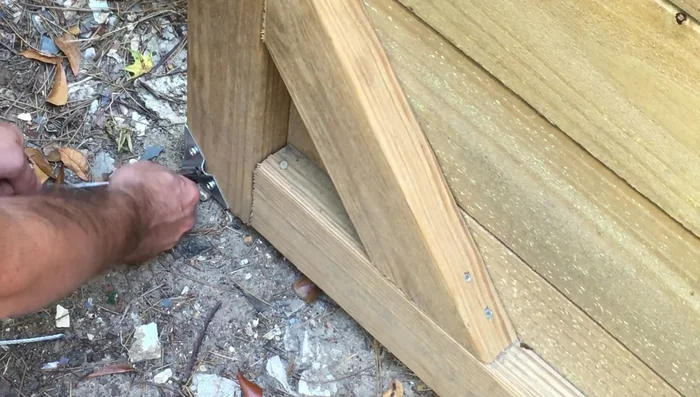
Prepare for Installation
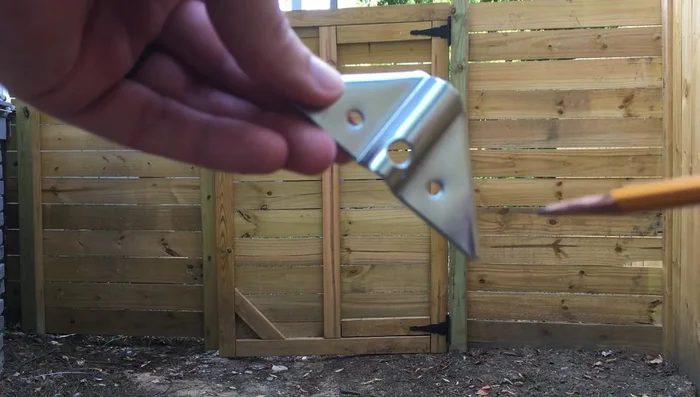
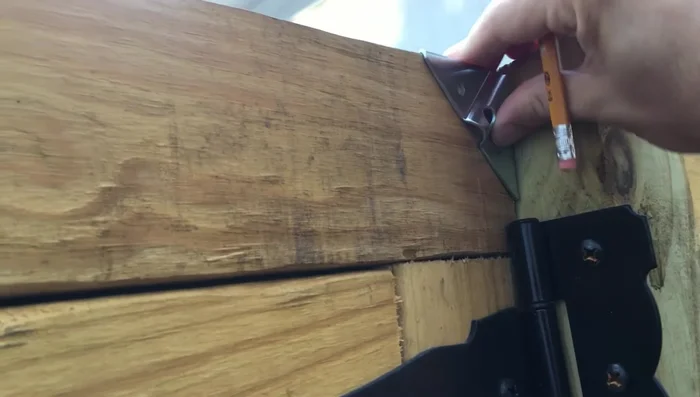
- Position the corner brackets and mark the hole locations.
- Pre-drill holes using a 7/64" drill bit.

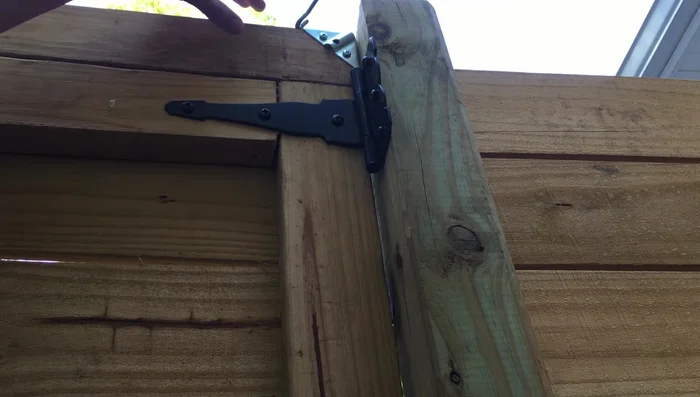
Prepare for Installation Install Corner Brackets
- Attach the corner brackets to the gate posts.
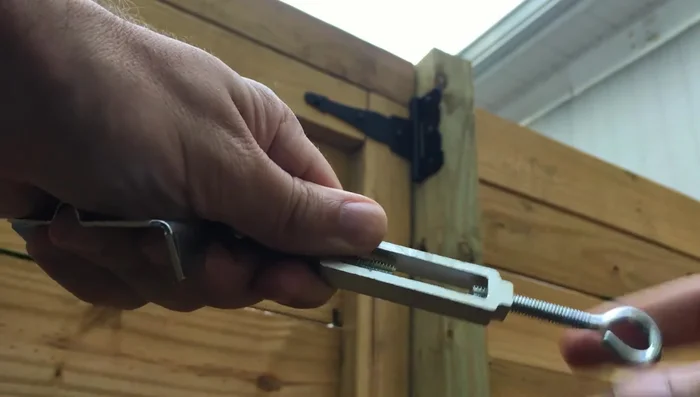
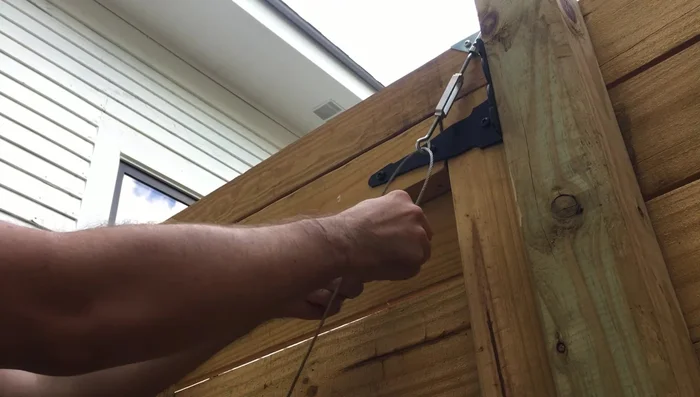
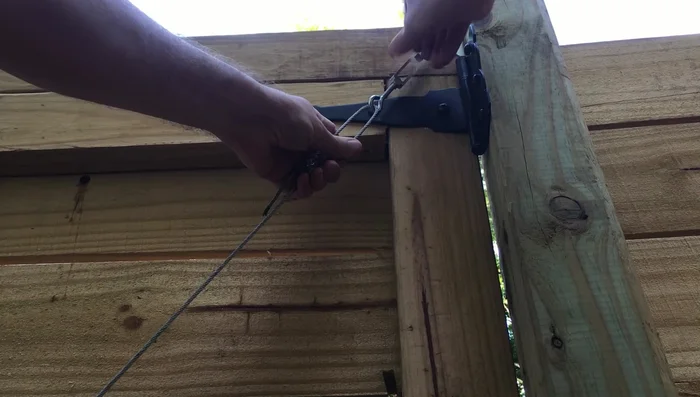
Install Corner Brackets Prepare and Attach Turnbuckle
- Fully extend the turnbuckle.
- Attach the turnbuckle to the top bracket.
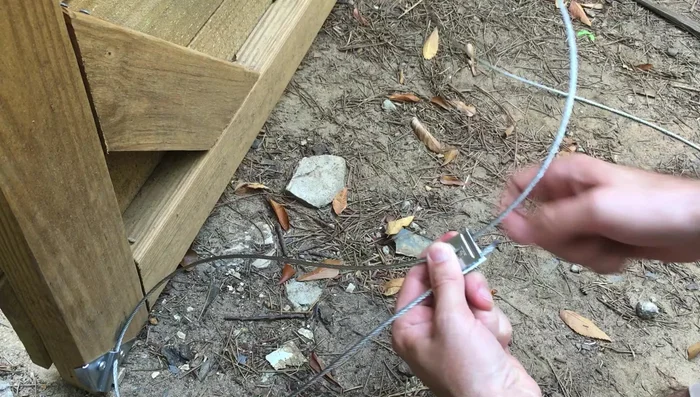
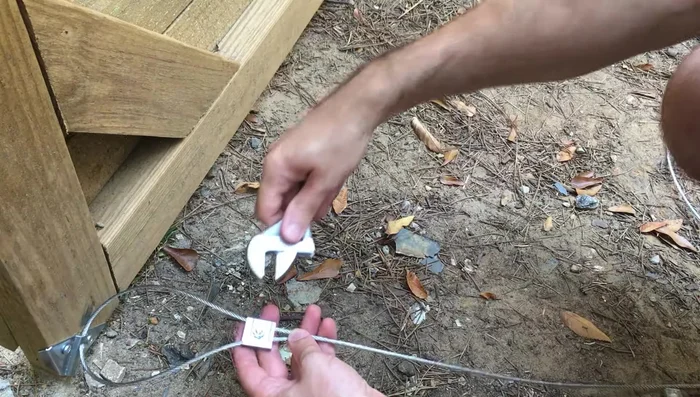
Prepare and Attach Turnbuckle Attach Bottom Cable Clamp
- Run the wire through the bottom bracket.
- Assemble and attach the cable clamps using the carriage bolt, lock washer, and nut.
- Tighten the bottom cable clamp.
Attach Bottom Cable Clamp Attach Top Cable Clamp
- Attach the top cable clamp and tighten.
Attach Top Cable Clamp Adjust Tension
- Tighten the turnbuckle to adjust the gate tension.
Adjust Tension

Read more: Reinforce Wobbly Deck Railings: The Lag Bolt Method
Tips
- It might be easier to run the wire through the bottom bracket before fully tightening the turnbuckle.
- Tighten the cable clamps securely to prevent them from popping out.
- Pull the cable tight before fully tightening the turnbuckle to reduce the amount of tightening needed.
- Check the gate alignment and tension after initial tightening; you may need to make further adjustments after a few days.