Tired of overflowing recycling bins and the constant influx of fast fashion? Give your old clothes a new lease on life with this simple and stylish DIY project! We'll show you how to transform unwanted clothing into a charming and reusable wine bag, perfect for gifting or carrying your favorite bottle to a picnic. This upcycling project is not only environmentally friendly but also a fun way to showcase your creativity and reduce textile waste. It's a perfect blend of practicality and sustainability, resulting in a unique accessory that’s both beautiful and eco-conscious.
This tutorial will guide you through each step of creating your own personalized wine bag, using readily available materials and easy-to-follow instructions. Whether you’re a seasoned crafter or a complete beginner, you'll find this project surprisingly straightforward and immensely satisfying. Get ready to upcycle your wardrobe and learn how to make a beautiful wine bag from old clothes – let’s get started!
Preparation and Safety Guidelines
- Piece of clothing
- Cutting board
- Tape measure or ruler
- At least 30 inches of ribbon
- Stick pins
- Needle or sewing machine
- Thread
- Torch or laundry marker
- Scissors or rotary cutter
- Iron and ironing board
- Always thoroughly clean and dry any fabric used before making contact with wine. Residual detergent or fabric softener can affect the taste of the wine.
- Ensure the fabric is tightly woven and doesn't have any holes or weak areas that could leak wine. Consider lining the bag with a waterproof material (like a plastic bag) for extra protection.
- Avoid using fabrics that might absorb and retain wine odors, such as heavily textured materials or those treated with strong chemicals. Test a small area with a bit of wine before using the whole piece.
Step-by-Step Instructions
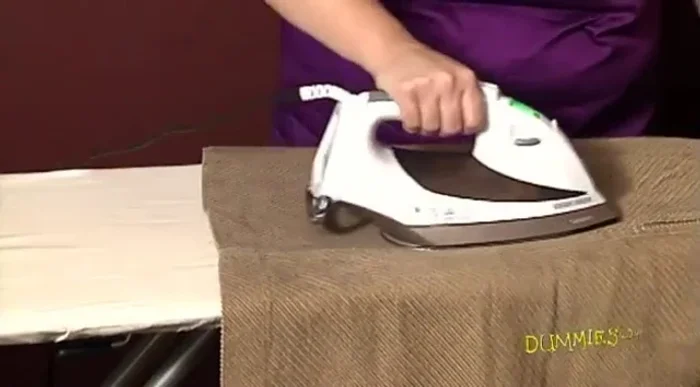
Prepare the Fabric
- Iron your garment to lay it flat. Lay it out with the hem (bottom) farthest from you.

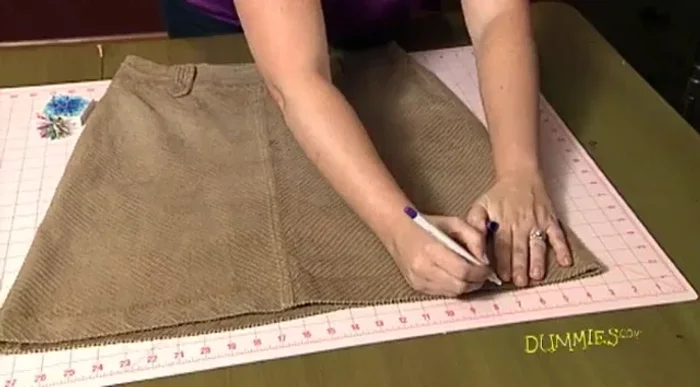
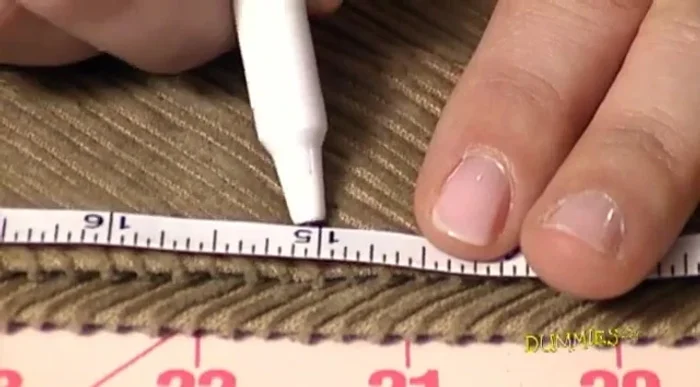
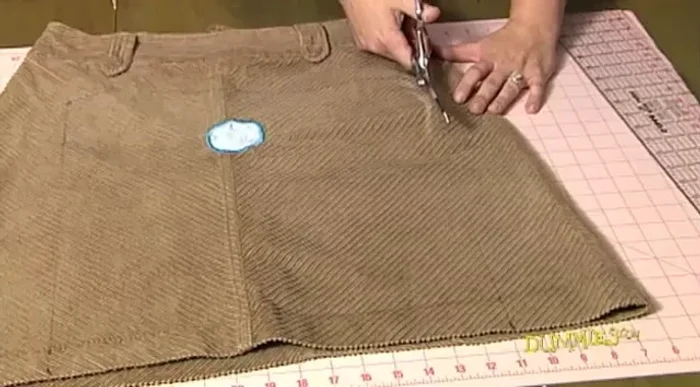
Prepare the Fabric Mark the Cutting Lines
- Mark the cut line using a torch or laundry marker. Measure 15 inches along the hem, mark the end. Measure 16 inches straight down from each point and mark.
- Ensure the points are 15 inches apart. Connect the marks to create a rectangle. Measure diagonally both ways; measurements should be close if not the same.
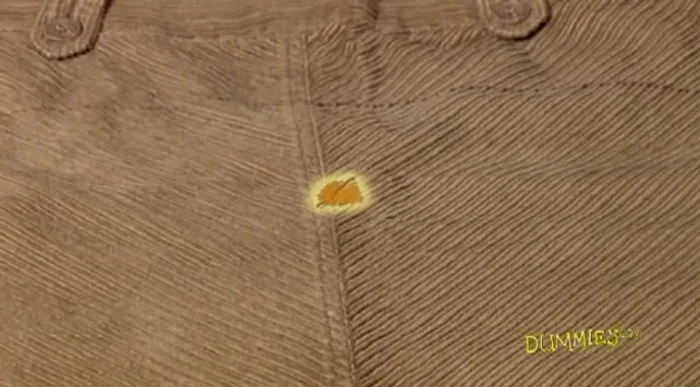
- Work around stains and snags. If necessary, incorporate tears or stains creatively with patches or contrasting colors.
Mark the Cutting Lines Cut and Pin
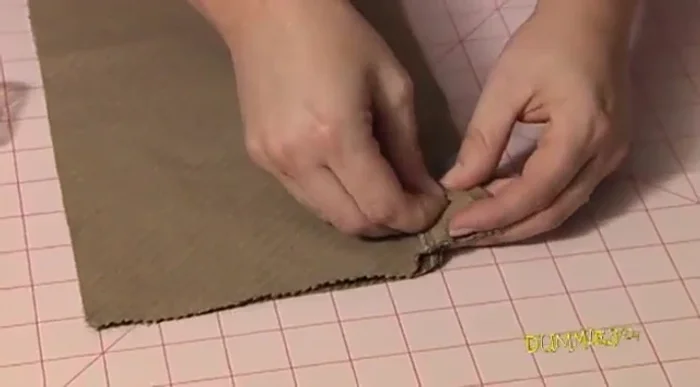
- Cut along the marked lines. Fold the rectangle in half (right sides facing each other). Pin the layers together along the cut edges, placing pins diagonally at each corner and perpendicular to the edge.
Cut and Pin Sew the Bag
- Sew the entire cut edge (don't sew the hemmed edge). Use a running stitch by hand or a straight stitch with a machine.
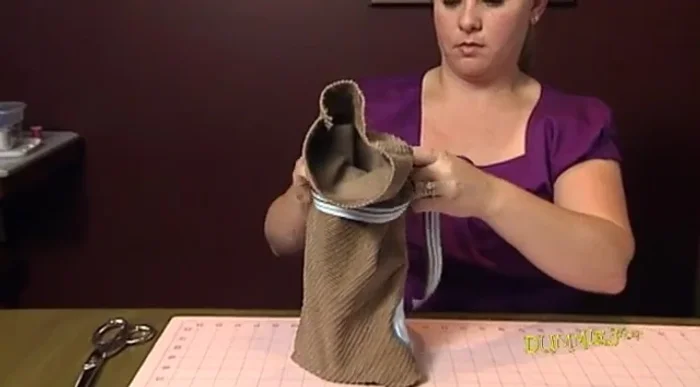
Sew the Bag Finish the Bag
- Turn the bag right side out. Place your wine bottle inside.
- Tie the ribbon around the top to create the bottleneck.
Finish the Bag
Read more: DIY Vibrant Car Organizer: A Step-by-Step Quilting Tutorial
Tips
- Don't throw away old clothes; repurpose them!
- Get creative with patches or contrasting colors to hide imperfections.