Transform ordinary branches into breathtaking works of art with this easy-to-follow tutorial on creating stunning beaded branch décor. Bring a touch of bohemian elegance or modern chic to your home with this simple yet impactful DIY project. Whether you're aiming for a whimsical fairy-light vibe, a sophisticated minimalist statement, or something entirely unique, this versatile craft allows for endless customization and creative expression. Imagine the captivating shimmer and texture these beaded branches will add to your living space, mantlepiece, or even a wedding centerpiece.
This project requires minimal supplies and is surprisingly quick to complete, making it perfect for a weekend crafting session or a fun activity with friends. Forget expensive store-bought decorations – let's unlock your inner artisan and create something truly special. Ready to get started? Let's dive into the step-by-step process and learn how to craft your own mesmerizing beaded branch décor.
Preparation and Safety Guidelines
- Dried stalks
- Hot glue gun
- Masking tape
- Spray paint (silver)
- White stone pebbles
- Chandelier beads
- Silver paint
- Display panels
- Tray
- Mirror
- E6000 adhesive (optional)
- Always use sharp scissors or wire cutters designed for crafting. Avoid using dull tools which can lead to slips and injuries.
- If working with small beads, supervise children closely or keep them out of the work area entirely to prevent choking hazards.
- Be mindful of the type of glue used. Ensure it's appropriate for the materials (branch and beads) and is non-toxic, especially if the project will be displayed in a home with children or pets.
Step-by-Step Instructions
Prepare the Branch Structure
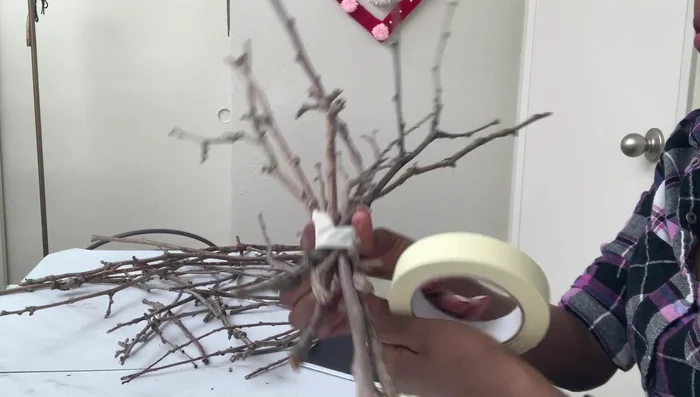
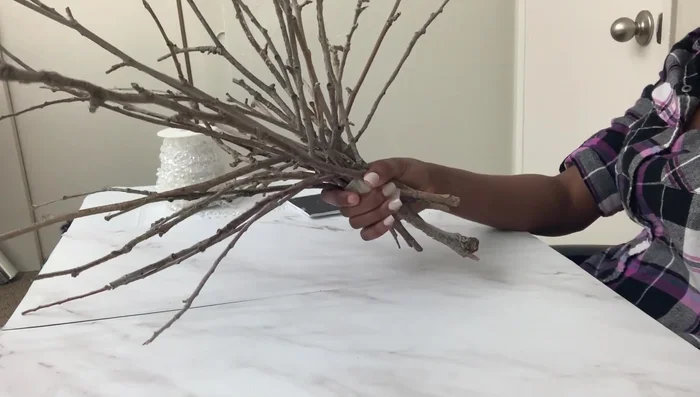
- Collect various dried stalks. Use hot glue to combine them into a larger, unified branch structure.
- Use masking tape to hold the stalks together, especially while spray painting.
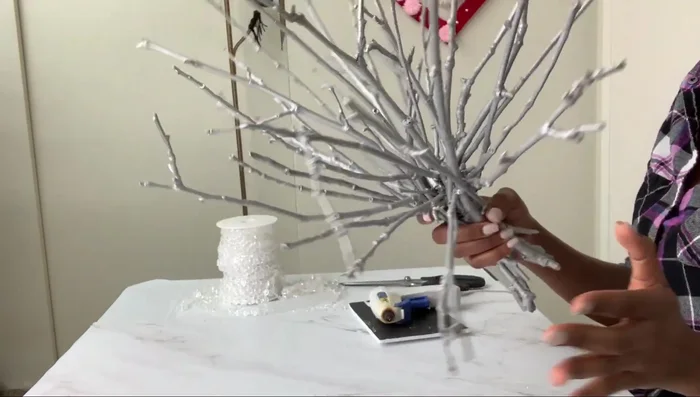
- Spray paint the branch silver.

Prepare the Branch Structure Create the Branch Base
- Fill the base of the branch structure with white stone pebbles for stability.
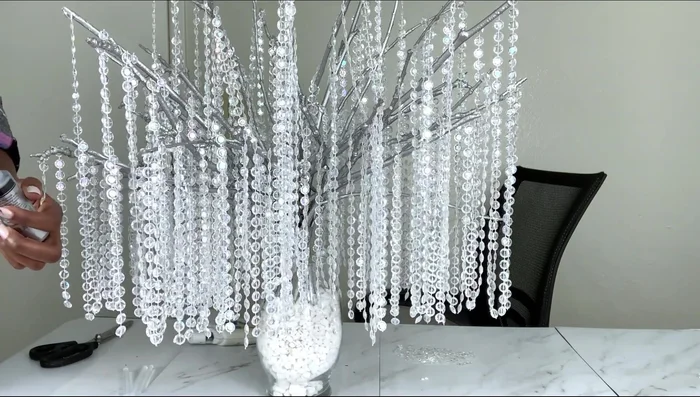
Create the Branch Base Add the Beads
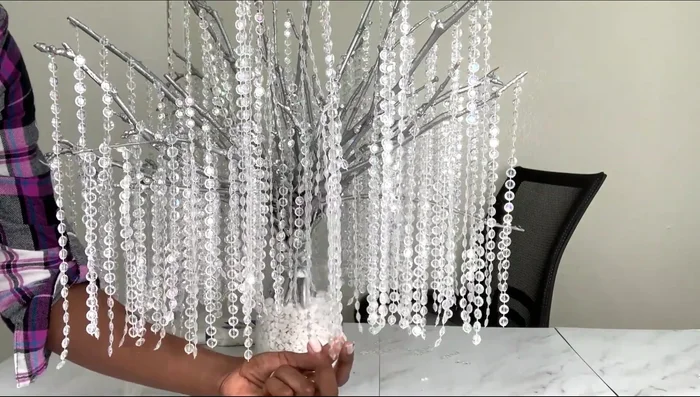
- Hot glue chandelier beads onto the stalks at your desired height and spacing.
- Cut and trim excess bead length to ensure uniformity and a polished look.
- Use silver paint to touch up any broken or exposed stalk ends.
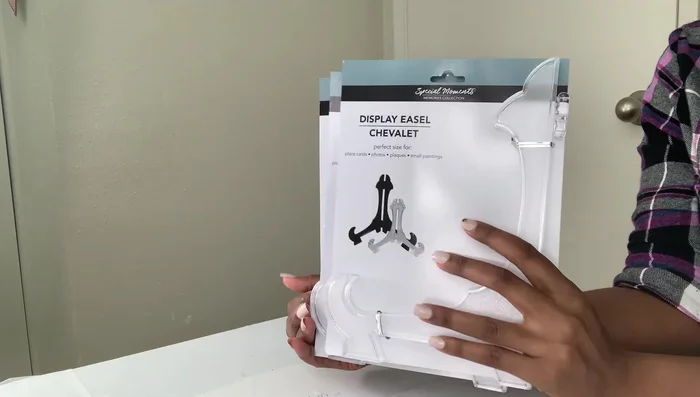
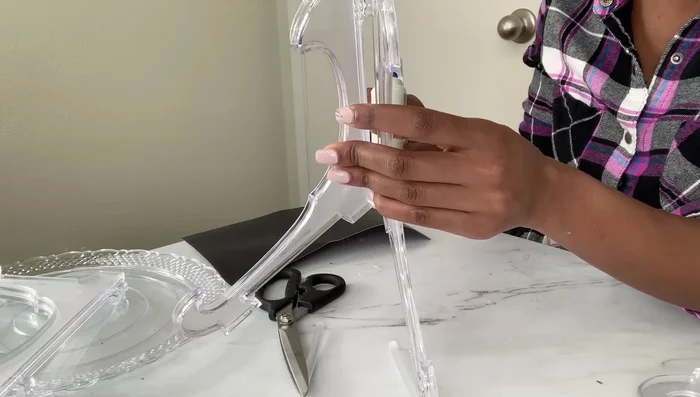
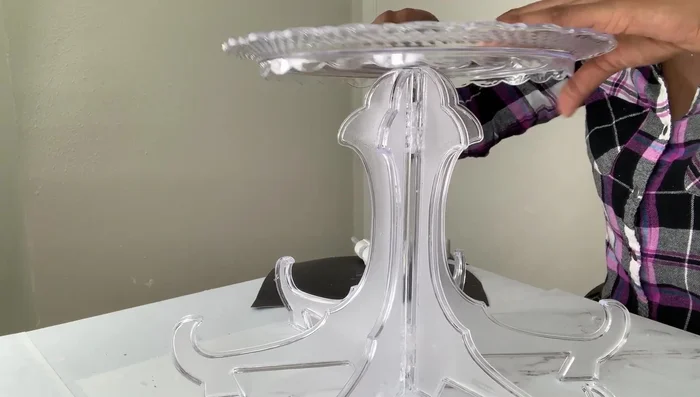
Add the Beads Assemble the Display Base
- Assemble three display panels from the Dollar Tree and glue the backs for stability.
- Glue the three display panels together and reinforce with additional glue for a stronger bond.
- Use a mirror or sturdy backing to create a stable surface for attaching the top tray to the display panels.
Assemble the Display Base


Read more: DIY Farmhouse X-Style Coffee Table: Easy Step-by-Step Guide
Tips
- Use hot glue to secure stalks but be patient, it can take time.
- Masking tape helps hold the structure while painting.
- Consider using a stronger adhesive like E6000 for the tray for increased durability.