Transform your bathroom into a tranquil oasis with this stunning DIY project! Imagine stepping into a space bathed in soft light, where the gentle sparkle of crushed glass and glitter catches your eye, instantly easing away the day's stresses. This isn't your average bathroom sign; it's a miniature work of art, a personalized touch that adds a unique and luxurious feel without breaking the bank. Forget generic, mass-produced decor – this DIY project lets you unleash your creativity and create a truly bespoke piece that reflects your personal style. You'll be amazed at how easily you can achieve a high-end look with readily available materials.
This shimmering, eye-catching sign is surprisingly simple to make, requiring only a few basic craft supplies and a little bit of patience. The process is broken down into easy-to-follow steps, guiding you from prepping your base to achieving that mesmerizing sparkle finish. Ready to create your own personalized spa-like retreat? Let's dive into the step-by-step instructions and bring some luxurious sparkle to your bathroom!
Preparation and Safety Guidelines
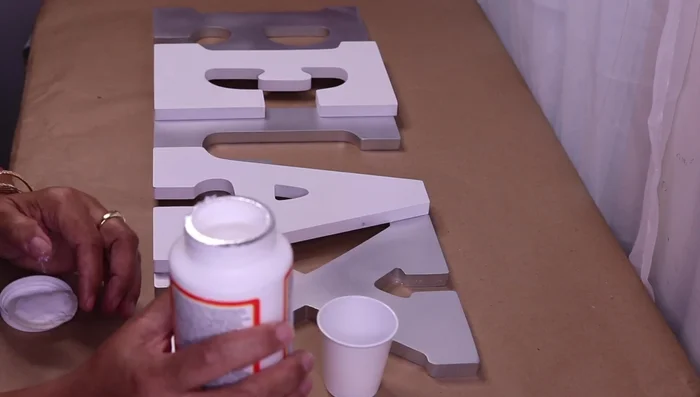
- Wooden letters (Michaels)
- Wood glue (Dollar Tree)
- Hot glue
- Mod Podge (Michaels/Walmart/Dollar Tree)
- Crushed glass
- Glitter (Michaels/Walmart)
- Small brush
- Popsicle stick
- Hairspray (Dollar Tree)
- Butterfly decoration (Dollar Tree)
- Spray paint
- Rhinestones
- Bling strips
- Fix All glue (Dollar Tree)
- String lights (Amazon)
- Battery pack
- Mirror tiles
- Brooch (Totallydazzle.com)
- Small blingy rectangular pieces (Totallydazzle.com)
- Crowns (Totallydazzle.com)
- Dollar Tree beaded bling
- Wear safety glasses to protect your eyes from flying glass fragments during the crushing and crafting process.
- Work in a well-ventilated area to avoid inhaling dust from the crushed glass and glitter.
- Keep crushed glass and glitter away from children and pets to prevent accidental ingestion or injury.
Step-by-Step Instructions
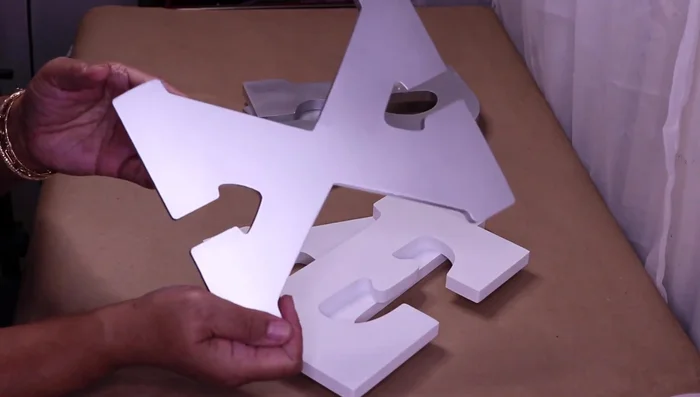
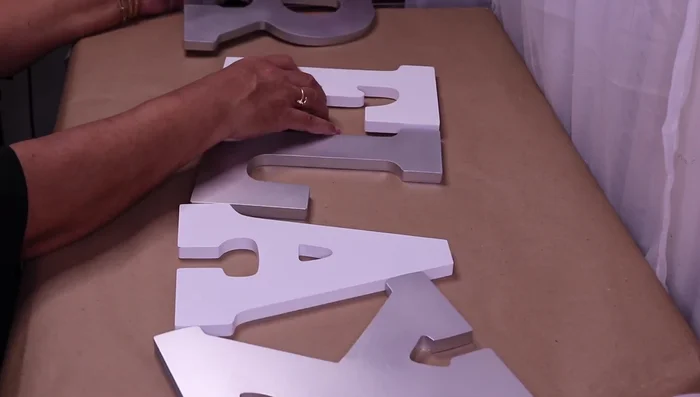
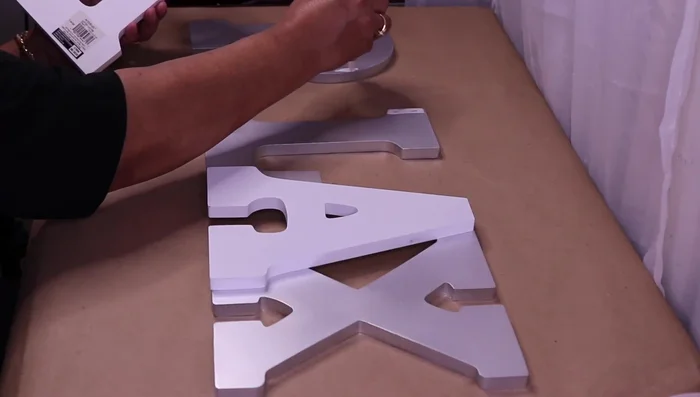
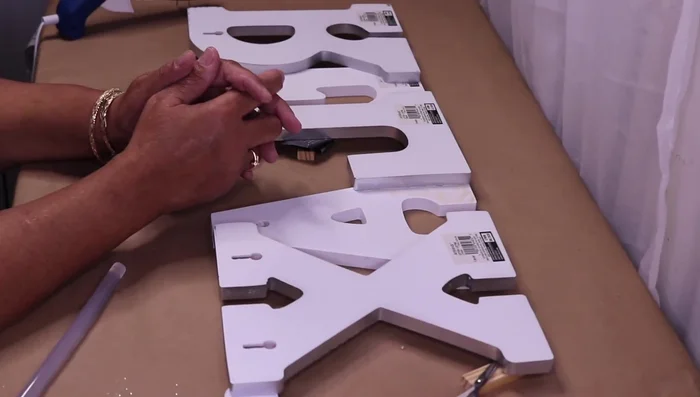
Prepare the Letters
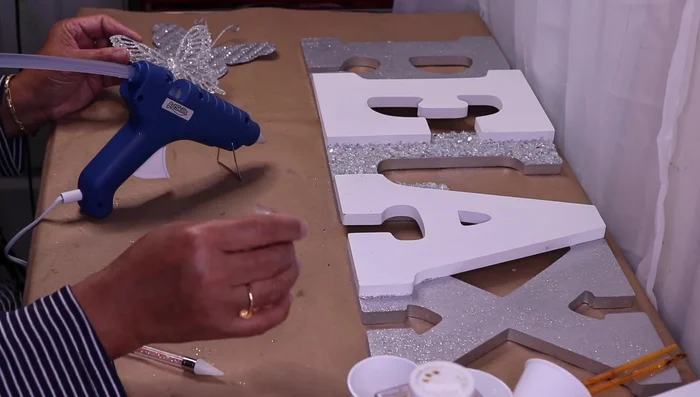
- Paint some wooden letters silver.
- Stack the letters to spell 'RELAX' in a layered design, ensuring it's straight.
- Glue the letters together using wood glue, then reinforce with hot glue to ensure sturdiness. Clean up any glue seepage.
- Let the glue dry completely (at least two hours, preferably overnight).

Prepare the Letters Decorate with Crushed Glass & Glitter
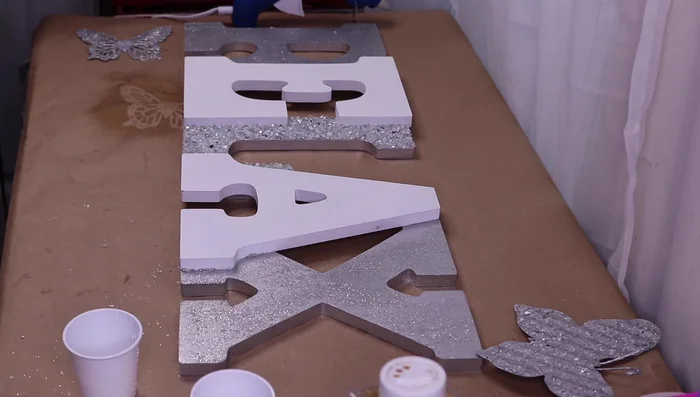
- Decorate the letters using crushed glass and Mod Podge. Apply Mod Podge, add crushed glass, let it sit for 10 minutes, shake off excess, and fill in gaps with more glass and Mod Podge. Add glitter for extra sparkle.
Decorate with Crushed Glass & Glitter Prepare & Decorate Butterfly
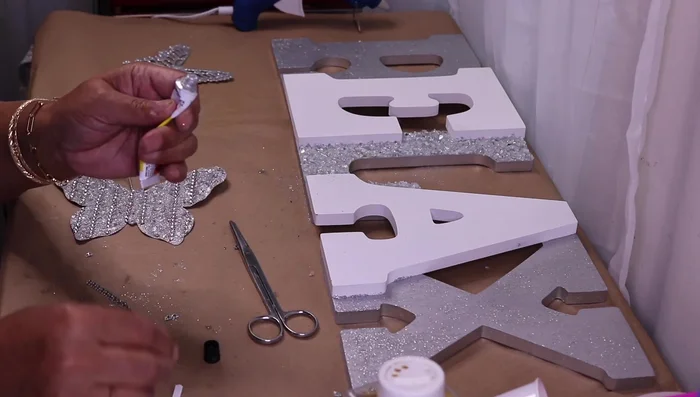
- disassemble and spray paint silver (if necessary). Mix glitter and Mod Podge, apply to the butterfly and letter 'R'.
Prepare & Decorate Butterfly Seal Crushed Glass & Add Back Details
- Seal the crushed glass with a diluted Mod Podge and water mixture, then sprinkle with fine silver glitter.
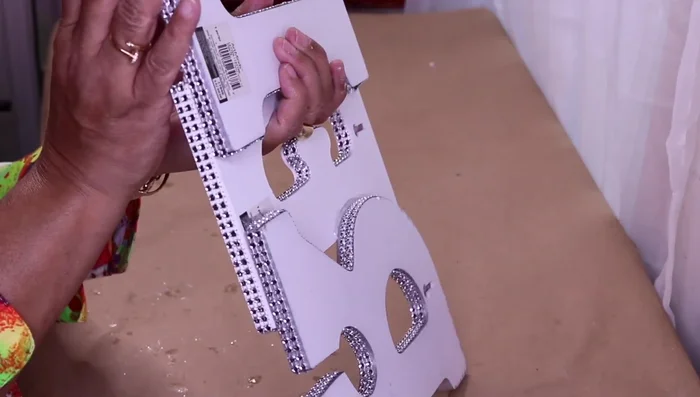
- Decorate the back of the sign with bling strips using Fix All glue. Apply glue to lines on wings, then add bling strips.
- Add crystals to the butterfly wings using hot glue.
- Add additional bling to the sides of the letters using Fix All glue.
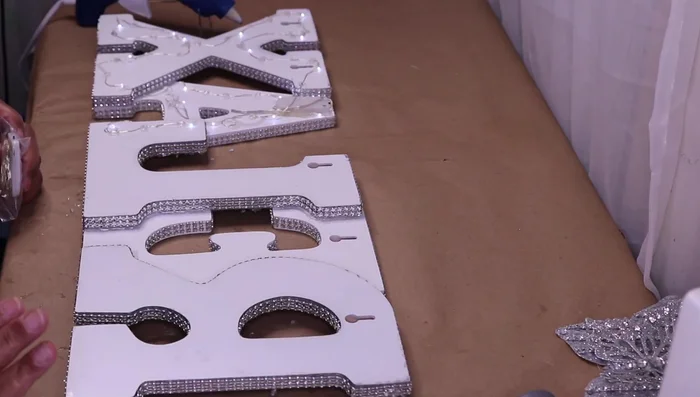
Seal Crushed Glass & Add Back Details Add String Lights
- Add string lights to the back of the letters. Secure the battery pack with hot glue and carefully wire the lights around the outline of each letter, hiding excess wire.
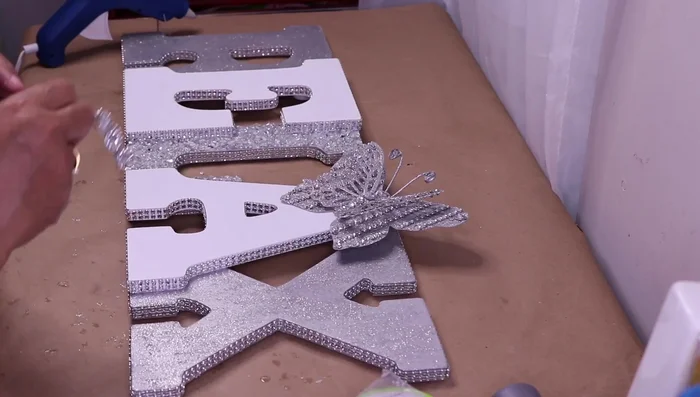
Add String Lights Decorate Letter A
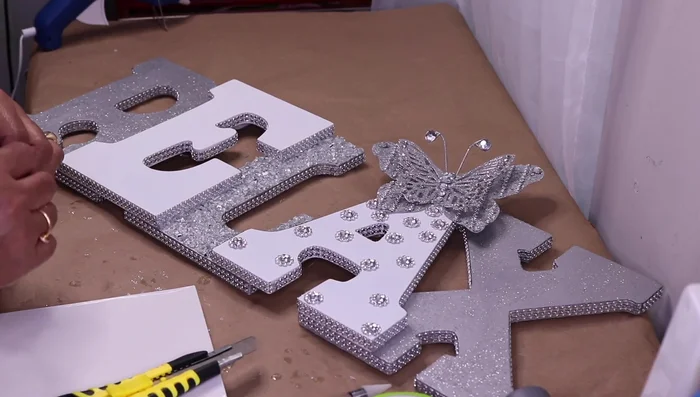
- Glue the butterfly to the letter 'A', adding flower bling and rhinestones.
Decorate Letter A Decorate Letter R
- Decorate the letter 'R' with mirror tiles in a skyscraper design, adding glitter for extra bling.
Decorate Letter R Decorate Letter E
- Decorate the letter 'E' with strips of silver bling and small rectangular bling pieces and crowns.
Decorate Letter E Decorate Letter X
- Decorate the letter 'X' with beaded bling strips and a brooch.
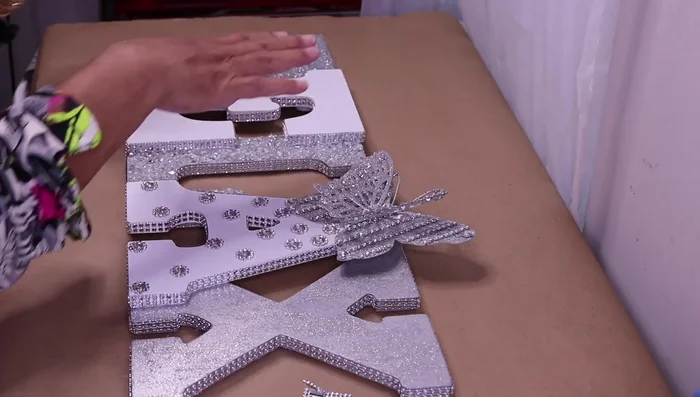
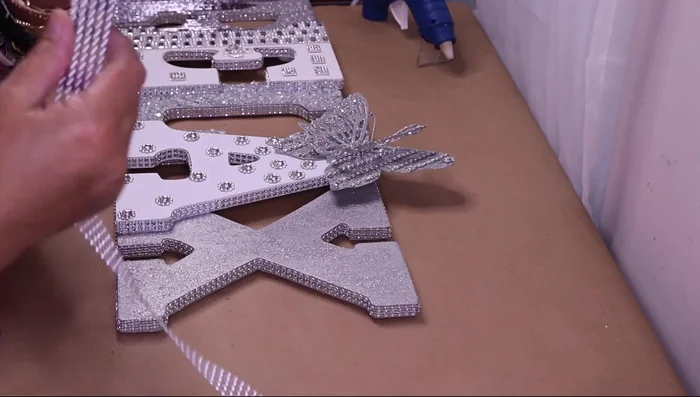
Decorate Letter X Final Touches & Display
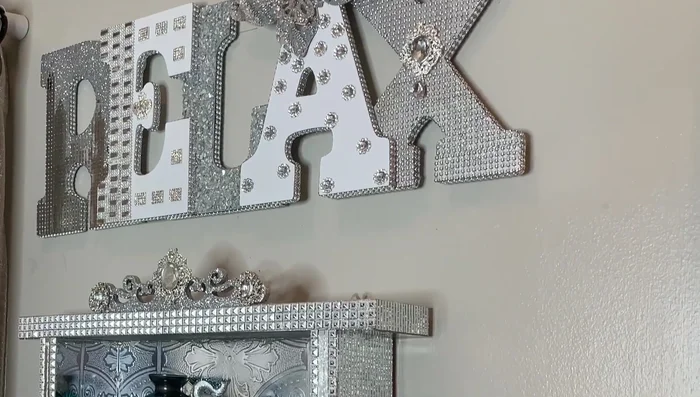
- Clean up any excess glue and display the sign.
Final Touches & Display
Read more: DIY Mason Jar Soap Dispensers: A Step-by-Step Guide with Two Stunning Designs
Tips
- Use hot glue to reinforce wood glue for extra strength.
- When using Mod Podge and crushed glass, carefully remove any excess glass that detracts from the shape of the letters.
- Use a diluted Mod Podge and water mixture to seal crushed glass without reactivating the original Mod Podge layer.
- For a clean look when attaching small details, use Fix All glue instead of hot glue.
- When stacking letters, use an odd number of letters for a balanced look. Consider words like 'SPA' for a similar project.