Attract vibrant feathered friends to your garden with this simple and eco-friendly DIY project! Learning to build a bird feeder not only provides a vital food source for our winged neighbors but also offers a rewarding and sustainable way to repurpose everyday materials. Instead of discarding plastic bottles, transform them into charming and functional bird feeders, contributing to a healthier environment while enriching your outdoor space. This project is perfect for beginners, requiring minimal tools and materials, making it an ideal activity for families or anyone looking for a fun and engaging afternoon crafting session. Plus, you'll enjoy the satisfaction of creating something beautiful and useful from something that would otherwise end up in a landfill.
This easy-to-follow tutorial will guide you through each step, from preparing the plastic bottle to hanging your finished bird feeder. Get ready to learn how to create a beautiful and functional bird feeder that's both budget-friendly and kind to the planet, providing a welcome feast for your local birds all year round. Let's begin!
Preparation and Safety Guidelines
- Plastic bottles (at least 2, one larger and one smaller)
- Metal hook
- Soldering iron
- Cutter
- Circular rubber piece
- 1-inch screw
- Washer
- Rope
- Always supervise children when they are near the bird feeder or working on the project. Sharp objects and small parts present potential hazards.
- Ensure the bottle is thoroughly cleaned and free of any residue from its previous contents. Chemicals can be harmful to birds.
- Securely fasten all parts to prevent the feeder from falling apart and injuring birds or causing accidental ingestion of small parts.
Step-by-Step Instructions
Prepare the Support and Larger Bottle
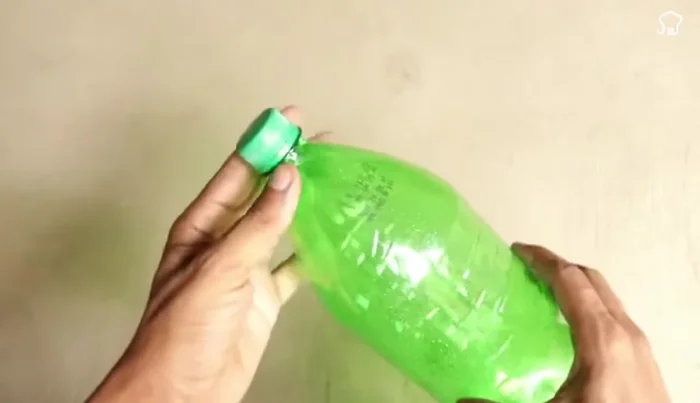
- Secure a metal hook as shown (serves as the main support for the bird feeder)
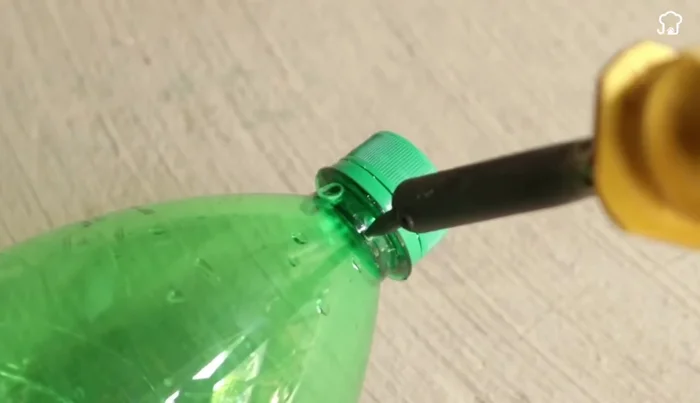
- Make holes in the bottle's mouth near the cap to allow birds access to water (using a hot soldering iron)
- Make a hole at the bottom for drainage and air circulation
- Thread the metal hook through the bottom of the larger bottle

Prepare the Support and Larger Bottle Prepare the Cap and Smaller Bottle
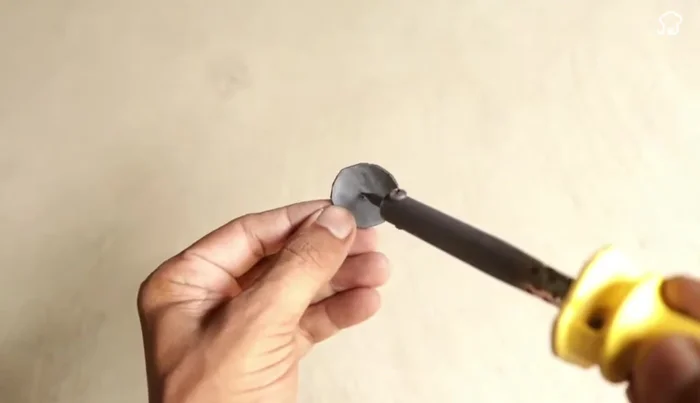
- Make a hole in the center of the bottle cap
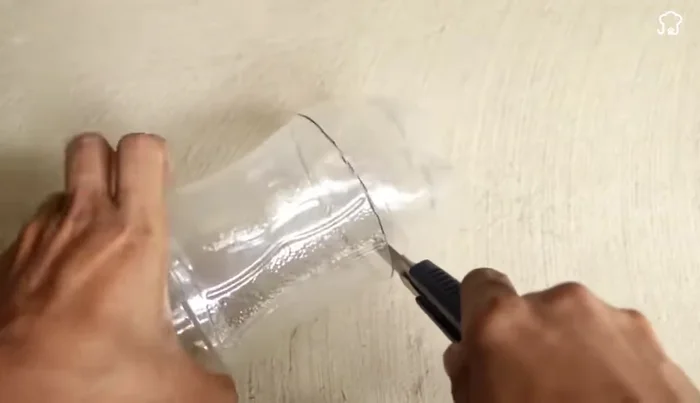
- Cut the bottom of a smaller bottle in a circular shape
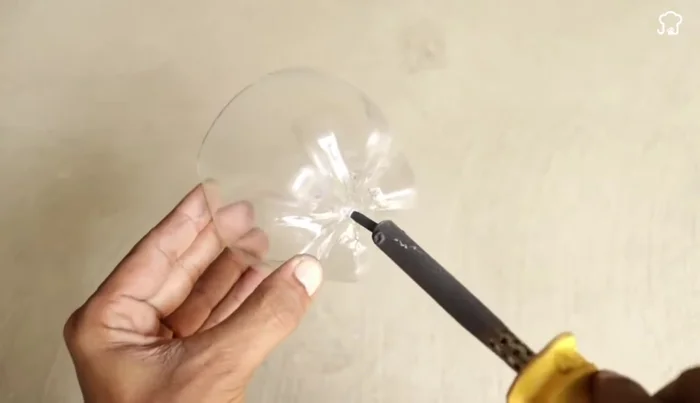
- Make a hole at the bottom of the smaller bottle (using a soldering iron)
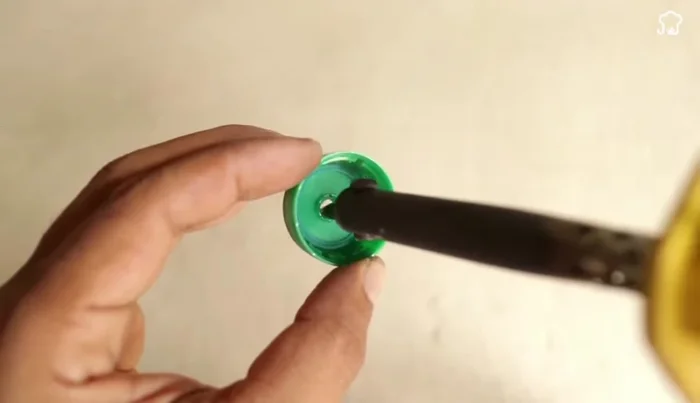
- Make a hole in the center of a circular rubber piece (using a soldering iron)
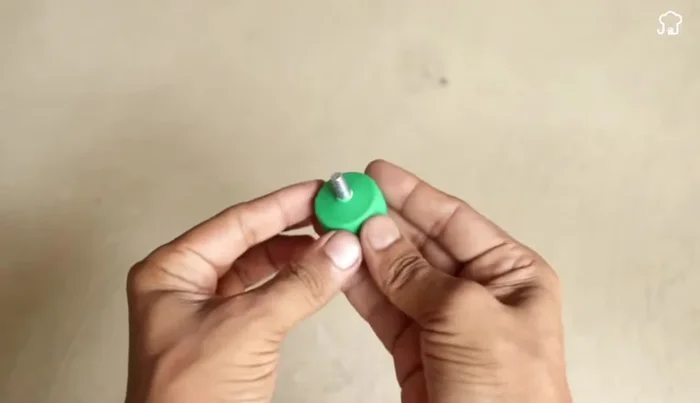
Prepare the Cap and Smaller Bottle Assemble the Feeder Components
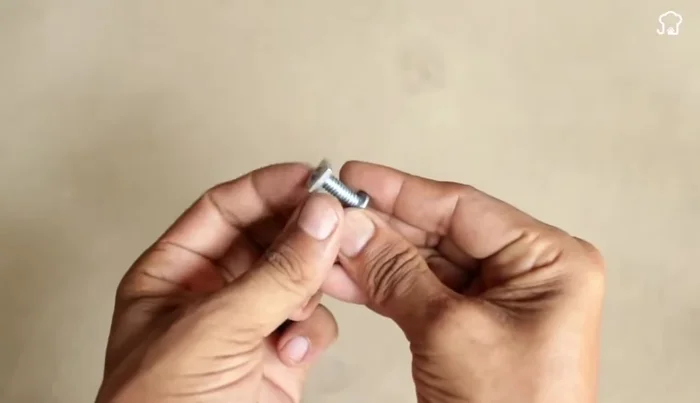
- Pass a 1-inch screw and washer through the rubber piece and into the hole in the cap
- Thread the cut plastic piece from the smaller bottle onto the screw and add another washer
Assemble the Feeder Components Hang and Fill the Feeder
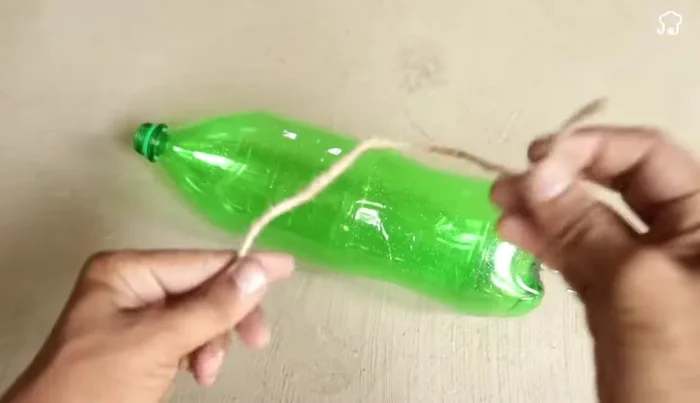
- Tie a rope around the hook to hang the feeder
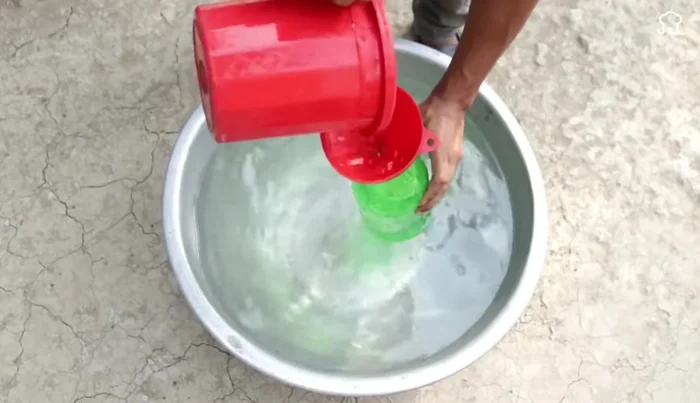
- Fill the larger bottle with water and attach the cap assembly
Hang and Fill the Feeder
Read more: DIY Plastic Gallon Candy Basket: Upcycled & Adorable!
Tips
- Ensure the metal hook is securely attached to support the water weight.
- Hang the feeder in a location accessible to birds, such as a tree or pole.