Tired of expensive, disposable cleaning supplies piling up and contributing to landfill waste? There's a simple, sustainable, and surprisingly effective alternative: the DIY bottle broom! This ingenious cleaning tool repurposes plastic bottles, transforming them from potential trash into a practical and reusable household item. Not only will you be saving money by utilizing readily available materials, but you'll also be contributing to a greener planet by reducing your reliance on mass-produced cleaning tools. This eco-conscious approach to cleaning is not only beneficial for the environment but also a fun and satisfying project for anyone looking to embrace a more sustainable lifestyle.
Making your own bottle broom is easier than you think! This project requires minimal tools and materials, and the end result is a sturdy and effective cleaning tool perfect for sweeping patios, garages, or even your home. Ready to get started and transform those discarded plastic bottles into a valuable cleaning solution? Let's dive into the step-by-step guide below.
Preparation and Safety Guidelines
- Plastic bottles
- Marker
- Scissors/Knife
- String/Saree fabric
- Needle
- Bangles (or screws)
- Pipe (optional)
- Decorative tape (optional)
- Always wear gloves when handling the plastic bottles and wire. Sharp edges and chemicals from bottle residue can irritate skin.
- Ensure the bottle is thoroughly cleaned and free of any food residue or harmful chemicals before crafting your broom. Residue can contaminate surfaces during cleaning.
- Use caution when working with the wire; sharp ends can cause injury. Handle carefully and consider using wire cutters with safety guards.
Step-by-Step Instructions
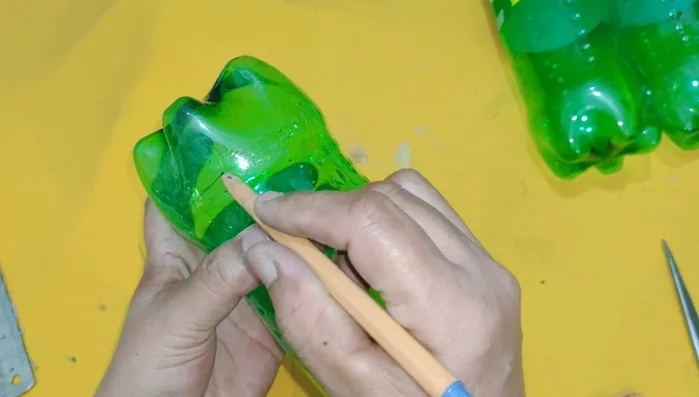
Prepare Bottles
- Remove the rims from the plastic bottles. Mark the bottom line of each bottle and cut along the line to create a flat base.

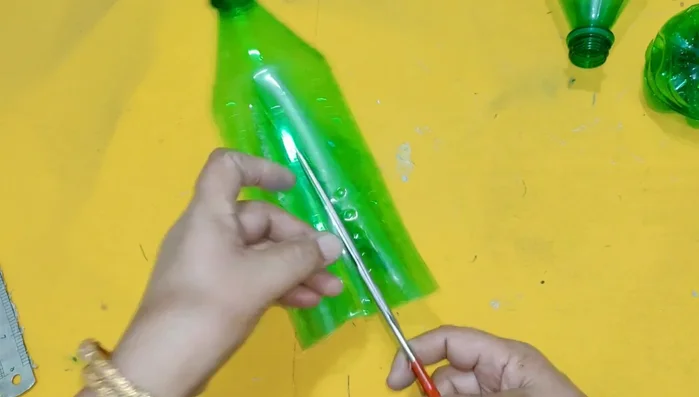
Prepare Bottles Cut Bottle Bristles
- Cut each bottle from the top and bottom lines, creating fringe-like bristles. Cut finely for a better broom.
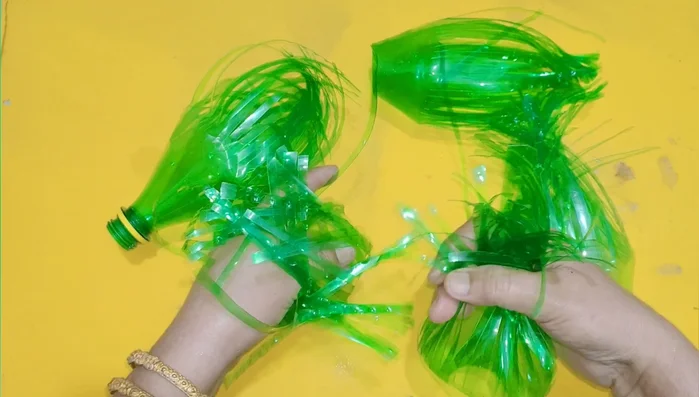
Cut Bottle Bristles Assemble Bristles
- Leave one bottle with its lid intact. Insert the cut bristles into this bottle, packing them tightly.
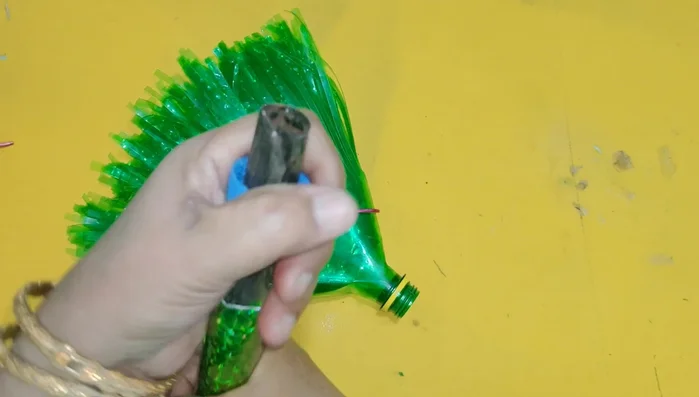
Assemble Bristles Secure Bristles
- Make three holes near the top of the main bottle. Use string, fabric, or a net to secure the bristles and prevent them from falling out. Reinforce with bangles or screws.
Secure Bristles Attach Handle
- Attach a pipe (or a sturdy handle from a broken wiper) to the bottle lid. Secure the handle tightly.
Attach Handle Decorate (Optional)
- Wrap decorative tape around the handle for a better look.
Decorate (Optional)


Read more: DIY Plastic Gallon Candy Basket: Upcycled & Adorable!
Tips
- Use smaller bottles for a more efficient broom.
- Secure the bristles well to ensure durability.