A broken dryer drive belt can bring laundry day to a screeching halt, leaving you with a pile of unworn clothes. The good news is, replacing a Whirlpool dryer drive belt is often a surprisingly simple DIY repair, saving you the cost and inconvenience of a service call. Whirlpool dryers, while robust, are susceptible to belt wear and tear, especially with frequent use. A worn or broken belt will prevent the drum from rotating, resulting in a non-functional dryer. This frustrating problem is usually easy to fix with a little bit of know-how and the right tools.
This guide provides a quick and easy, step-by-step process for replacing your Whirlpool dryer's drive belt. We’ll walk you through each stage, from accessing the belt to reinstalling it, ensuring you get your dryer back up and running smoothly in no time. Let's get started with the straightforward instructions that will have your laundry spinning again!
Preparation and Safety Guidelines
- Parting knife
- 5/16 inch nut driver
- Always unplug the dryer from the power outlet before starting any repair work. Failure to do so could result in serious electrical shock.
- Wear appropriate safety glasses to protect your eyes from debris or broken parts during disassembly and reassembly.
- Refer to your dryer's specific model manual for detailed diagrams and instructions. Belt routing can vary between models.
Step-by-Step Instructions
Prepare the Dryer
- Unplug the dryer or turn off the circuit breaker.
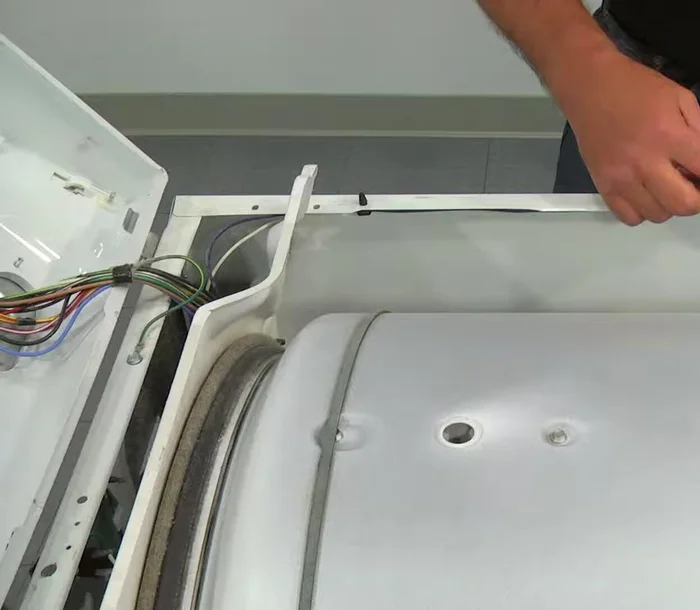
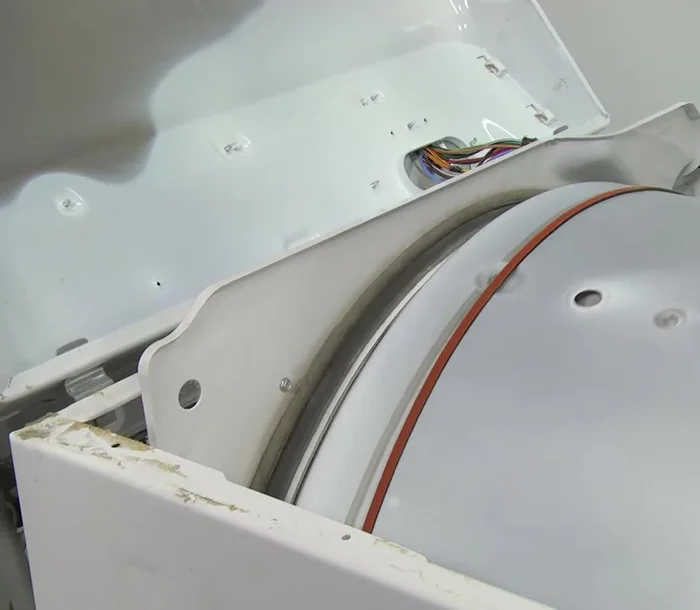
Remove Top Panel
- Open the dryer door and lift the top panel using a parting knife to release the locking clips.
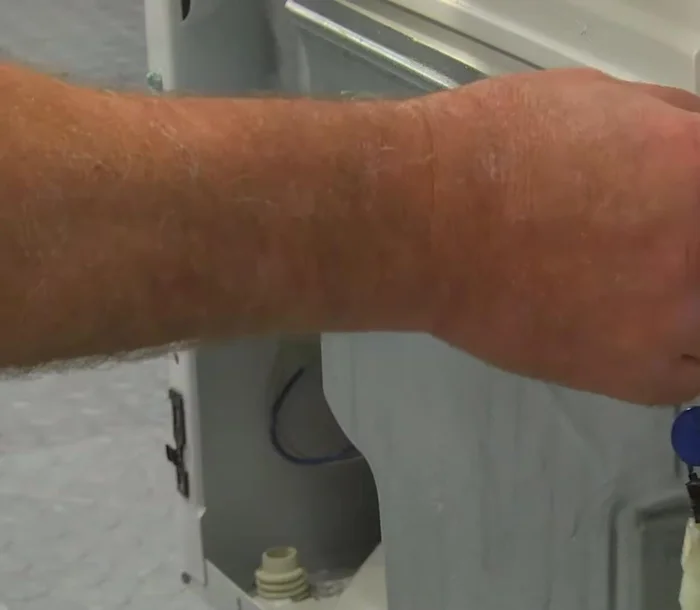
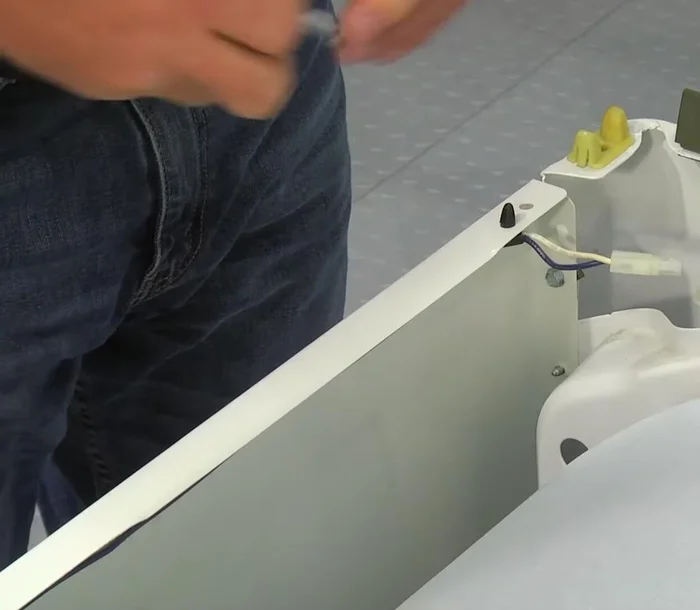
- Disconnect the wire harness plug using a small flat-blade screwdriver.
- Remove the two top screws on the top panel using a 5/16 inch nut driver.
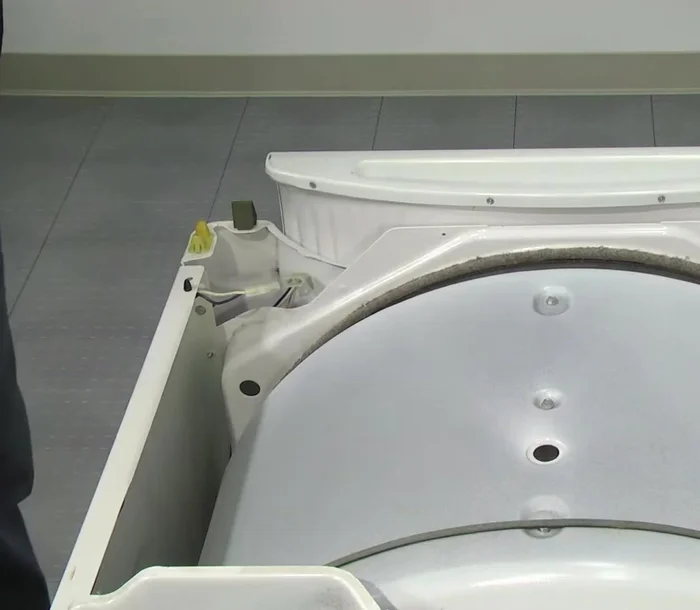
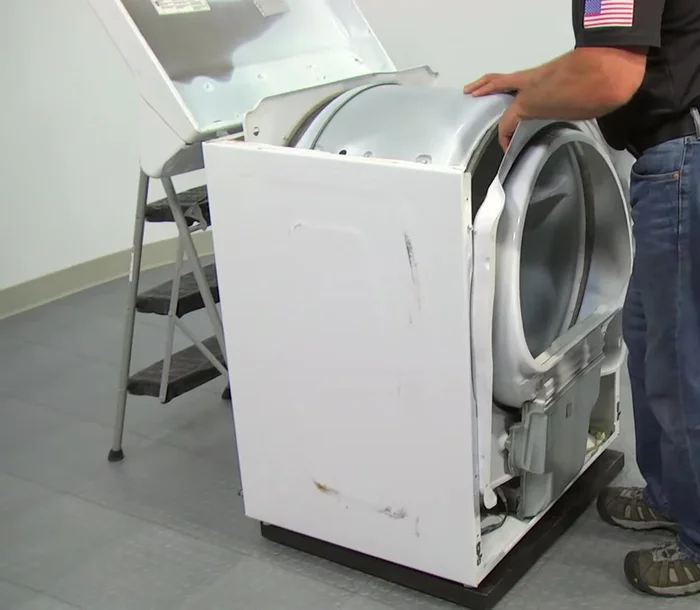
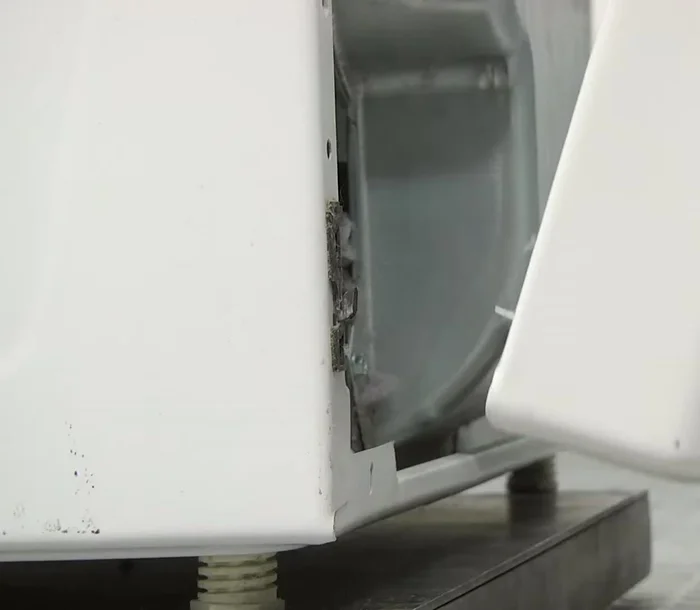
- Remove the front panel by tilting it back and pulling it up from the mounting clips.

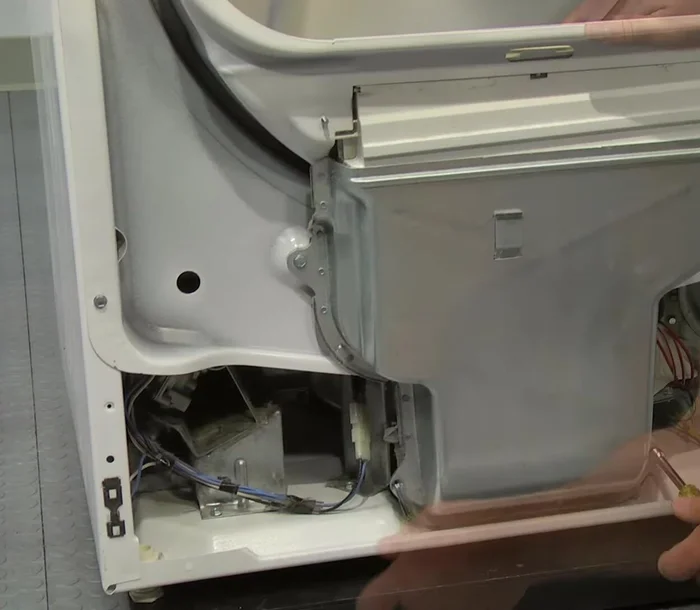
Remove Top Panel Remove Front Panel & Bulkhead
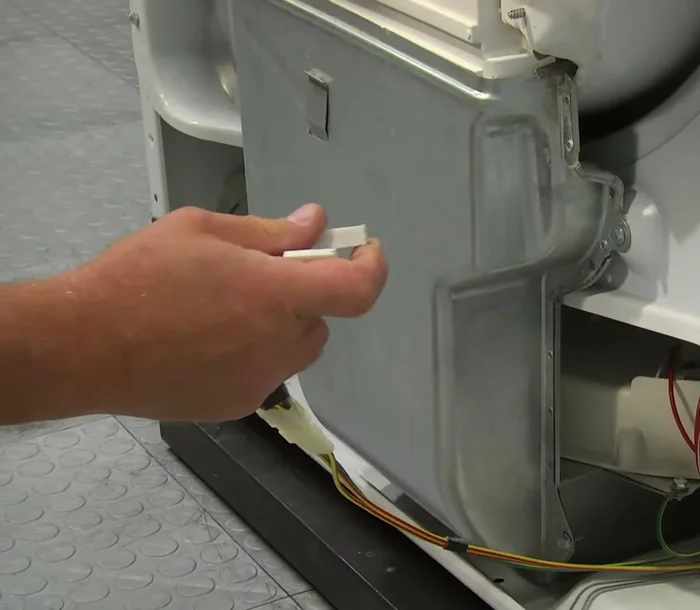
- Disconnect the two moisture sensor wires.
- Remove the front bulkhead by removing two screws at the bottom and two on each side, then loosening two at the top.
Remove Front Panel & Bulkhead Remove Old Belt
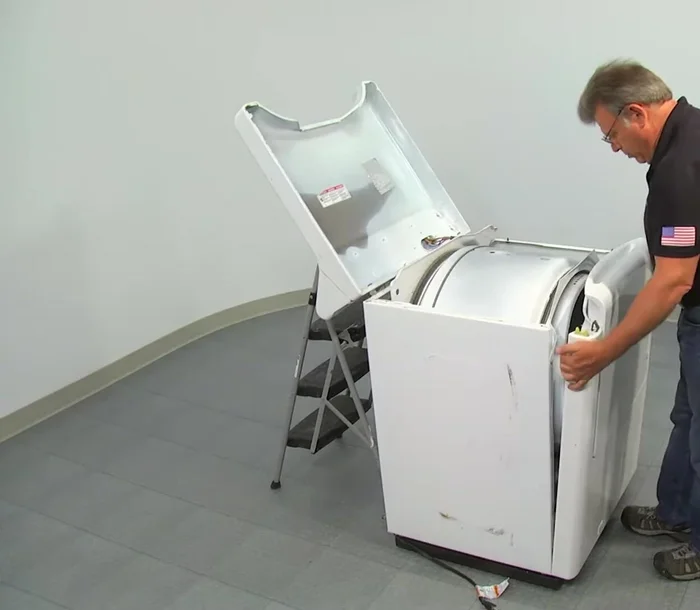
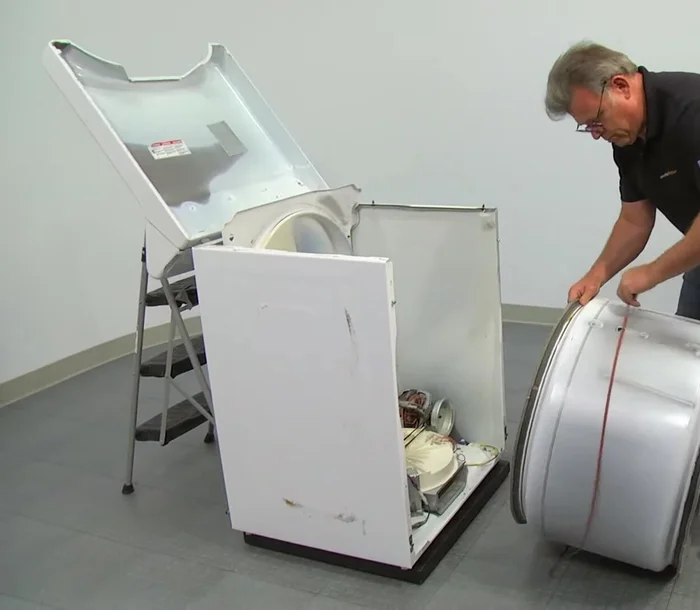
- Remove the old drum drive belt from the motor pulley and idler pulley by reaching underneath the drum, pushing the idler pulley arm towards the motor, and releasing the belt.
- Remove the drum from the cabinet.
Remove Old Belt Install New Belt
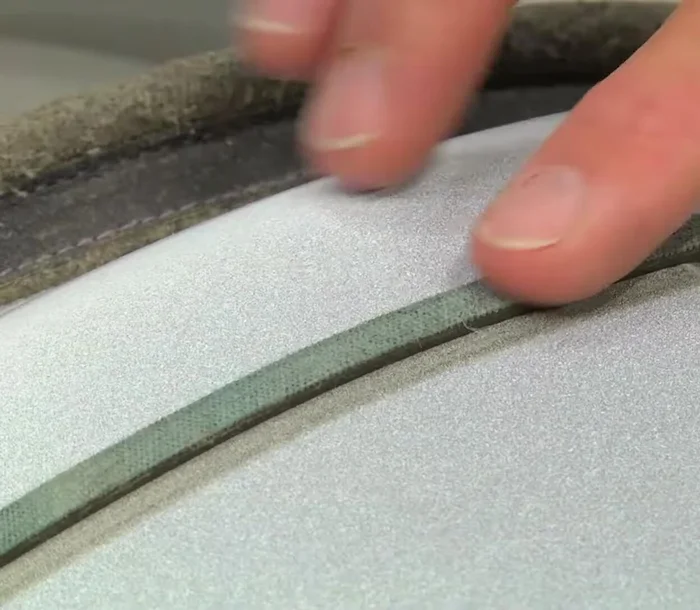
- Install the new drum drive belt, ensuring the ribbed side faces the drum. Wrap it around the drum and then around the idler pulley and motor pulley.
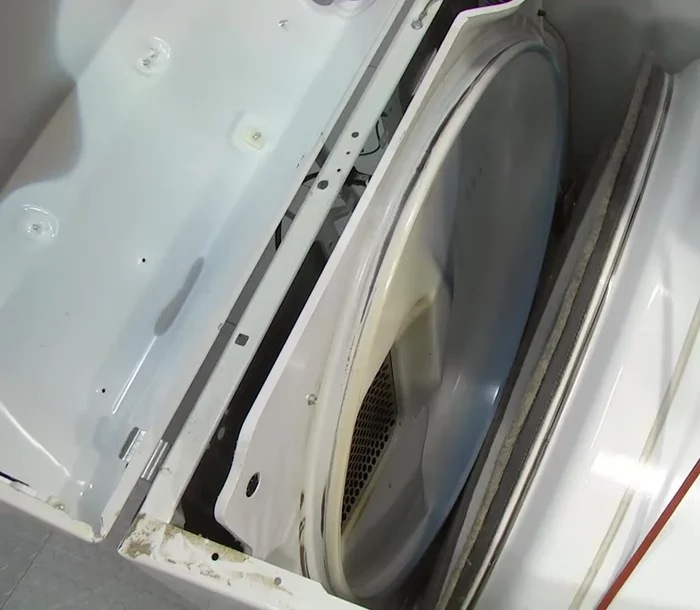
- Install the drum back into the cabinet, ensuring it's correctly seated on the rear support rollers.
- Check the belt placement by turning the drum at least one complete turn.
Install New Belt Reassemble Front
- Install the front bulkhead, securing it with the screws.
- Reconnect the moisture sensor wires.
- Install the front panel and secure it with screws.
- Reconnect the wire harness plug.
Reassemble Front Reassemble Top & Final Steps
- Lower the top panel and secure it.
- Plug the dryer back in.
Reassemble Top & Final Steps
Read more: Fix Washing Machine Won't Spin: Quick & Easy Motor Coupler Replacement
Tips
- Always unplug the appliance or turn off the circuit breaker before starting any repair.
- Order your replacement drum drive belt from appliancepartspros.com if needed.