Easter is a time for family, fun, and of course, adorable photos! But professional photoshoots can quickly drain your budget, leaving less for those delicious Easter treats. This year, ditch the expensive studio and embrace the charm of your own backyard for a budget-friendly Easter photoshoot that's bursting with springtime cheer. With a little creativity and some readily available materials, you can capture memories that are both beautiful and cost-effective, making this Easter a truly memorable one for the whole family.
Forget elaborate backdrops and pricey props; this DIY photoshoot focuses on simple, natural elements that transform your backyard into a whimsical Easter wonderland. We'll guide you through creating stunning photos using everyday items you likely already have, or can easily source affordably. Ready to transform your outdoor space into an enchanting Easter photo studio? Let's dive into our step-by-step guide!
Preparation and Safety Guidelines
- Camera (phone camera works too)
- Props (easily accessible items)
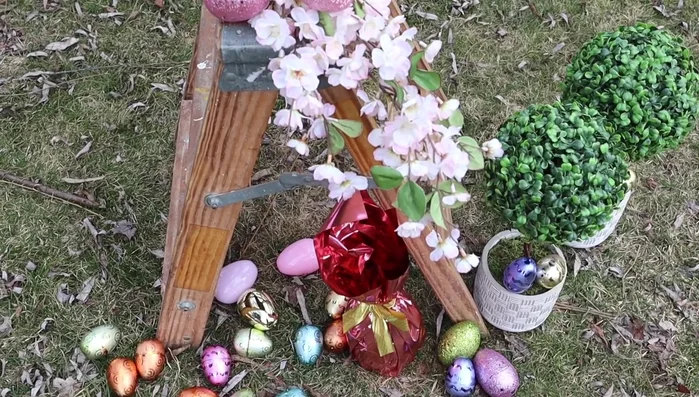
- Step stool or similar
- Adult supervision is crucial, especially with young children handling props or being near water features (if used). Never leave children unattended.
- Be mindful of sun exposure. Use shade or hats to protect yourself and your subjects from sunburn, especially during peak sun hours.
- Ensure your chosen location is free of hazards like broken glass, sharp objects, or poisonous plants. Check the area thoroughly before beginning the photoshoot.
Step-by-Step Instructions
Gather Supplies
- Collect simple, inexpensive items from around your house or grocery store.
Choose Location
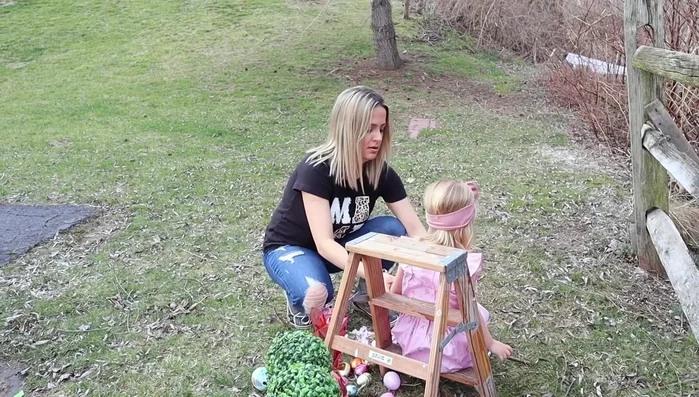
- Look for a spot in your backyard or a park with a simple background (trees, fence, etc.) to avoid clutter.
Arrange the Scene
- Place props close to your child for easy framing.

Arrange the Scene Position Your Child
- Consider shooting at eye level, especially with younger children. Use a step stool or other prop to elevate them if needed.
Position Your Child Consider Lighting and Angles
- If the sun is harsh, shoot in the shade or position your child so the sun is behind them.
Consider Lighting and Angles Take Pictures
- Experiment with different angles and poses.
Take Pictures


Read more: Build a Sag-Proof Wood Fence Gate: The Ultimate DIY Guide
Tips
- Keep it simple: Focus on creating a clean, uncluttered background and using simple props.
- Get close to the ground: When shooting children sitting on the ground, get down to their eye level for better perspective.
- Use different setups: Experiment with placing your child on a prop (like a step stool) and also on the ground for variety.