Barn doors have become a stylish and increasingly popular addition to homes, offering a unique blend of rustic charm and modern functionality. However, the price tag associated with pre-made barn doors can often be prohibitive, pushing them out of reach for many DIY enthusiasts on a budget. This guide offers a refreshing alternative, demonstrating how you can create your own stunning barn door for under $300, transforming your home without breaking the bank. We'll focus on cost-effective materials and techniques, ensuring an accessible and achievable project for even the most novice DIYer.
Forget expensive contractors and overpriced retail options; this comprehensive guide walks you through each stage of the process, from selecting the right materials to installing the finished product. We'll delve into detailed instructions and helpful tips to ensure a smooth and successful build. Ready to get started and add a touch of rustic elegance to your home? Let's dive into the step-by-step process of building your budget-friendly barn door!
Preparation and Safety Guidelines
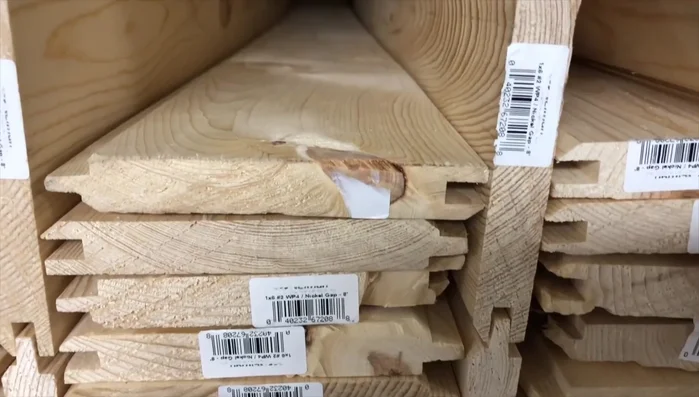
- Pine tongue and groove siding
- Mounting brackets
- Rails
- Wheels
- Guide
- Steel (optional)
- 2x6 board
- Router
- Table saw
- Skill saw
- Belt sander
- Hand sander
- Screws (1 1/4" square head)
- Stain (e.g., Jacobean)
- Polyurethane clear satin varnish
- Steel L bracket
- Oak (optional)
- Always use appropriate safety glasses and a dust mask when cutting and sanding wood. Wood dust is harmful to your lungs.
- Ensure proper support when hanging the door; improper installation can lead to the door falling and causing injury or damage.
- Use caution when handling power tools. Familiarize yourself with their operation and safety features before use. If unsure, seek assistance from someone experienced.
Step-by-Step Instructions
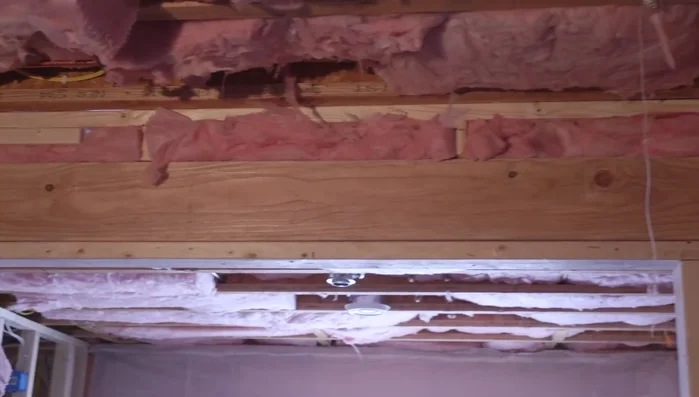
Wall Preparation
- Mount a 2x6 between studs for reinforcement (or add an exterior board to existing walls).

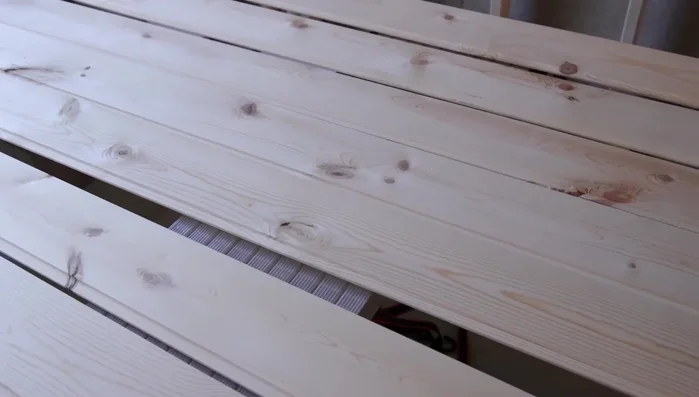
Wall Preparation Lumber Selection and Preparation
- Choose pine tongue-and-groove siding. Acclimate boards for a couple of days. Orient boards to have consistent look (all flat or all curved edges). If needed, use a router to make edges uniform.
Assemble Door Panels
- Lay out boards tongue-and-groove style. Overlap 1-2 inches at the top and leave 3/4 inch at the bottom for floor clearance.
Assemble Door Panels Create and Attach Door Frames
- Cut framing boards (same lumber as panels, tongue and groove removed) to 3 7/8 inches wide. Use measurements to ensure door panel is centered within the frame. Attach framing boards to the panels with screws.
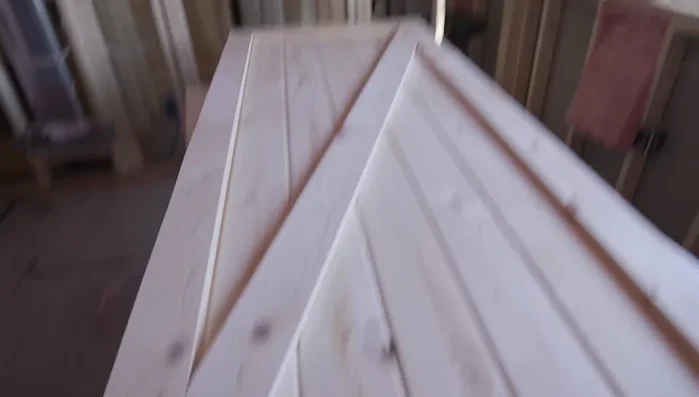
Add Cross-Bracing
- Lay framing boards across door and mark cuts for diagonal bracing. Cut with a skill saw. Gaps do not need to be perfectly precise.
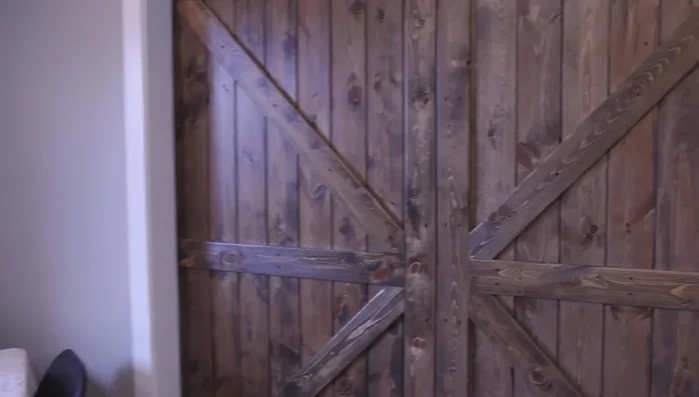
Add Cross-Bracing Sanding and Finishing
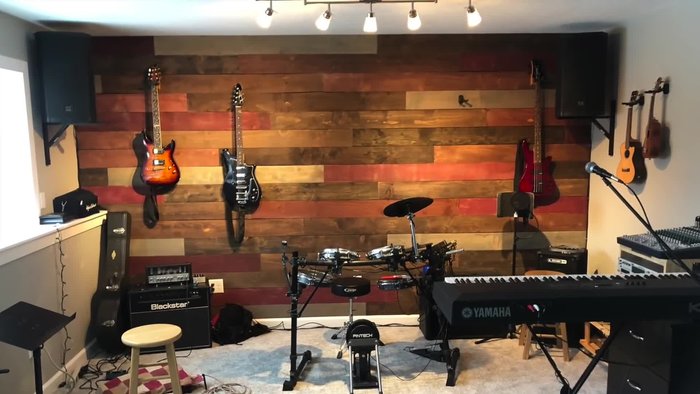
- Sand with a belt sander and hand sander to create smooth surface (120-300 grit sandpaper). Apply stain and varnish (or paint).
Sanding and Finishing Install Hardware
- Mount the rail system. Use a steel channel if needed to cover the gap. Install bottom support channel for stability (use a steel L bracket and oak for increased strength).
Install Hardware Hang the Doors
- Securely attach the doors to the hardware.
Hang the Doors
Read more: Ultimate Guide to Harmonious Bedroom Furniture Arrangement
Tips
- Consider the width of your door space. If the pre-made hardware rail is too short, use a custom-cut piece of steel.
- Use 1 1/4" square head screws to avoid piercing through the door.
- Adding a top and bottom board to the frame helps to band all the tongue-and-groove boards together and provides extra stability.
- Position the bottom frame boards lower than the bottom of the door panel to create a channel for extra stability and prevent the doors from wobbling.
- Finishing is customizable. Stain, paint, varnish, or leave natural wood as desired.