Transform your bedroom into a luxurious sanctuary with a DIY bed canopy – a stylish and practical solution for adding a touch of elegance while keeping pesky mosquitos at bay. Forget expensive, store-bought options; creating your own stunning canopy is surprisingly simple and affordable, using materials readily available at most home stores. Imagine drifting off to sleep under a graceful, flowing net, shielded from insects and enveloped in a feeling of tranquil escape. This project is perfect for those seeking a touch of opulence without the hefty price tag, requiring minimal tools and skills.
This guide offers a detailed, step-by-step walkthrough for installing your very own luxurious and easy DIY mosquito net bed canopy, taking you from initial planning to the final, dreamy draping. Prepare to be amazed at how quickly and effortlessly you can achieve this beautiful and functional addition to your bedroom. Let's get started!
Preparation and Safety Guidelines
- 28 feet of 18-gauge wire (or similar thin, strong wire)
- Drywall anchors (expanding type)
- Clips for attaching netting to wire
- Netting (gourmet panel)
- Ceiling hooks
- Ensure the canopy's hanging point is sturdy and can support the weight of the net and any additional decorations. A weak ceiling fixture could lead to collapse.
- Always keep the canopy away from any open flames or heat sources to prevent fire hazards. The net material is often flammable.
- Check for any loose threads or damaged areas in the mosquito net before installation and use. Tears or holes compromise its effectiveness and could pose a safety risk to children.
Step-by-Step Instructions
Secure Ceiling Hooks
- Install ceiling hooks securely into the ceiling using drywall anchors to ensure strong support.

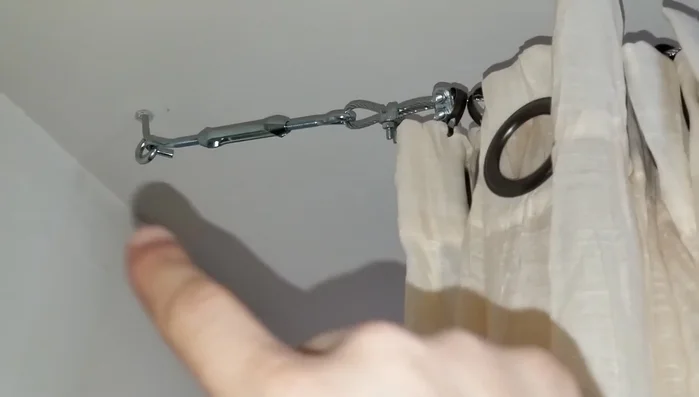
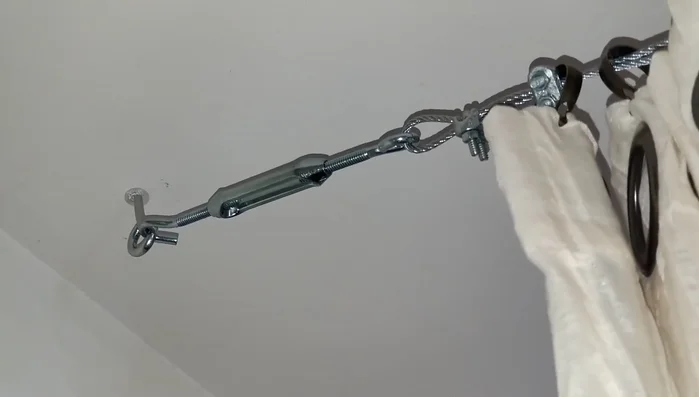
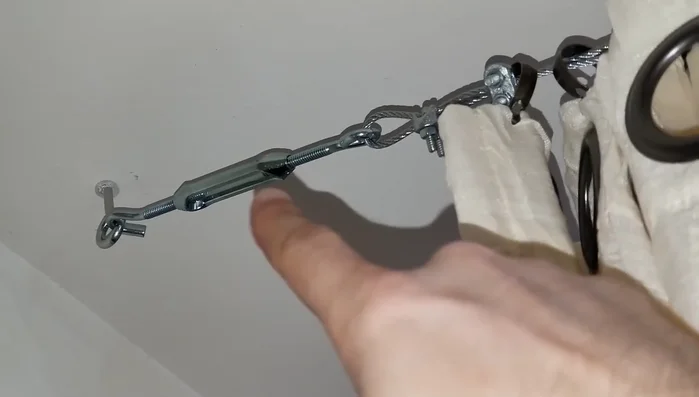
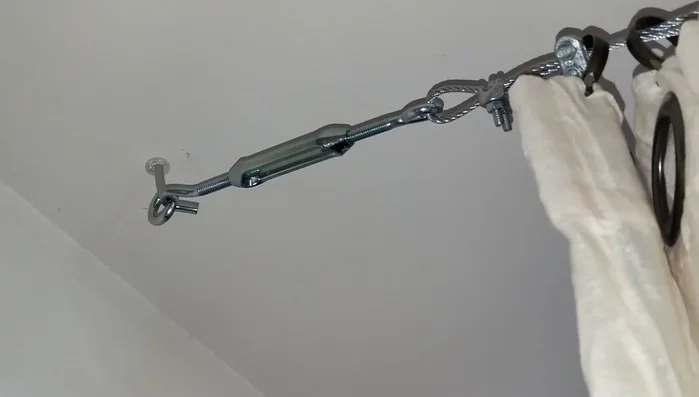
Secure Ceiling Hooks Install Wire Across Ceiling
- Attach one end of the wire to one of the ceiling hooks using the included clamps.
- Run the wire across the ceiling to the opposite side.
- Attach the other end of the wire to the second ceiling hook using the clamps.
- Adjust the wire tension using the hooks' mechanism to create a taut line.
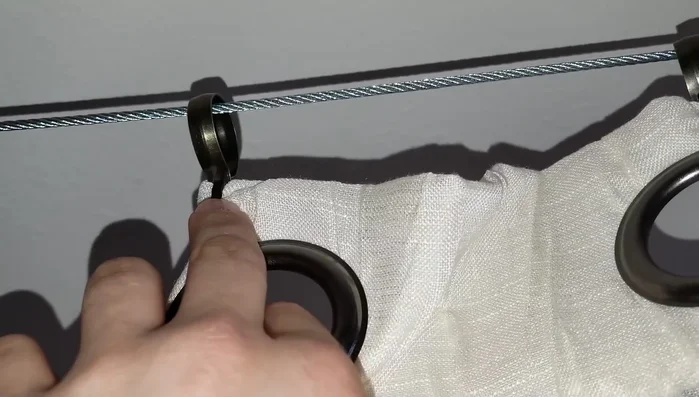
Install Wire Across Ceiling Attach Netting to Wire
- Attach the netting to the wire using the clips, ensuring even spacing and sufficient overlap to prevent gaps.
Attach Netting to Wire

Read more: Ultimate Guide to Harmonious Bedroom Furniture Arrangement
Tips
- Use thin wire to minimize weight and make installation easier. Thicker wire will be much heavier and harder to manage.
- Choose clips that allow for easy removal and adjustment of the netting.
- Plan for extra clips or rings, so you can add more as needed for smoother movement and to prevent sagging.
- Ensure sufficient distance (at least 6 inches) between the netting and any ceiling fans to prevent accidental contact.
- Consider the height of the canopy to prevent the netting from dragging on the floor.