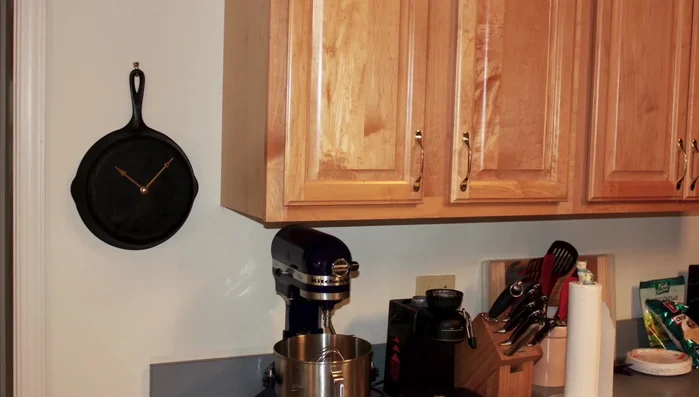
Cast iron cookware is renowned for its durability and ability to impart a unique flavor to food, but did you know it can also become the unexpected centerpiece of your home décor? This guide explores a fascinating and surprisingly simple project: crafting a functional clock from a repurposed cast iron skillet. Transforming a humble cooking vessel into a rustic, charming timepiece is not only a unique crafting experience but a testament to the versatility of this beloved material. The raw, industrial aesthetic of cast iron lends itself beautifully to this project, creating a conversation starter that blends practical function with handcrafted style.
Forget expensive, mass-produced clocks; let's delve into the satisfying process of building your own unique timepiece, brimming with character and personality. This detailed, step-by-step guide will walk you through each stage of the transformation, from sourcing the perfect skillet to the final installation of the clock mechanism. Let's get started!
Preparation and Safety Guidelines
- Cast iron pan
- Compass
- Center punch
- Drill
- 3/8 inch drill bit
- Machine oil
- Pencil
- Marker
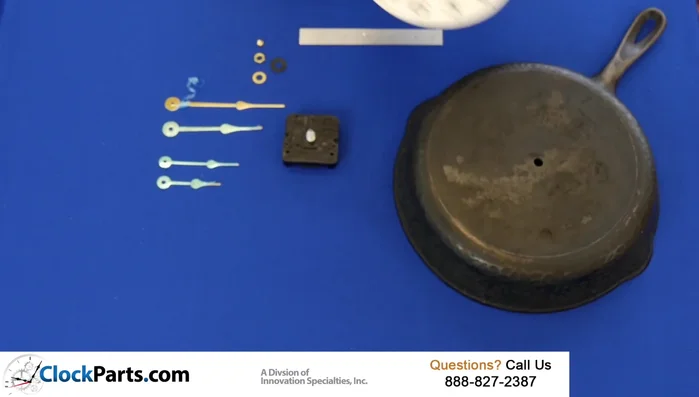
- American mini movement Craft clock kit (kit #1)
- Rubber washer
- Brass washer
- Brass hex nut
- Block of wood
- Cast iron is heavy and can break if dropped. Work on a sturdy, stable surface and take care when handling.
- Cast iron gets extremely hot. Allow ample time for cooling before handling. Use oven mitts or gloves.
- Always use appropriate safety glasses when working with tools, especially when drilling or hammering.
Step-by-Step Instructions
Prepare the Cast Iron Pan
- Clean the cast iron pan.
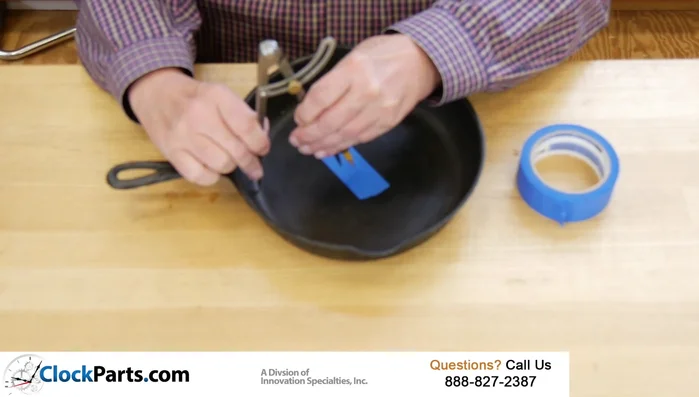
- Find the center of the pan using a compass to draw two arcs. The intersection is the center.
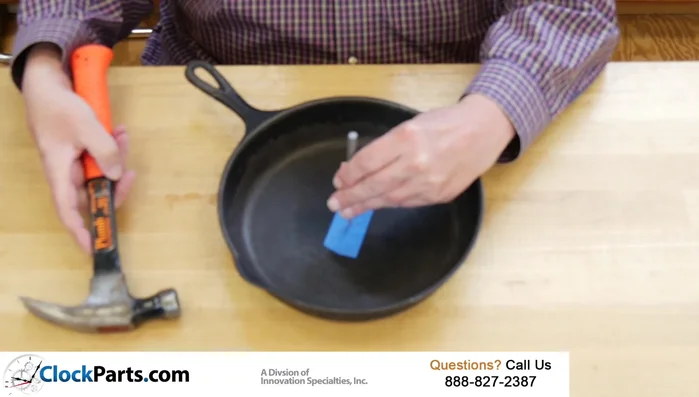
- Use a center punch to create a divot at the center point to guide the drill.
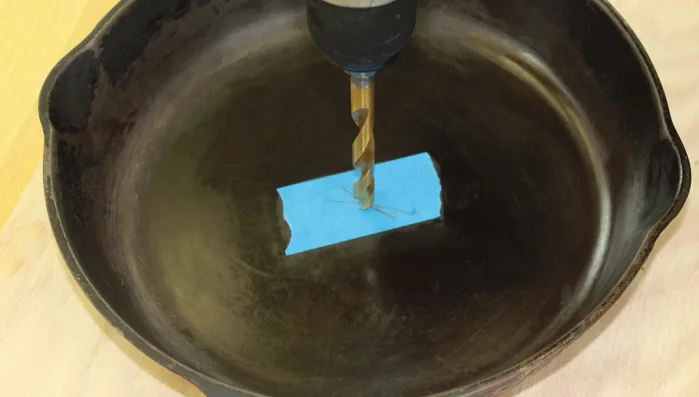
- Drill a 3/8 inch mounting hole for the clock movement.

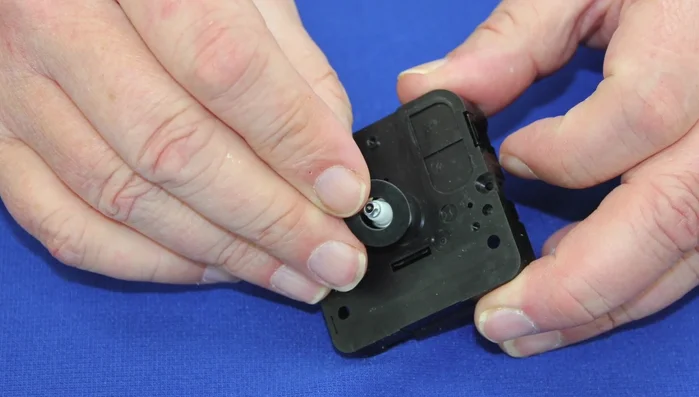
Prepare the Cast Iron Pan - Measure the thickness of the pan to select the appropriate clock movement kit (Kit #1 in this case).
Install the Clock Movement
- Install the clock dial or adhesive back numbers.
- Place a rubber washer over the hands shaft, then slide the hands shaft through the cast iron pan.
- Slide the brass washer over the shaft, then add and tighten the brass hex nut (don't overtighten).
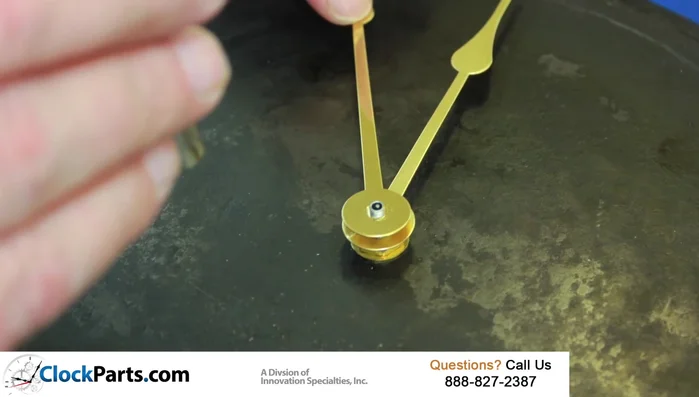
Install the Clock Movement Install the Clock Hands
- Firmly press the hour hand onto the shaft at the 12:00 position.
- Install the minute hand by aligning the flat sides of the mounting hole with the flat sides on the minute hand post.
- Thread the brass nut onto the top of the minute hand shaft.
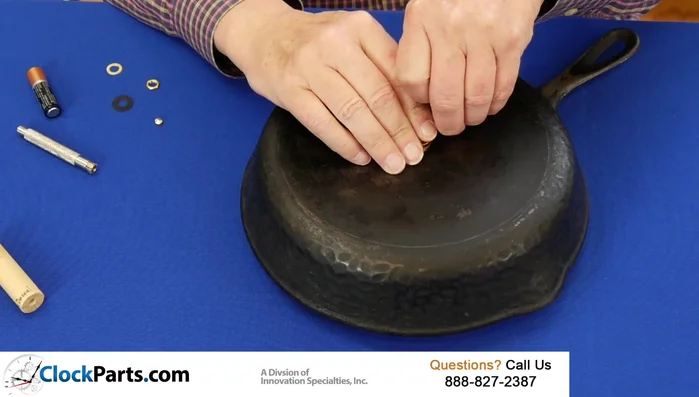
Install the Clock Hands Set the Time and Hang
- Align the hour and minute hands at 12:00 and set the time using the knob on the back of the movement.
- Hang the clock.
Set the Time and Hang
Read more: DIY Pantry Door Spice Rack: Organize Your Spices in Minutes!
Tips
- Use machine oil to lubricate the drill bit for smoother operation.
- Gold hands show up better on dark surfaces like cast iron.
- Don't overtighten the brass hex nut.
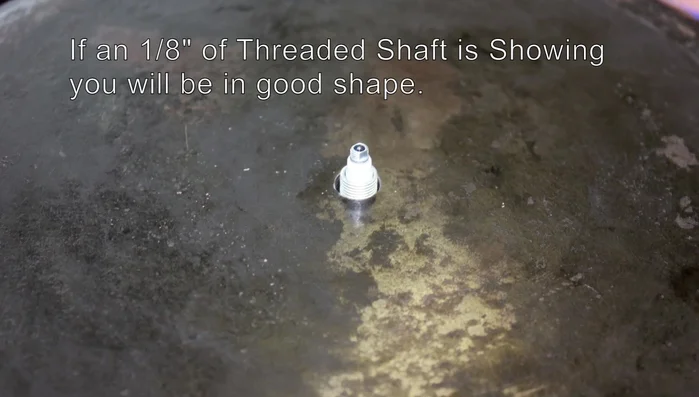
- Ensure the hour hand doesn't touch the threaded part of the shaft below it.