Transform your garden into a whimsical wonderland with the charm of unique, handcrafted cement figures! Forget expensive store-bought ornaments; this guide empowers you to create stunning, personalized garden decorations using readily available materials and simple techniques. From adorable gnomes to elegant statues, the possibilities are as limitless as your imagination. Creating these delightful additions is surprisingly accessible, requiring minimal tools and a satisfyingly hands-on approach. You'll discover the joy of bringing your creative visions to life, adding personality and character to your outdoor space.
This step-by-step guide will walk you through the entire process, from initial mold creation to the final finishing touches, ensuring you achieve professional-looking results. Let's embark on this creative journey and learn how to craft charming DIY garden cement figures that will be the envy of your neighbors!
Preparation and Safety Guidelines
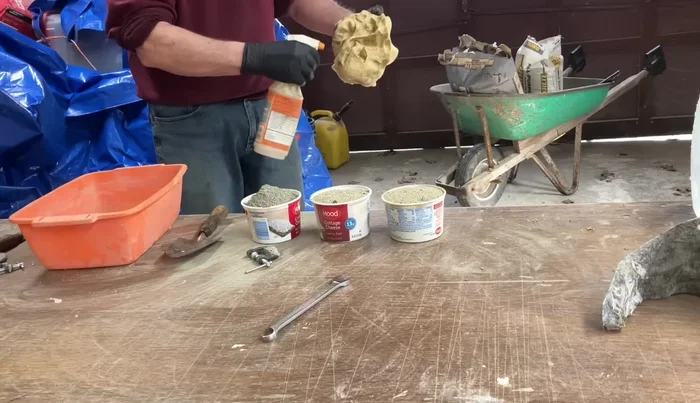
- Cement
- Sand
- Mold
- Mold Release (rubbing alcohol & castor oil)
- Fiberglass shell
- Clamps or tie wraps
- Shims
- Always wear appropriate safety gear, including gloves, eye protection, and a dust mask, when working with cement.
- Work in a well-ventilated area to avoid inhaling cement dust. Cement dust can irritate the lungs and eyes.
- Mix cement according to the manufacturer's instructions. Adding too much or too little water can weaken the final product.
Step-by-Step Instructions
Preparation
- Gather all materials and supplies.
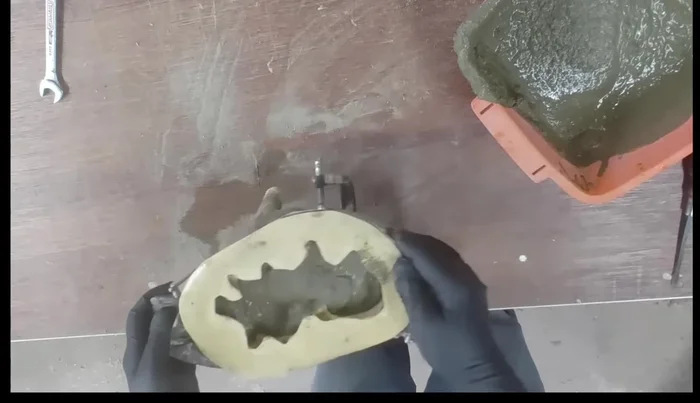
- Spray the inside of the mold with mold release (a mixture of rubbing alcohol and castor oil). Ensure every crevice is coated.

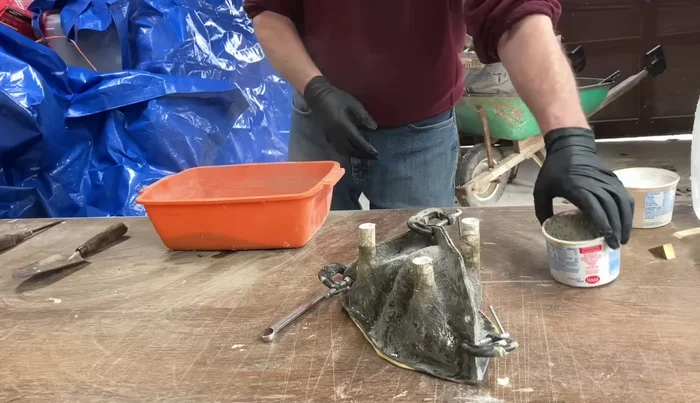
Preparation Mold Securing
- Place the mold inside a fiberglass shell to maintain its shape during cement pouring. Secure it using clamps, bolts, or tie wraps.
Mold Securing Mixing Cement
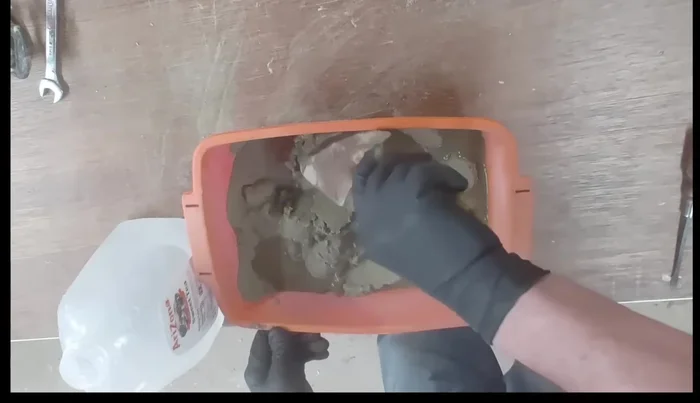
- 1 part cement to 2 parts sand). Use construction sand for better results. Mix thoroughly until the color is uniform.
- Slowly add water to the cement-sand mixture, ensuring it’s loose enough to pour but not too watery. Aim for a consistency similar to soft-serve ice cream.
Mixing Cement Pouring and De-airing
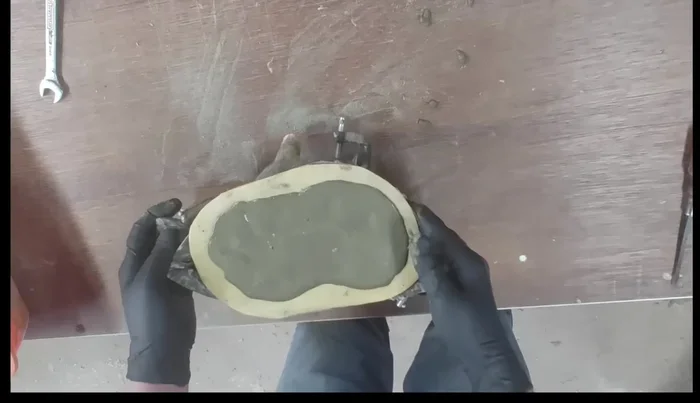
- Pour the mixture into the mold until about three-quarters full. Shake the mold vigorously to release air bubbles and fill crevices. Then, continue adding mixture until it reaches the top and shake again.
Pouring and De-airing Leveling and Finishing
- Level the mold using shims if necessary to compensate for uneven surfaces. Tap the sides of the mold to release more air bubbles.
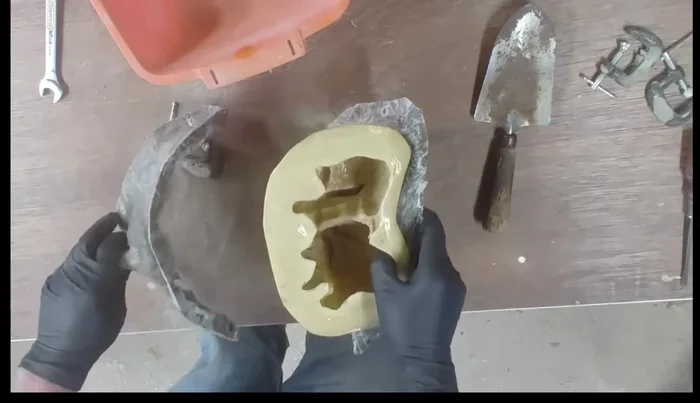
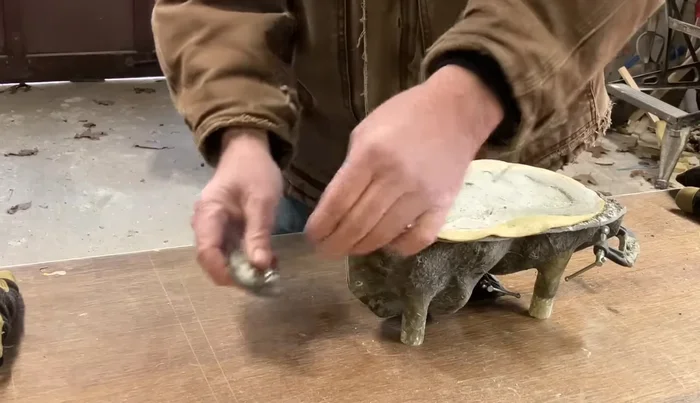
Leveling and Finishing Removing the Figure
- Once the cement has set, carefully remove the figure from the mold by gently working your way around the edges. Latex molds are particularly easy to remove from.
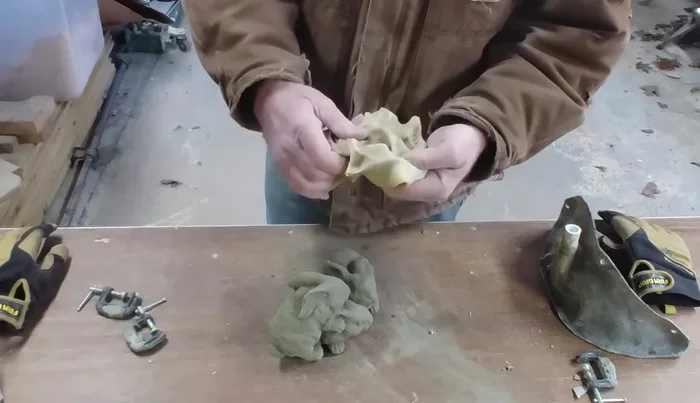
Removing the Figure Mold Cleaning
- Clean the mold thoroughly to remove any leftover cement, ensuring all crevices are clear for future use.
Mold Cleaning

Read more: Build a Sag-Proof Wood Fence Gate: The Ultimate DIY Guide
Tips
- Thoroughly coat the mold with mold release to prevent the cement from sticking.
- Use construction sand to ensure a smooth final product.
- Add water slowly to avoid making the mixture too runny.
- Shake the mold vigorously to remove air bubbles and ensure a seamless finish.
- Use shims to ensure the mold is level during the setting process.