Love books but hate the price tag of fancy shelving? Transform a simple wooden crate into a charming and functional hanging bookshelf – all without breaking the bank! This DIY project is perfect for those seeking a unique and budget-friendly way to display their favorite reads, adding a touch of rustic charm to any room. Whether you're a seasoned DIY enthusiast or a complete beginner, this project is surprisingly straightforward and requires minimal tools. Forget expensive, mass-produced furniture; let's create something personalized and beautiful together.
We'll be utilizing readily available materials and simple techniques to create a stunning hanging bookshelf that's as practical as it is aesthetically pleasing. From prepping the crate to the final hanging, this easy-to-follow guide will walk you through every step of the process, ensuring you achieve a professional-looking result with minimal effort. Ready to get started? Let's dive into the step-by-step tutorial!
Preparation and Safety Guidelines
- Crate
- Paint
- Sandpaper
- Damp Cloth
- 1x2 Wood
- Jigsaw
- Keyhole Hangers
- Drywall Anchors
- Placemats
- Ensure the crate is sturdy and free of any splinters or loose nails before starting. Use appropriate safety glasses and gloves during construction.
- Securely fasten the hanging hardware to both the crate and the wall, using appropriate screws and anchors for your wall type. Test the weight capacity before placing heavy books.
- Never overload the bookshelf. Distribute the weight evenly to prevent tipping or damage. Consider the weight limit of the hanging hardware and the crate itself.
Step-by-Step Instructions
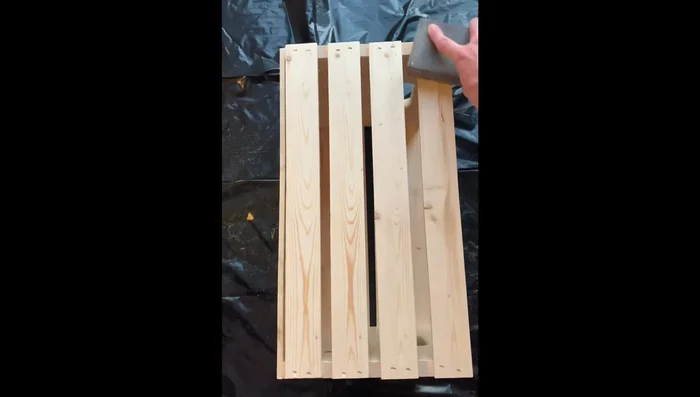
Prepare the Crate
- Sand any jagged edges for a smooth surface.
- Wipe down with a damp cloth to remove dust.

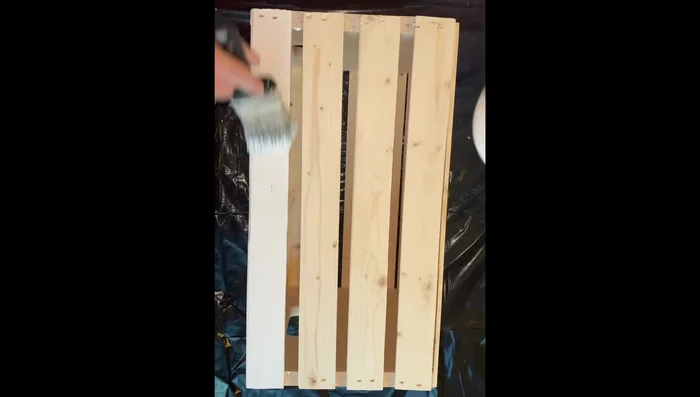
Prepare the Crate Paint the Crate
- Apply a fresh coat of paint (Valspar sample paint recommended).
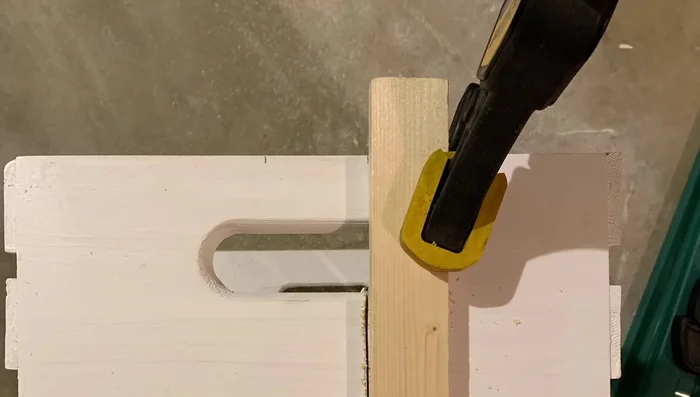
Paint the Crate Modify the Crate for Hanging
- Using a jigsaw, make two cuts on either side of the middle bottom slat to create space for hanging.
- Add four keyhole hangers (one on each side) for wall mounting.
Modify the Crate for Hanging Prepare for Book Storage
- Cut down placemats to prevent books from falling through the crate slats.
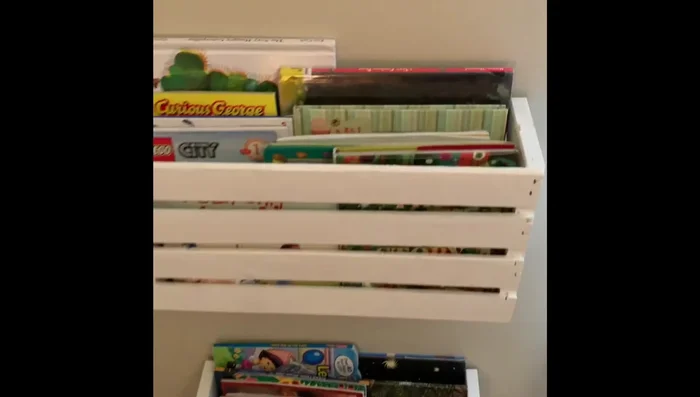
Prepare for Book Storage Install the Bookshelf
- Securely mount the bookshelf to the wall using drywall anchors.
Install the Bookshelf


Read more: Build a Giant Toy Box: DIY Playroom Organization
Tips
- Use Valspar sample paint from Lowe's for an affordable and wide color selection.