Tired of cluttered corners and overflowing storage? Transform unused space into a stylish and functional display area with a DIY ladder shelf! This simple yet elegant design is perfect for adding character to any room, whether it’s a rustic farmhouse aesthetic or a modern minimalist space. From bedrooms and living rooms to hallways and even bathrooms, a ladder shelf offers versatile storage solutions for books, plants, decorative items, and more. Building your own allows for complete customization, letting you choose the perfect size, wood type, and finish to match your personal style.
Forget expensive, mass-produced furniture; creating your own ladder shelf is surprisingly easy and rewarding. This step-by-step guide will walk you through the entire process, from selecting the right materials and tools to the final finishing touches, ensuring you achieve a beautiful and sturdy shelf you'll be proud to display. Let's get started!
Preparation and Safety Guidelines
- Contractor screws (2.5 inches)
- Double loop chains
- Hinges
- Plywood (6ft x 11 inches, 2 pieces)
- 2x4 lumber (8ft, 4 pieces)
- Miter saw
- Drill
- Self-tapping screws
- Nail gun
- Measuring tape
- Always use appropriate safety equipment, including safety glasses and work gloves, to protect yourself from potential injuries like splinters or eye damage during cutting and assembly.
- Ensure the ladder you are using is sturdy and in good condition. Inspect it for any damage before starting the project and ensure it's properly secured during construction and use. Do not use a damaged or unstable ladder.
- Securely fasten all screws and brackets to ensure the shelf is stable and won't collapse under weight. Overtightening can cause damage, so tighten according to manufacturer instructions.
Step-by-Step Instructions
Prepare the Ladder Sides
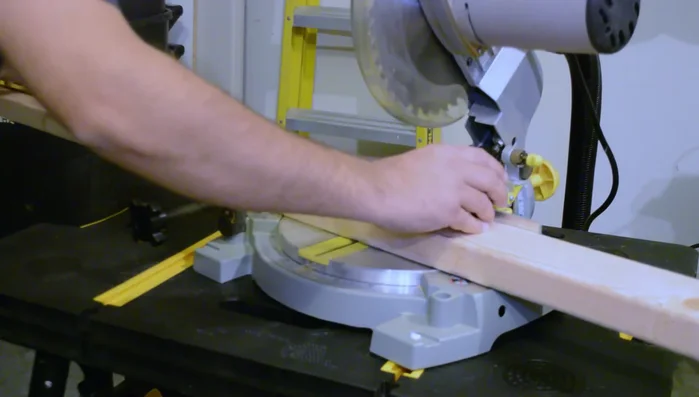
- Cut the 2x4s to 5 feet using a miter saw. Save the leftover wood for the steps.

Prepare the Ladder Sides Cut and Attach Ladder Steps
- Measure and cut the steps from the leftover 2x4s. The spacing between steps is determined by measuring the 2x4 against another with plywood in between (14 inches in this example).
- Attach the steps to the 5-foot 2x4s using self-tapping screws. Ensure the bottom step is slightly elevated from the floor.
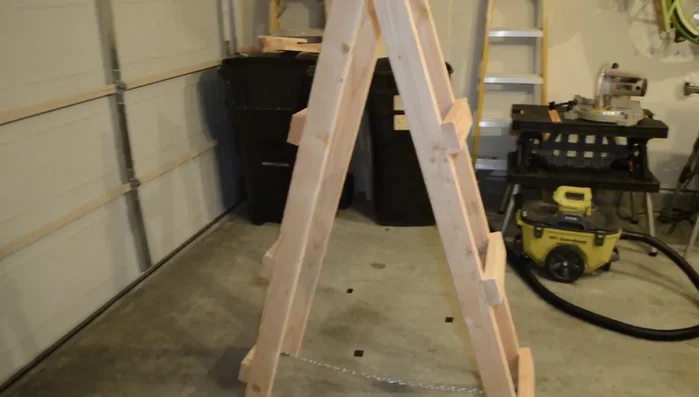
Assemble the Ladder Frame
- Attach hinges to connect the two ladder sides.
- Attach the double loop chains to maintain the desired ladder angle and prevent overextension.
Assemble the Ladder Frame Prepare Shelf Pieces
- Pre-cut plywood pieces (6ft, 5ft, and 4ft) for the shelf. Also cut smaller pieces to add a nice finish to the top.
Prepare Shelf Pieces Attach Shelves to Ladder
- Slide the pre-cut plywood pieces onto the ladder structure and secure them with nails using a nail gun.
Attach Shelves to Ladder


Read more: Build a Giant Toy Box: DIY Playroom Organization
Tips
- Save leftover wood from the initial 2x4 cuts to use for the ladder steps.
- Leave a small gap between the bottom step and the floor to prevent it from fully touching the ground.
- Use self-tapping screws for easier assembly.
- Use a nail gun for securing the plywood shelves to ensure a clean and sturdy finish.