Love plants but lack the space (and maybe the green thumb) for a thriving indoor garden? Don't despair! Limited square footage doesn't mean you have to sacrifice the calming presence of greenery. A DIY self-watering planter is the perfect solution for small spaces, allowing you to cultivate your favorite blooms and foliage without the constant worry of underwatering or overwatering. This ingenious system provides a consistent water supply, ensuring your plants thrive even when you're busy or away from home. Forget wilting leaves and frustrating plant care routines; this guide will empower you to create a flourishing miniature ecosystem in your apartment, dorm room, or even a tiny balcony.
This ultimate guide will walk you through building your own self-watering planter, from choosing the right materials to mastering the simple construction process. Ready to transform your small space into a vibrant indoor oasis? Let's get started with the step-by-step instructions below!
Preparation and Safety Guidelines
- 2x6 boards
- 2x4 boards
- 4x4 boards
- Exterior grade screws
- Pocket hole jig
- Exterior grade wood glue
- Dark black stain
- Pond liner
- Staple gun
- Corrugated perforated hose
- Utility knife
- Landscape fabric
- Duct tape
- PVC pipe
- 3/4 inch flexible hose
- Deck stain
- Vermiculite
- Peat moss
- Potting soil
- Ensure proper drainage in your reservoir to prevent root rot. Excess water should have an escape route.
- Use a non-toxic material for your reservoir and planter to avoid contaminating your plants or leaching harmful chemicals into the soil.
- Monitor your water levels regularly to prevent overwatering or underwatering. The frequency will depend on your plant's needs, pot size, and environmental conditions.
Step-by-Step Instructions
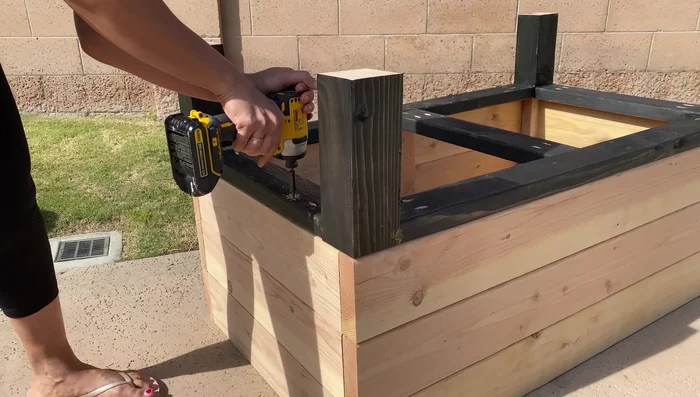
Build Planter Body
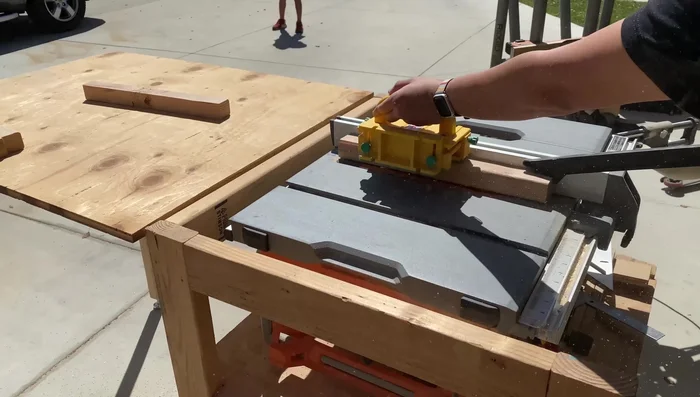
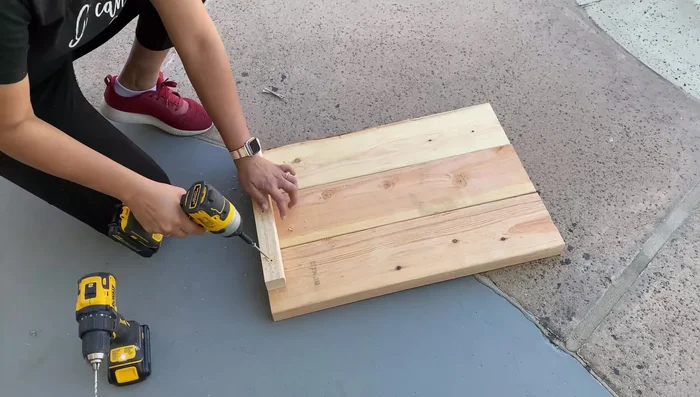
- Cut and assemble the planter body using 2x6 boards. Attach three short boards, using a cross support.
- Rip down 2x3 boards to create 2x2 boards for the ends.
- Build the short sides by attaching the 2x2 boards to each end.
- Assemble the planter frame.

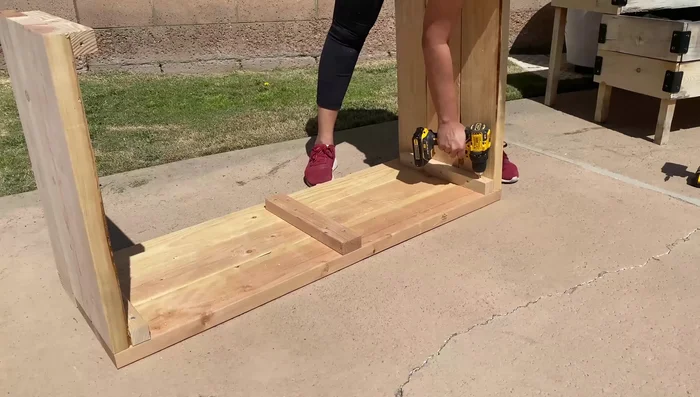
Build Planter Body Construct Base and Legs
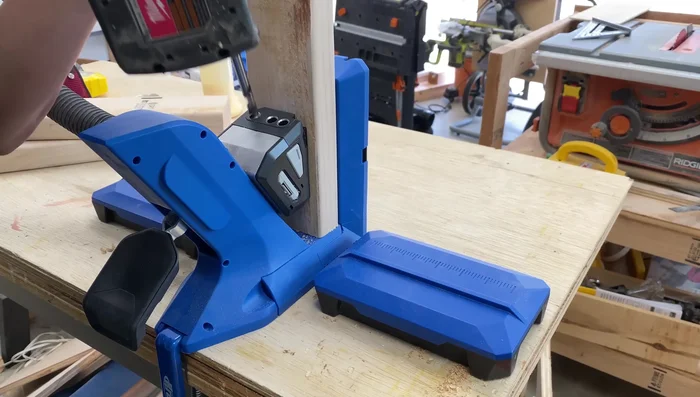
- Construct the legs using 2x4s and 4x4s using pocket holes and wood glue.
- Stain the base with a dark black stain.
- Attach the base to the planter using exterior grade screws.
- Attach the bottom using 2x4s, creating a lip on the inside.
Construct Base and Legs Create Water Reservoir
- Line the inside of the planter with a pond liner for waterproofing, securing it with a staple gun.
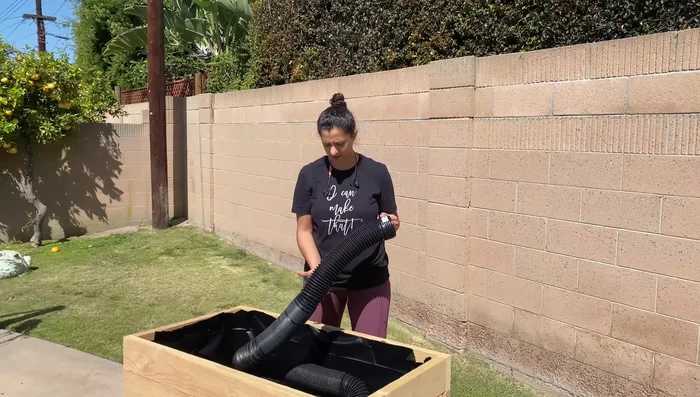
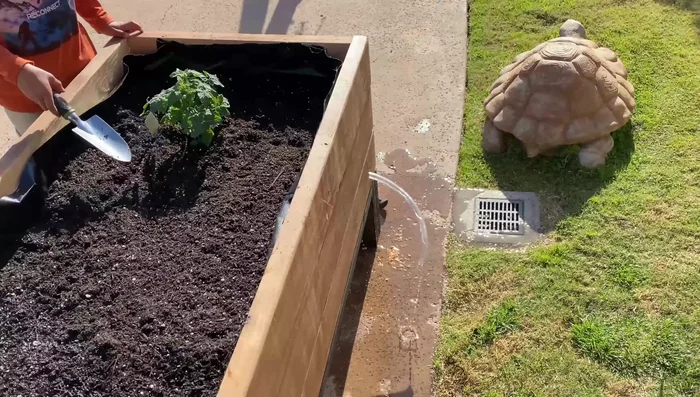
Install Watering System
- Cut and place the corrugated perforated hose (or fabric-covered version) to cover the bottom of the planter, ensuring no dirt gets inside. Cover ends with landscape fabric and duct tape.
- Create an inlet and outlet for water using a PVC pipe and a 3/4 inch flexible hose.
Install Watering System Finish and Protect
- Apply a protective stain (deck stain) to the exterior of the planter.
Finish and Protect Prepare and Plant
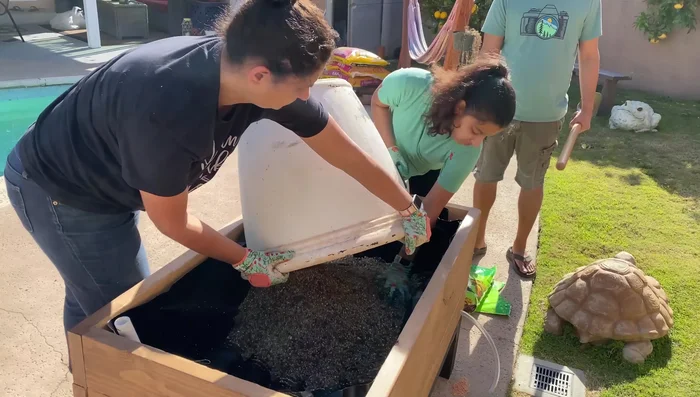
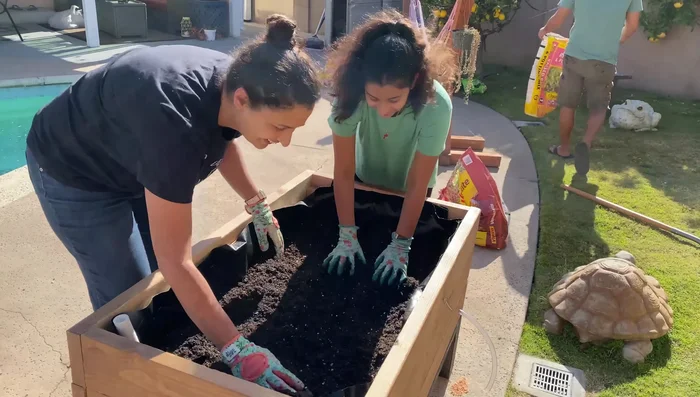
- Fill the bottom of the planter with a 2:1 mixture of vermiculite and peat moss, ensuring it covers all surfaces and pipes.
- Add potting soil and plant.
Prepare and Plant Test the System
- Fill the inlet with water to test the system.
Test the System


Read more: Build a Sag-Proof Wood Fence Gate: The Ultimate DIY Guide
Tips
- Use exterior-grade screws and wood glue for durability.
- Work on a flat surface when attaching the legs.
- Ensure a watertight seal when attaching the pond liner.
- Carefully cut and position the perforated hose to cover the entire bottom.
- Seal any gaps or slits in the pond liner with duct tape to prevent leaks.