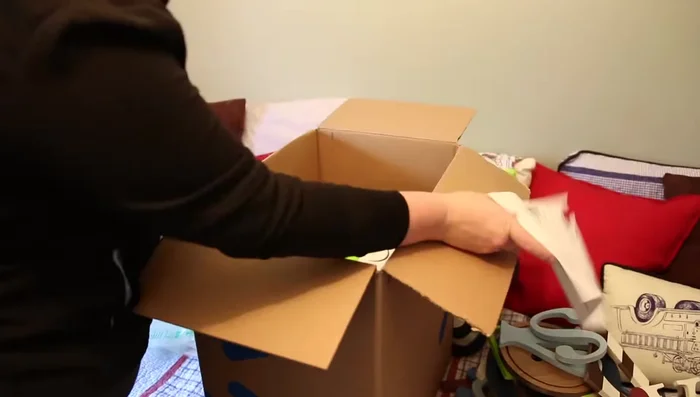
Ever dreamed of transforming your child's bedroom into a superhero headquarters? Forget expensive renovations and complicated designs; unleash your inner hero with this budget-friendly DIY superhero bedroom makeover! We'll show you how to create an incredible, personalized space that's both fun and functional, without breaking the bank. From repurposing everyday items to cleverly using paint and fabric, this guide is packed with creative ideas that will leave your little superhero speechless.
This isn't about hiring expensive contractors or buying pre-made superhero themes; it's about crafting a unique and memorable space using readily available resources and a dash of imagination. Get ready to assemble your DIY superhero team (that’s you and your helpful tools!), because we’re about to embark on a thrilling step-by-step journey filled with exciting transformations. Let’s get started!
Preparation and Safety Guidelines
- Craft paper
- Level
- MDF
- LED strip lights
- Plexiglas
- Black spray paint
- Dollar store picture frames
- Painter's tape
- Command strips
- Old comic books
- Inexpensive flush mount light fixture
- Vinyl
- Cricut (or hand-cutting tools)
- Inexpensive wood dresser poles
- Howetechs bright paint
- 2-inch diameter logos (printed)
- Mod Podge (glue and water mixture)
- Ikea bins (or similar)
- Dark t-shirt transfers
- Iron
- 3M strips
- Double-sided tape
- Adult supervision is required for all painting, power tool use, and any projects involving sharp objects or potentially hazardous materials. Never let children work unsupervised.
- Ensure proper ventilation when using paints, sprays, or adhesives. Wear a mask if necessary to avoid inhaling fumes.
- Securely fasten any wall decorations or hanging elements to prevent them from falling and causing injury. Use appropriate weight-bearing hardware for the job.
Step-by-Step Instructions
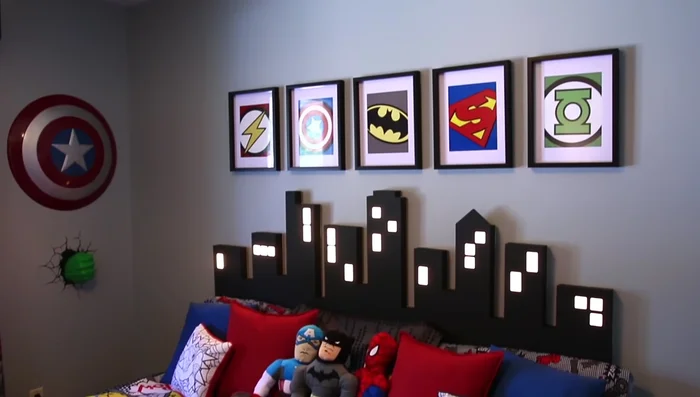
Headboard Creation
- Create a skyline headboard using a craft paper template, transferring the design to MDF, adding Plexiglas windows, LED lights, and painting it black.

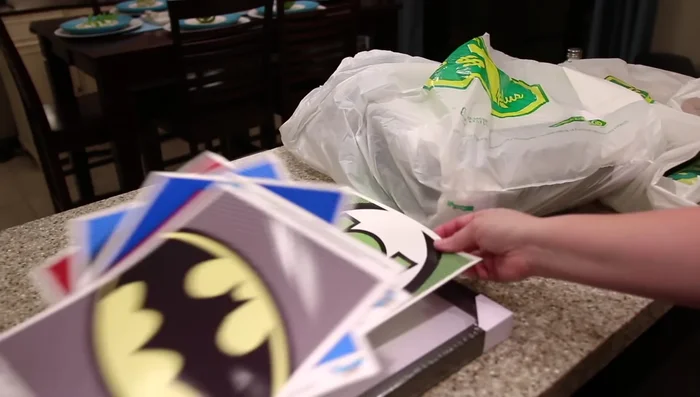
Headboard Creation Superhero Wall Art
- Make superhero artwork using dollar store picture frames and free printable logos. Arrange them on the wall using painter's tape and command strips for easy adjustments.
Superhero Wall Art Bat Light Modification
- Create a bat light by modifying an inexpensive flush mount light fixture with a vinyl bat symbol (cut with a Cricut or by hand).
Bat Light Modification Dresser Pole Customization
- Customize dresser poles by painting inexpensive wood poles and adding superhero logos using Mod Podge.
Dresser Pole Customization Bin Decoration
- Decorate bins with superhero logos using dark t-shirt transfers and an iron.
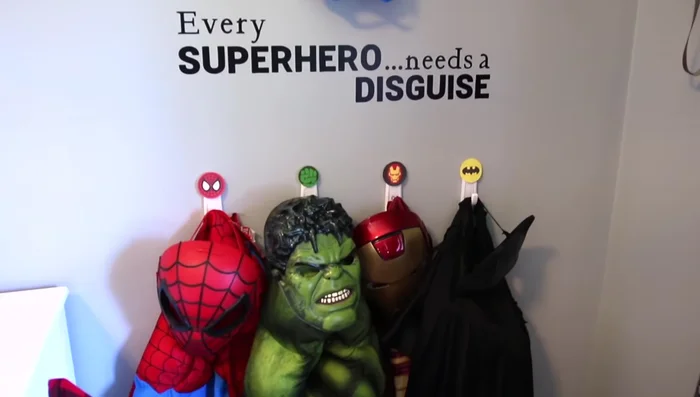
Dress-Up Corner Setup
- Create a dress-up corner with costumes and a Cricut-made sign.
Dress-Up Corner Setup Sheet-to-Curtain Transformation
- Make curtains from inexpensive sheets using iron-on fusion tape.
Sheet-to-Curtain Transformation Superhero Lamp Installation
- Add a superhero lamp (instructions linked in video).
Superhero Lamp Installation

Read more: Build a Giant Toy Box: DIY Playroom Organization
Tips
- Use a level to ensure straight lines when creating the skyline headboard template.
- Start with the center picture when creating a gallery wall, then work outwards.
- Use dark t-shirt transfers for easy application of superhero logos onto bins – no need to reverse the image.