Tired of mass-produced wall art that lacks personality? Yearning for a touch of elegant sophistication in your home without breaking the bank? Then prepare to be amazed by the transformative power of DIY wire and cord word art! This incredibly simple yet stunning craft project allows you to create personalized wall décor that perfectly reflects your style, all while utilizing inexpensive and readily available materials. Forget expensive canvases and prints – we're talking about creating breathtaking pieces using wire, cord, and a touch of creativity.
This guide will unveil the secrets to crafting your own elegant word art, from selecting the perfect word or phrase to mastering the techniques for shaping and securing your chosen materials. We'll walk you through each step, providing clear instructions and helpful tips to ensure your finished project is both beautiful and durable. Get ready to unleash your inner artist and prepare to be inspired as we delve into the detailed step-by-step process.
Preparation and Safety Guidelines
- 5mm braided cord
- 3mm aluminum wire
- Needle-nose pliers
- Scissors
- Glue gun
- Always unplug the power source before working with any electrical wires or cords. Never work with live wires.
- Use appropriate wire cutters and pliers designed for the type of wire you are using to avoid injury and ensure clean cuts.
- If you're unsure about any step of the process, especially working with electricity, consult a qualified electrician before proceeding.
Step-by-Step Instructions
Prepare the Wire and Cord
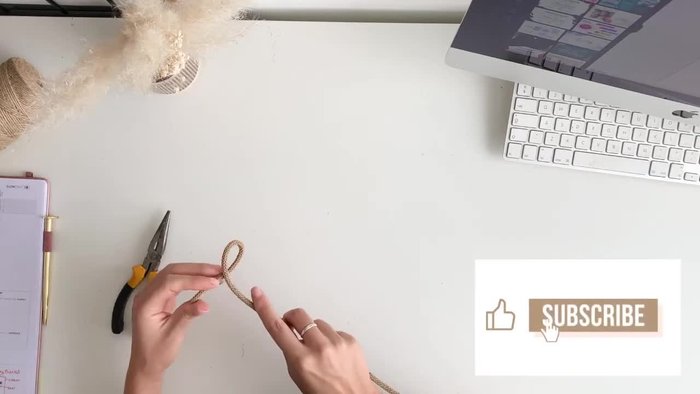
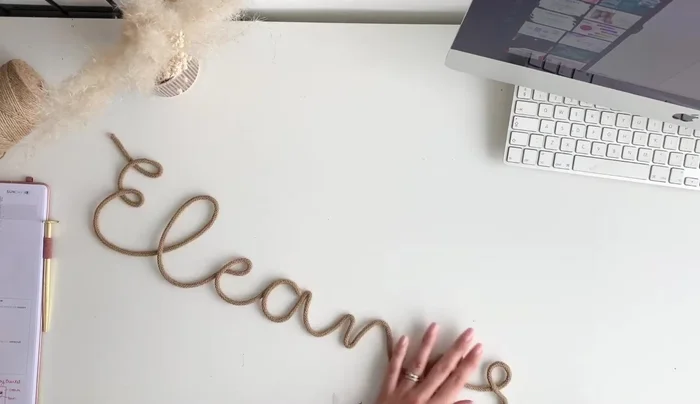
- Thread aluminum wire through braided cord (approx. 2 meters). Remove any inner filling from the cord to avoid lumps.

Prepare the Wire and Cord Choose Font and Plan Letters
- Choose a font (e.g., from Canva). Use the font as a guide to form the letters with the wire.
Choose Font and Plan Letters Shape the Letters
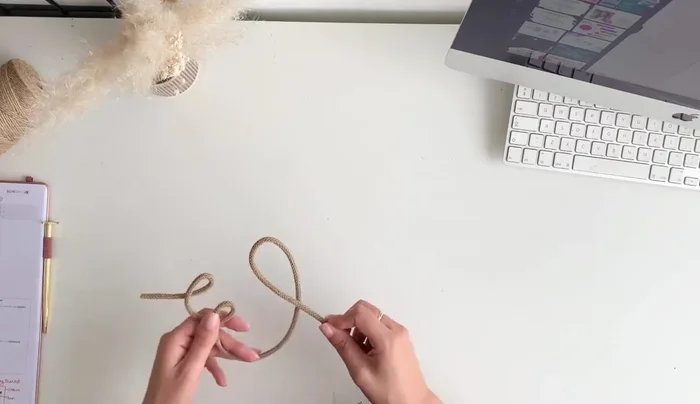
- Bend the wire to shape each letter. Use pliers to create sharp angles and curves, ensuring the letters lie flat.
Shape the Letters Assemble the Word
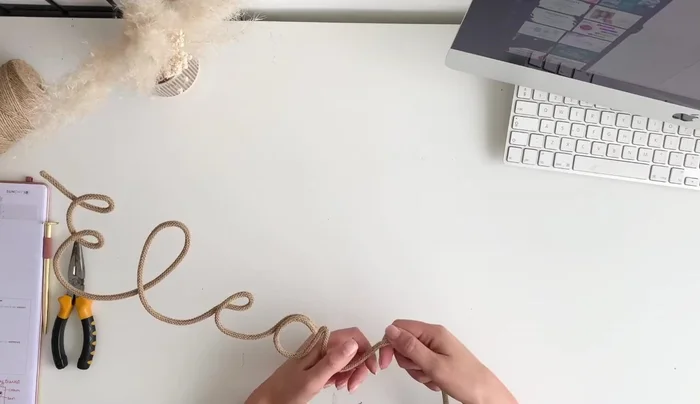
- Connect the letters, adjusting as needed to maintain a smooth flow. Don't worry if letters vary slightly in size; consistency in following the font is key.
Assemble the Word Finish and Secure
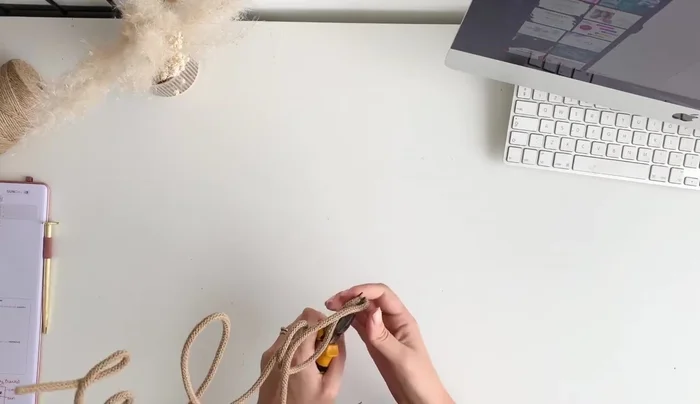
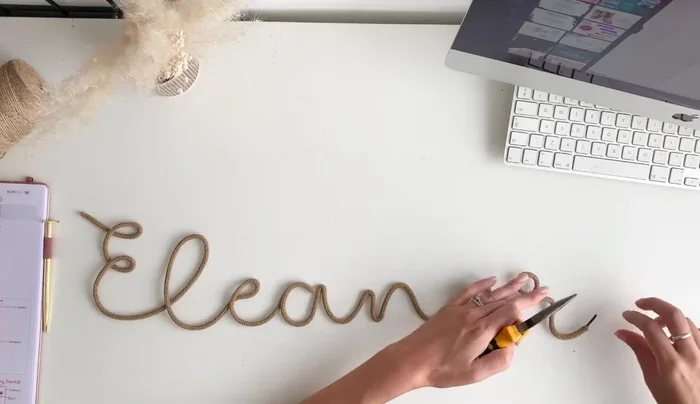
- Once the word is complete, cut excess wire with pliers or wire cutters. Ensure the word is flat.
- Apply hot glue to the back of the word, pulling the cord taut to secure the letters.
- Cut away any excess cord.
Finish and Secure

Read more: Ultimate Guide to Harmonious Bedroom Furniture Arrangement
Tips
- Remove the inner filling from the cord before threading the wire to avoid lumps.
- Use a font as a guide. This ensures consistency and makes shaping the letters easier.
- Keep the wire smooth and avoid over-manipulation to prevent distortion.
- A small pin can hold the finished word art on the wall, especially with its lightweight nature.