Add a touch of whimsical charm to your home décor with this easy-to-make no-weld wire bird wall art! Forget complicated tools and messy welding – this project is perfectly suited for beginners and requires only readily available materials. Imagine a delightful flock of birds perched playfully on a wire, creating a unique and eye-catching piece that's sure to spark conversation. This charming wall hanging is surprisingly simple to construct, making it a perfect afternoon project for crafting enthusiasts of all skill levels. You'll be amazed at how quickly you can transform basic wire into a beautiful piece of art.
This fun and satisfying DIY project uses readily accessible materials and simple techniques, resulting in a stunning and personalized piece of wall art. Ready to create your own feathered friends? Let's dive into the step-by-step instructions and bring your creative vision to life!
Preparation and Safety Guidelines
- Anodized aluminum bonsai training wire (2.5mm)
- Masking tape
- Wire cutters
- Pliers
- Drawing of birds on wire
- Always use wire cutters designed for the gauge of wire you are using. Improper tools can lead to injury.
- Be mindful of sharp wire ends. Use pliers to carefully bend and shape the wire, and consider covering sharp points with tape or sealant once the project is complete.
- If working with young children, provide close supervision at all times and ensure they don’t put the wire in their mouths.
Step-by-Step Instructions
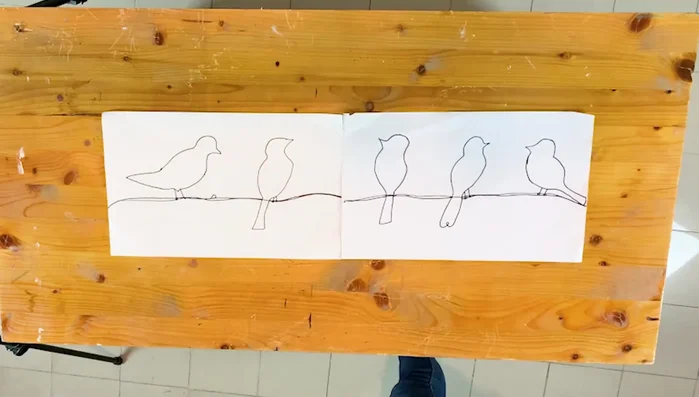
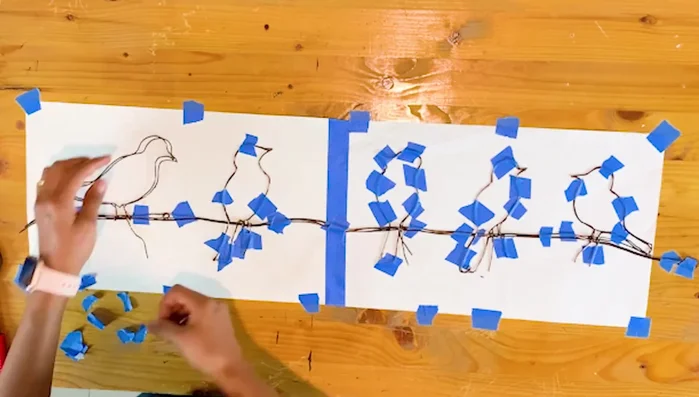
Prepare the Template
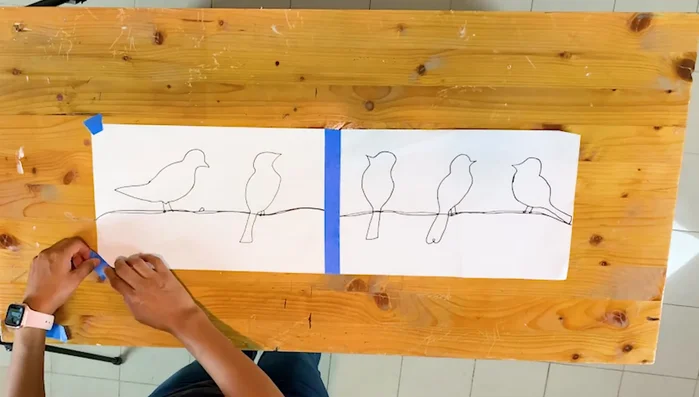
- Use a drawing of birds on a wire. If the drawing is large, divide it into smaller sections and join them using masking tape.
- Stick the drawing onto your working table using masking tape to prevent it from moving.

Prepare the Template Create the Wire Branches
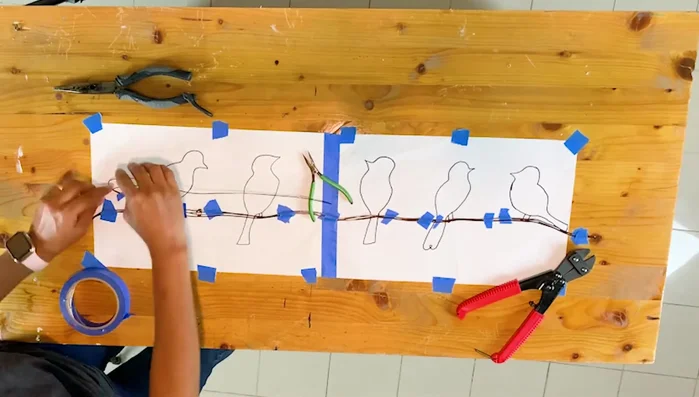
- Follow the drawing to create the branches using the wire. You don't need to be exact; the drawing serves as a guide.
Create the Wire Branches Form the Birds
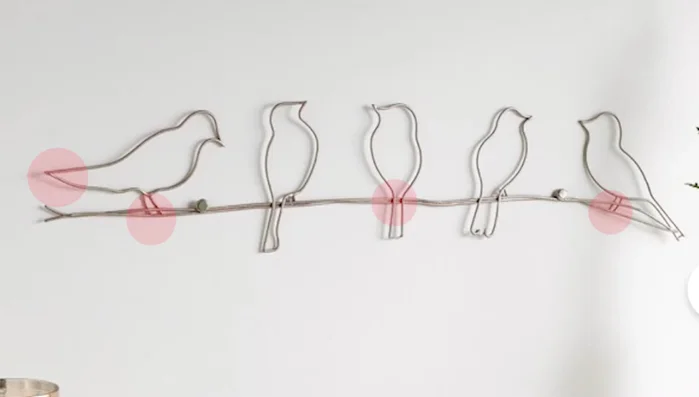
- For each bird, start by creating a loop of wire around a branch. Then, follow the shape of the bird in the drawing, wrapping the wire around the branch at the end to secure it. Leave extra wire (about an inch) at both ends for later securing.
- Use pliers to shape the wire according to the bird's form, creating curves and details. Use masking tape to hold the wire in place while shaping.
Form the Birds Secure the Birds
- Once you reach the other end of the bird, wrap the extra wire around the branch. Twist and tighten the wire using pliers to secure the bird and mimic the bird's feet.
Secure the Birds Finish and Clean Up
- Carefully remove the masking tape from the finished project.
Finish and Clean Up


Read more: Miniature Spider Welding Tutorial: Crafting a Tiny Metal Arachnid
Tips
- Use masking tape to keep your wire and drawing in place.
- Leave extra wire at the ends of each bird to secure it to the branch.
- Use pliers to create sharp bends and secure the wire.
- Don't be afraid to experiment with size and placement for a more customized look.