Fairy lights instantly transform a room, adding a touch of magic and whimsy. Whether you're aiming for a cozy bedroom retreat or a festive party atmosphere, these twinkling strands offer endless possibilities for enhancing your space. But wrestling with tangled wires and struggling to find the perfect placement can quickly dampen the festive spirit. Fortunately, hanging fairy lights doesn't have to be a frustrating ordeal. With a few simple techniques and the right tools, you can achieve a stunning, professionally-looking display with minimal effort.
Forget sticky tack and haphazard placement; this guide will walk you through several easy and effective methods to elegantly drape your fairy lights across your walls. We'll explore various options, from utilizing readily available household items to showcasing more creative and permanent solutions. Ready to illuminate your home with ease and style? Let's dive into the step-by-step process and discover the best way to hang your fairy lights.
Preparation and Safety Guidelines
- Fairy lights
- Command damage-free hanging hooks (small, clear)
- Tape
- Always use low-voltage fairy lights designed for indoor use. High-voltage lights pose a fire risk.
- Never cover or obstruct the fairy lights while plugged in. This can cause overheating and fire.
- Ensure the lights are unplugged before handling them or making any adjustments to their placement.
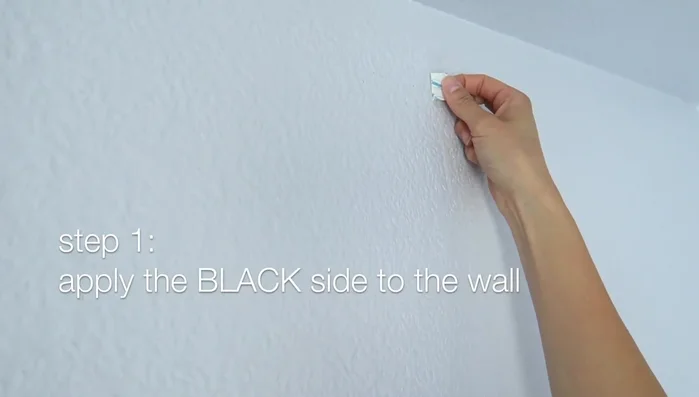
Step-by-Step Instructions
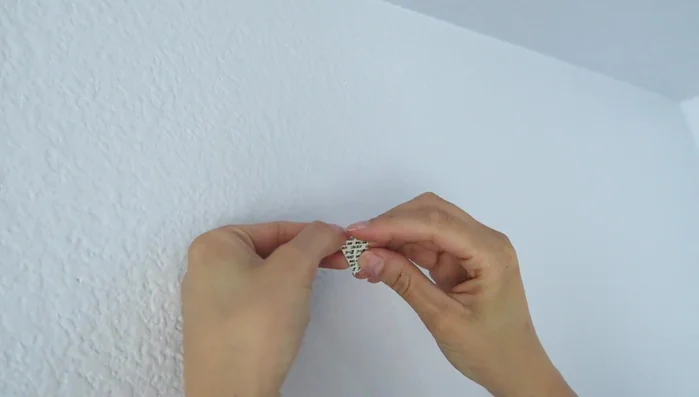
Prepare the Command Hook
- Remove the liner on the black side of the Command hook that says 'wall side'.
- Remove the liner on the blue side of the hook.

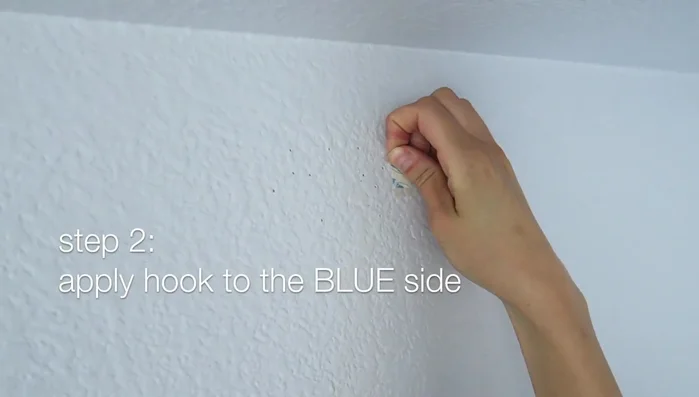
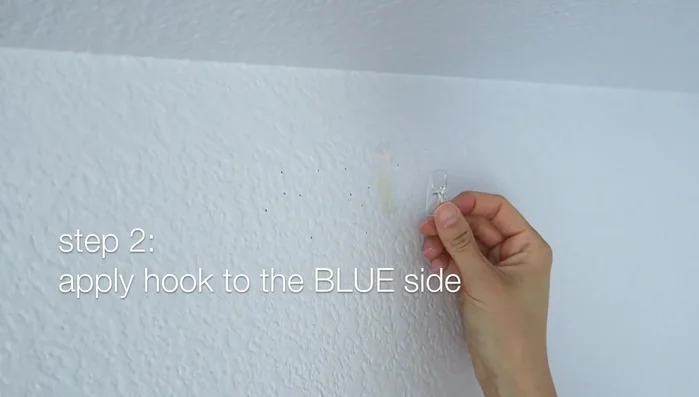
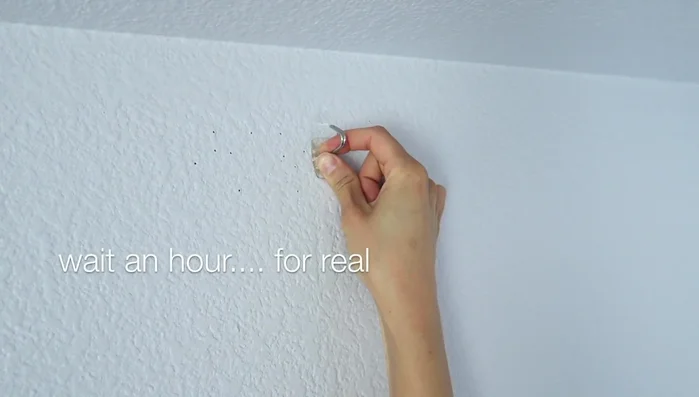
Prepare the Command Hook Apply the Command Hook to the Wall
- Stick the hook to the wall and hold it for 30 seconds.
- Attach the hook firmly to the wall and hold for another 30 seconds.
- Let the hook sit for an hour to ensure proper adhesion.
Apply the Command Hook to the Wall Hang the Fairy Lights
- Hang the lights onto the hook.
Secure the Battery Box
- Tape the battery box to the wall.
Read more: Ultimate Guide to Harmonious Bedroom Furniture Arrangement
Tips
- These hooks work best on smooth, clean surfaces.
- Consider where to place the battery box; you can hide it behind a tapestry or tape it to a corner.