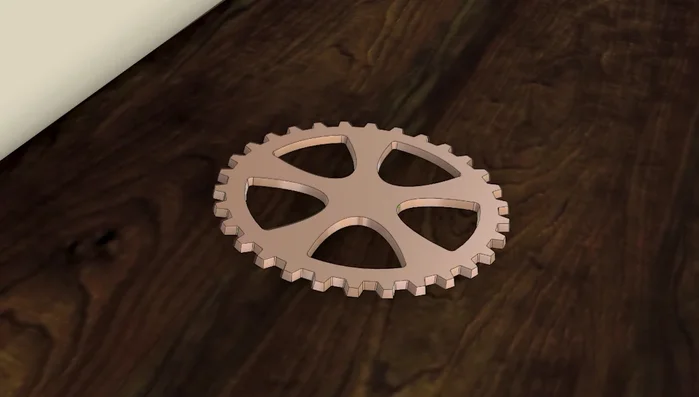
Solid copper trivets, with their inherent beauty and exceptional heat resistance, are a coveted addition to any kitchen. Their rich patina develops naturally over time, adding character and a touch of rustic elegance. While beautifully crafted copper trivets can be expensive, the rewarding process of creating your own using lost-wax casting opens up a world of artistic expression and considerable cost savings. This ancient technique, refined over centuries, allows you to transform a simple design into a unique, handcrafted piece.
This tutorial will guide you through each stage of creating your own DIY solid copper trivets using the lost-wax casting method, from initial design and wax carving to the exciting moment of revealing your finished piece. Prepare to delve into the fascinating world of metal casting, and get ready to discover just how accessible and rewarding this centuries-old craft truly is. Let's begin!
Preparation and Safety Guidelines
- Fusion 360 (CAD software)
- Sand (Petrobond oil-bonded sand)
- Casting pattern (3D printed)
- Crucible
- Copper ingots
- Phosphor copper
- Milling machine
- Hacksaw
- Hand file
- Wire brush
- Clear coat (Protectaclear)
- Safety equipment (gloves, eye protection)
- Molten copper is extremely hot and can cause severe burns. Always wear appropriate safety gear, including heat-resistant gloves, eye protection, and a long-sleeved shirt. Never work alone.
- Work in a well-ventilated area. The fumes produced during melting and casting copper can be toxic. Use a respirator if necessary.
- Use proper fire safety precautions. Keep a fire extinguisher nearby and be aware of potential fire hazards, particularly concerning flammable materials near your workspace.
Step-by-Step Instructions
CAD Design and Pattern Creation
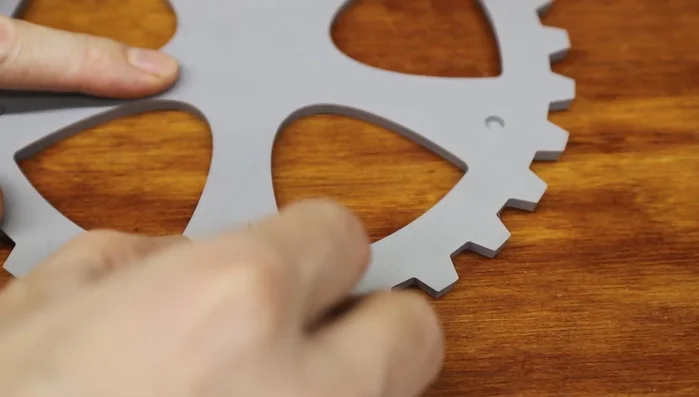
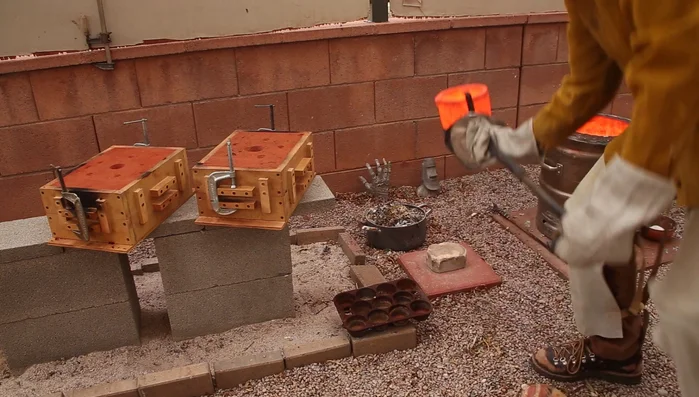
- Design the trivet in Fusion 360 CAD software and 3D print the pattern with a 10-degree draft angle.

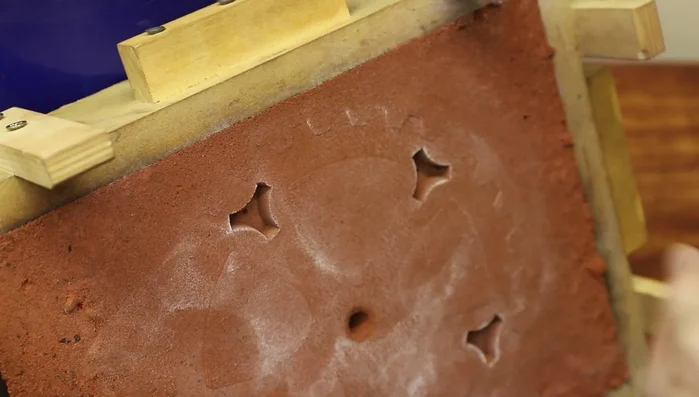
CAD Design and Pattern Creation Sand Mold Preparation
- Prepare the sand mold using Petrobond oil-bonded sand. Use baby powder to prevent sticking.
- Create sprue and vent holes in the mold.
Sand Mold Preparation Copper Melting and Pouring
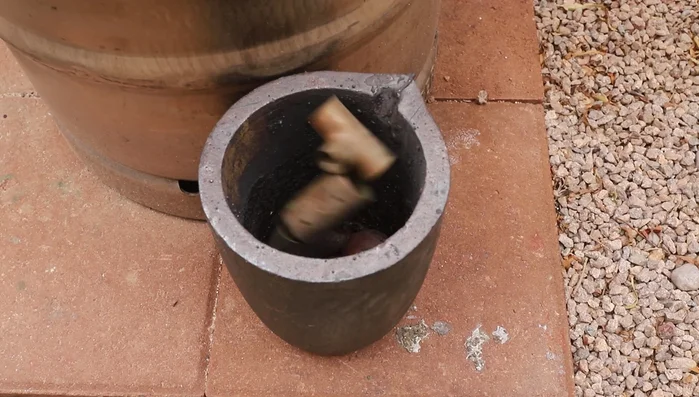
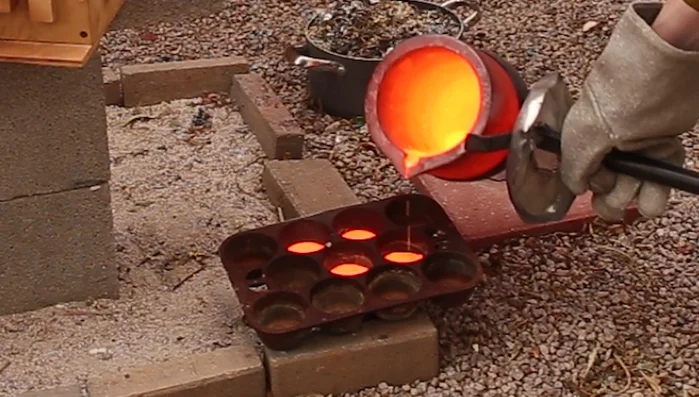
- Melt copper ingots, exceeding the melting point by a couple hundred degrees. Add phosphor copper just before pouring.
- Pour molten copper into the molds quickly and carefully.
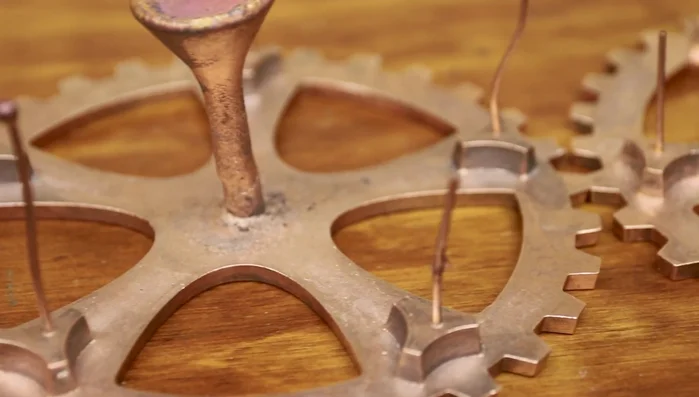
Copper Melting and Pouring Cooling and Casting Removal
- Allow the castings to cool completely.
- Remove the castings from the molds and cut off the sprue using a hacksaw and milling machine.
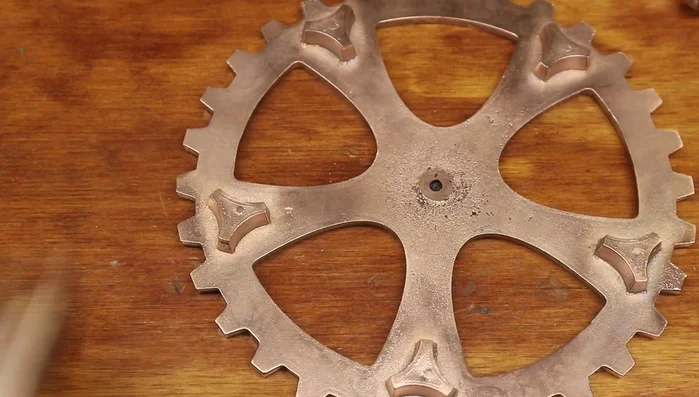
Cooling and Casting Removal Cleaning and Finishing
- Clean the castings using a hand file and wire brush.
- Stamp with initials and year, then apply a durable clear coat (Protectaclear).
Cleaning and Finishing

Read more: DIY Pantry Door Spice Rack: Organize Your Spices in Minutes!
Tips
- Use a 10-degree draft angle on your 3D printed pattern to facilitate easy removal from the sand mold.
- Baby powder helps prevent the pattern from sticking in the mold.
- Overheat the copper (a couple hundred degrees past melting point) to ensure proper flow into the mold.
- Add phosphor copper to reduce viscosity and remove gases from the molten metal.
- Allow castings to cool completely before opening the mold.