Dreaming of a cozy, bohemian-chic addition to your living space? A macrame hammock chair offers the perfect blend of comfort and style, transforming any room into a relaxing sanctuary. But the thought of creating one yourself might seem daunting, conjuring images of complex knots and endless hours of work. Forget those preconceptions! This tutorial will guide you through making your own stunning macrame hammock chair with surprising ease and speed. We'll utilize simple knots and readily available materials, making this project achievable even for beginners.
Forget those complicated, time-consuming macrame projects you’ve seen online. This isn't about intricate patterns; it's about crafting a beautiful and functional chair efficiently. We've streamlined the process to focus on the core techniques, ensuring you'll be swinging in your handcrafted relaxation haven in less time than you think. Ready to get started? Let's dive into the step-by-step instructions and begin creating your DIY macrame hammock chair.
Preparation and Safety Guidelines
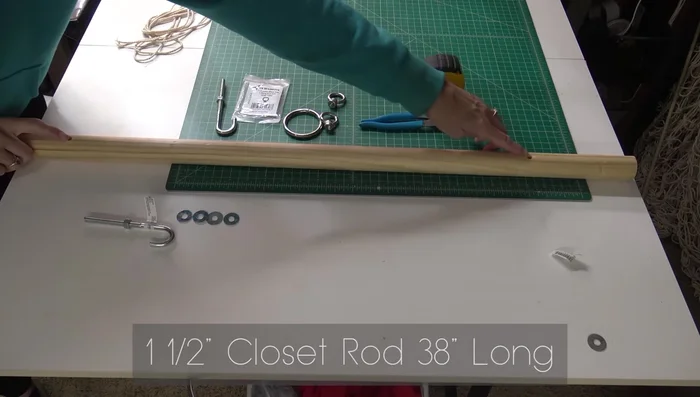
- Macrame cord (3mm recommended)
- Temporary dowel (48 inches)
- Cardboard strips (1 inch long)
- 2-inch rings (with good weight limit)
- J-hooks (5/16" diameter)
- Closet rod (38 inches)
- Lifting eyelets
- Washers
- Nuts
- Floral wire
- Scissors/Rotary cutter
- Quilting ruler
- Pliers
- Always use strong, high-quality cordage suitable for weight-bearing. Cheap or thin cord can break under pressure, causing injury.
- Ensure your chosen hanging point is sturdy and can support the combined weight of the hammock and the person using it. Check weight limits of hooks and beams.
- Inspect the finished hammock chair regularly for wear and tear. Replace any damaged cords immediately to prevent accidents.
Step-by-Step Instructions
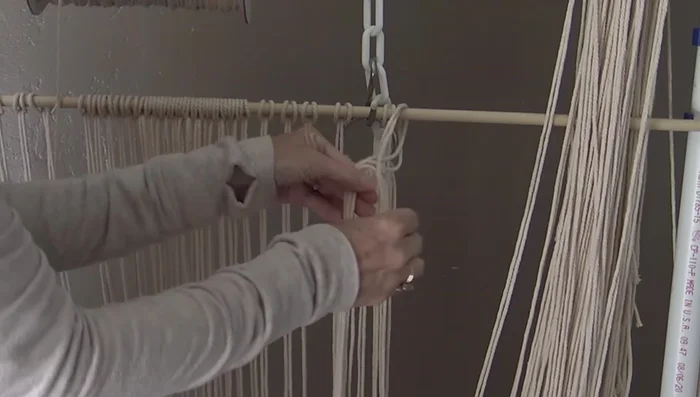
Prepare the Cords
- Attach cords to the temporary dowel, spacing them slightly over an inch apart.

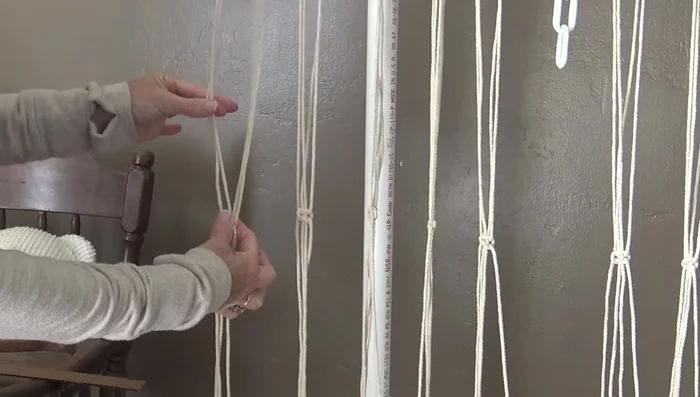
Prepare the Cords Create the Macrame Body
- Create the macrame portion by alternating square knots. The first row is approximately 24 inches down from the dowel.
- Use cardboard strips to maintain consistent 1-inch spacing between rows of square knots. Continue for approximately 39-40 inches.
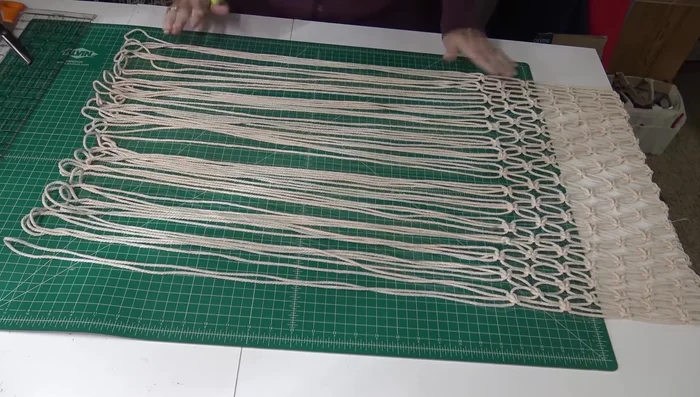
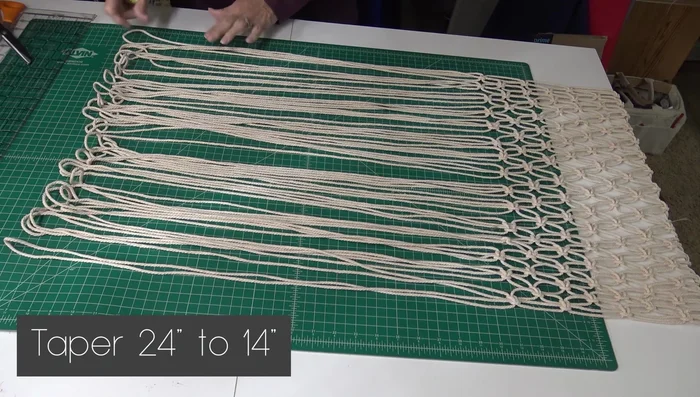
Create the Macrame Body Prepare for Chair Assembly
- Remove the temporary dowel.
- four cords at 14 inches and four at 24 inches (for the sides of the chair).
Prepare for Chair Assembly Attach to Rings
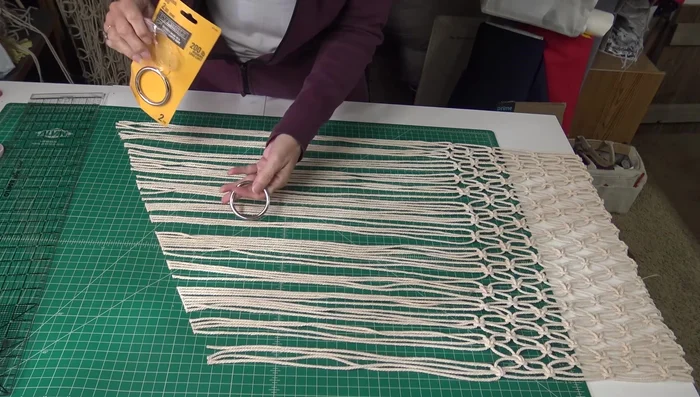
- Attach the cords to the 2-inch rings, using square knots to secure.
Attach to Rings Secure the Ring
- Create a noose using a 10-foot piece of cord and secure it to the ring, tucking in all the loose ends tightly.
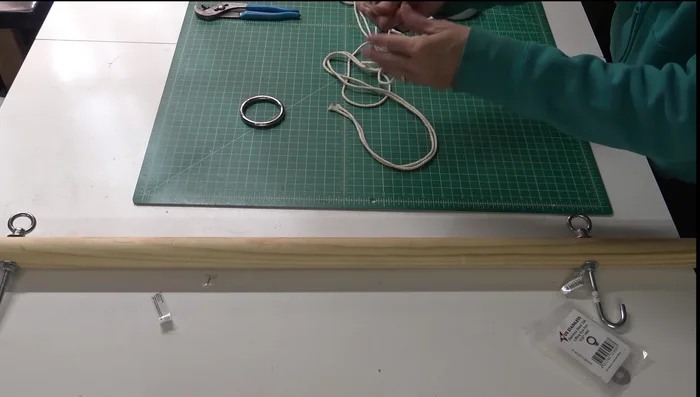
Secure the Ring Assemble the Hanging Mechanism
- Assemble the wooden rod with the J-hooks and eyelets.
- Create a hanging ring using 9-13 feet of cord and five square knots.
- Attach the hanging ring to the eyelets on the rod.
Assemble the Hanging Mechanism


Read more: Ultimate Guide to Harmonious Bedroom Furniture Arrangement
Tips
- Using a macrame stand and rolling off the cord makes cutting many lengths easier.
- Precise measurements aren't crucial for the macrame portion, but maintain consistency.
- The cardboard strips aid in creating consistent spacing and speed up the process.
- For the final assembly, semi-accurate measurements are sufficient.