Tired of that plain shower curtain gathering dust? Prepare to be amazed! This isn't your grandma's shower curtain; we're transforming a humble, discarded liner into a breathtaking piece of DIY marble wall art. With a few simple supplies and a little bit of creativity, you can effortlessly create a stunning, textured masterpiece that adds a touch of modern elegance to any room in your home. This upcycling project is surprisingly easy, budget-friendly, and a fantastic way to reduce waste while adding unique character to your living space.
Forget expensive marble tiles and complicated installation; this project puts the power (and the stunning results) directly into your hands. From a discarded shower curtain to a show-stopping wall feature, the transformation is incredible. Ready to see exactly how to achieve this striking look? Let’s dive into the step-by-step guide below!
Preparation and Safety Guidelines
- Shower curtain
- Tacky glue or Mod Podge
- Staple gun
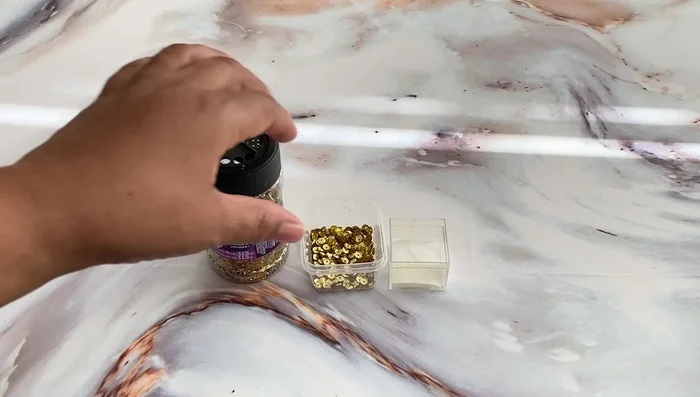
- Gold glitter
- Beading (optional)
- Sponge brush
- Canvas
- Iron (optional, steamer preferred)
- Always work in a well-ventilated area when using paint and sealant, as fumes can be harmful.
- Use caution when handling sharp objects like scissors or utility knives when cutting the shower curtain.
- Ensure the surface you're adhering the marble design to is clean and dry for optimal adhesion.
Step-by-Step Instructions
Prepare Shower Curtain
- Iron or steam to remove wrinkles.

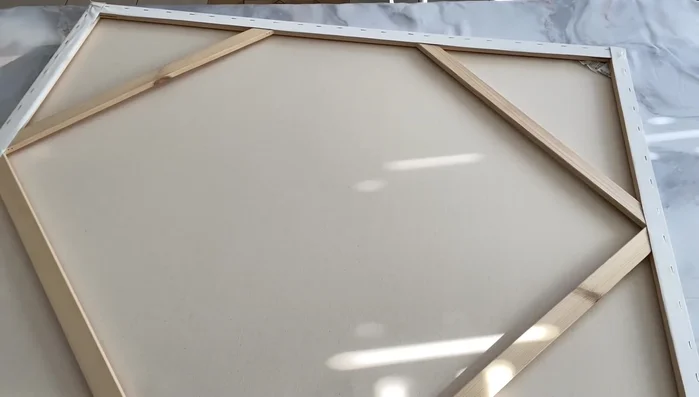
Prepare Shower Curtain Position and Secure Canvas
- Place the canvas face down on the ironed shower curtain, aligning the desired pattern.
- Staple one end of the shower curtain to the canvas to hold it in place.
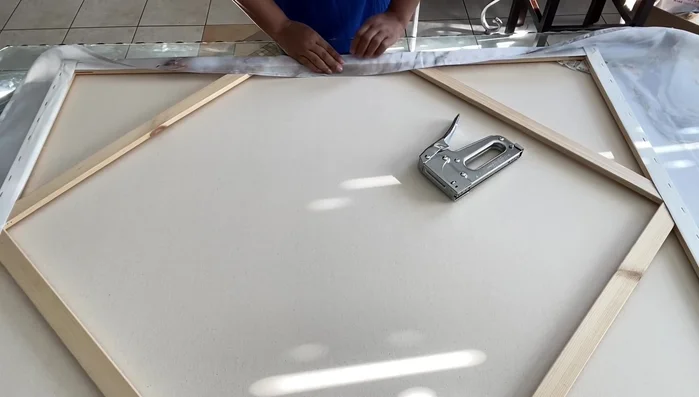
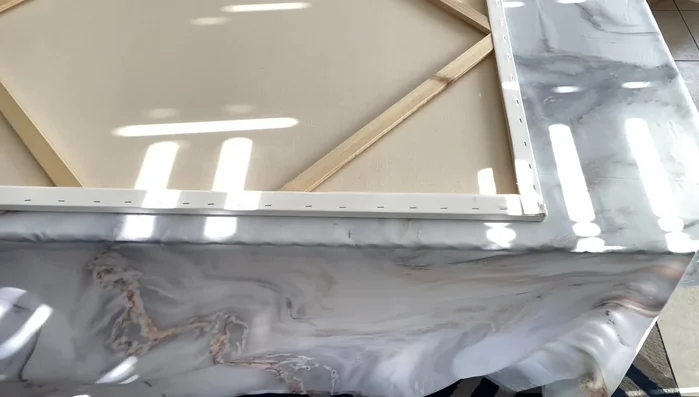
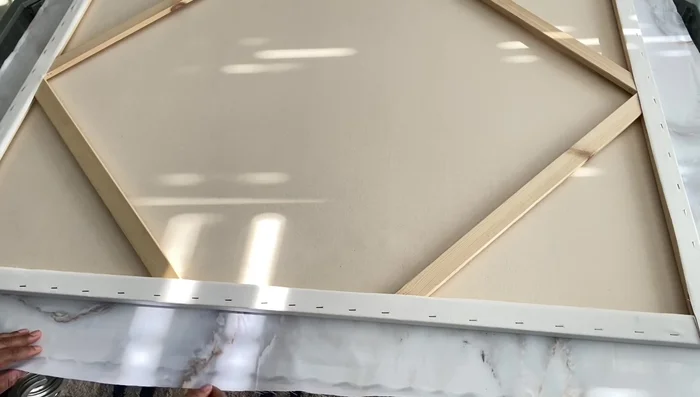
Position and Secure Canvas Cut and Staple Fabric
- Trim the excess shower curtain, leaving enough to wrap around and staple to the canvas.
- Fold the shower curtain edges neatly over the canvas edges and staple securely, ensuring a tight fit and no gaps.
Cut and Staple Fabric Finish Corners
- Fold corners neatly and staple like wrapping a gift.
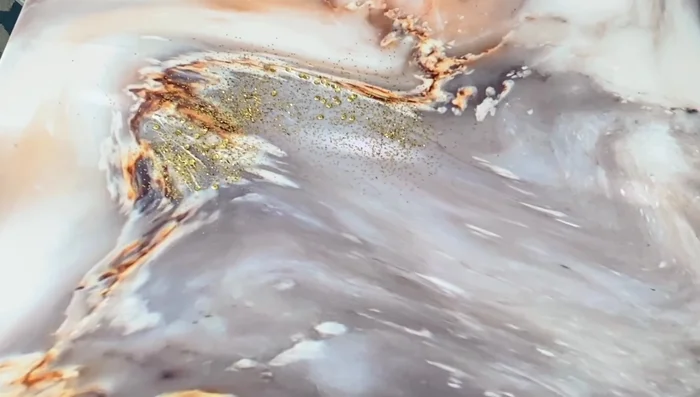
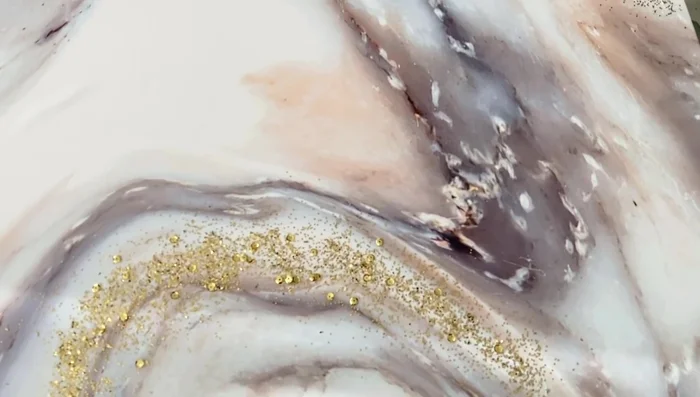
Add Glitter (Optional)
- Apply tacky glue or Mod Podge to desired areas and lightly sprinkle with glitter. Let it dry.
Add Glitter (Optional) Dry and Clean Up
- Allow the glitter to dry completely (about 24 hours).
- Gently tap off any loose glitter after drying.
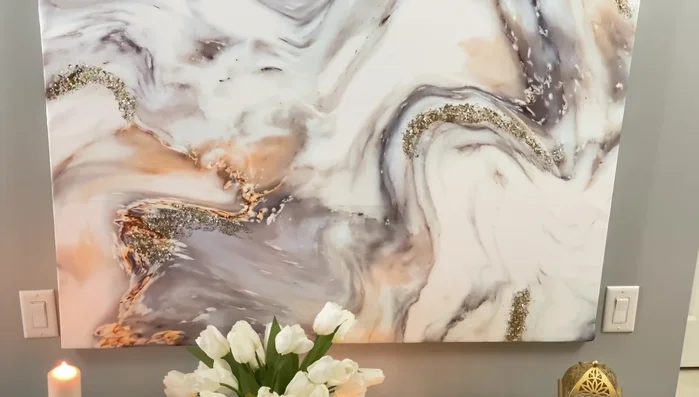
Dry and Clean Up Hang and Display
- Hang your finished wall art using command strips or other preferred hanging methods.
Hang and Display

Read more: DIY Mason Jar Soap Dispensers: A Step-by-Step Guide with Two Stunning Designs
Tips
- Use a steamer for best results in removing wrinkles from the shower curtain.
- Choose shower curtain patterns that will display well on the canvas. Select parts with interesting swirls or marble effects.
- Give yourself enough fabric when cutting to avoid tearing during stapling. Fold and staple to reinforce edges.
- Stretch the fabric while stapling to prevent gaps.
- Use Mod Podge as an alternative to tacky glue for the glitter.