In a world increasingly conscious of sustainability, the repurposing of materials is gaining significant traction. Upcycled metal furniture offers a compelling solution, breathing new life into discarded metal objects and transforming them into unique and stylish pieces for the home. From rusty industrial scraps to obsolete machinery, the potential for creative reuse is virtually limitless, resulting in furniture that boasts a distinct character and undeniable charm. This eco-friendly approach not only reduces waste and minimizes environmental impact but also allows for the creation of truly one-of-a-kind home décor.
The inherent durability and rugged beauty of metal lend themselves perfectly to upcycling, making it a rewarding and visually striking choice. This article will guide you through the process of transforming discarded metal into stunning pieces of furniture, step by step, empowering you to create your own masterpieces from reclaimed materials. Discover how simple techniques and a dash of creativity can turn discarded metal into breathtaking home decor.
Preparation and Safety Guidelines
- Angle grinder
- Reciprocating saw
- Screwdriver
- Pliers
- Wire brush (for angle grinder)
- Stripping disc (for cordless drill)
- Flap disc (for angle grinder)
- Drill
- Pop Riveter
- Pressure washer
- Rust-Oleum rusty metal primer
- Spray paint
- Plywood
- Dowel
- Clear acrylic sealer
- Plastic (from spray paint can)
- Hot glue gun
- Construction adhesive or silicone caulk
- Quarter inch rope
- Metal brackets
- Orbital sander
- 150 grit sandpaper
- Acetone
- Magnetic driver system
- Always wear appropriate safety gear, including gloves, eye protection, and a dust mask, when handling and working with upcycled metal. Sharp edges and potential inhalation of metal dust pose significant risks.
- Ensure proper ventilation when working with paints, primers, or other finishes to avoid inhaling harmful fumes. Work in a well-ventilated area or use respirators as needed.
- Be cautious of potential sharp edges and rusty surfaces. Use appropriate tools and techniques to safely handle and remove sharp pieces and rust before starting the upcycling process. Dispose of hazardous waste properly.
Step-by-Step Instructions
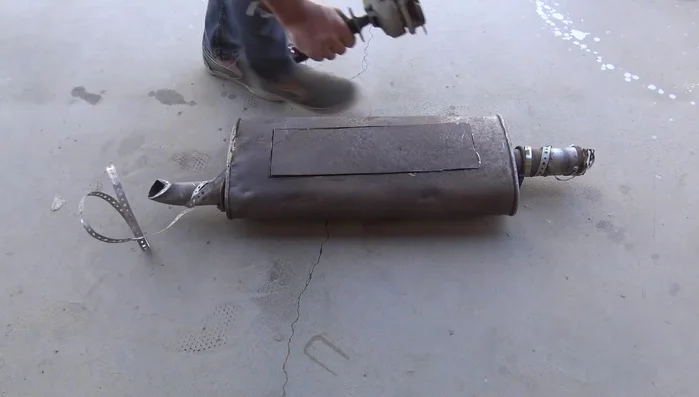
Source Material Acquisition
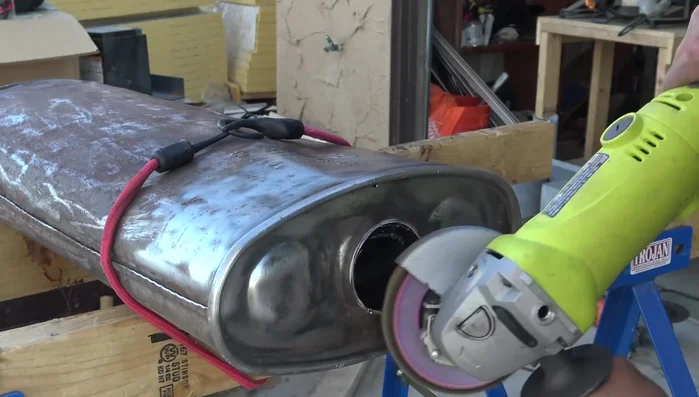
- Locate and retrieve discarded metal objects (e.g., a rusted muffler).

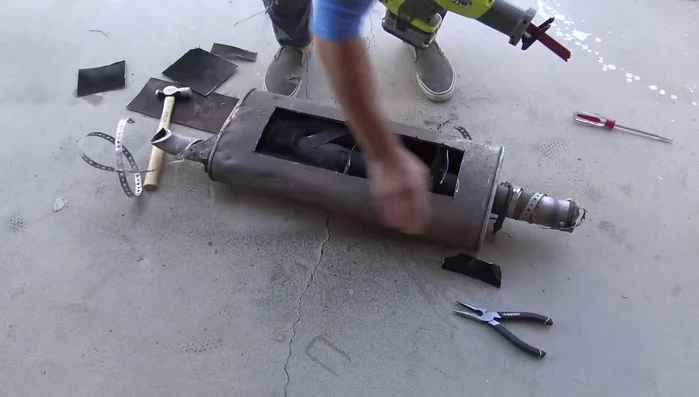
Source Material Acquisition Initial Metal Preparation
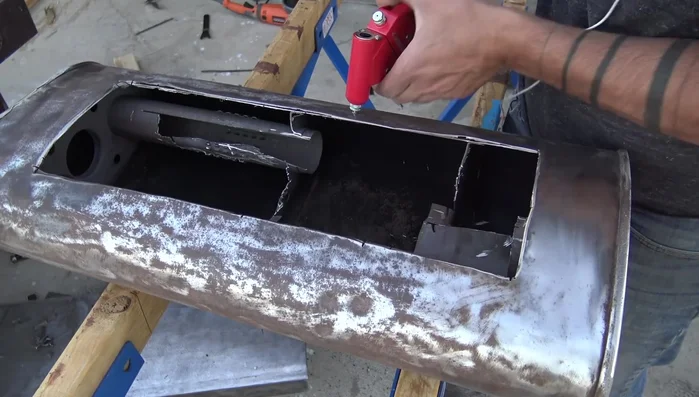
- Cut open the metal object using an angle grinder to reveal its interior.
- Remove unwanted inner components (pipes, steel wool, etc.) using an angle grinder or reciprocating saw.
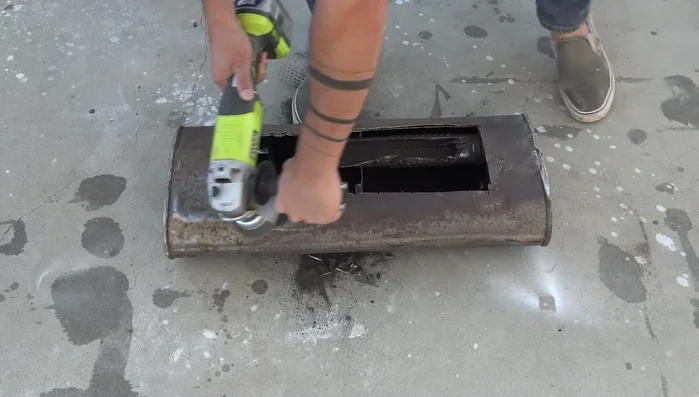
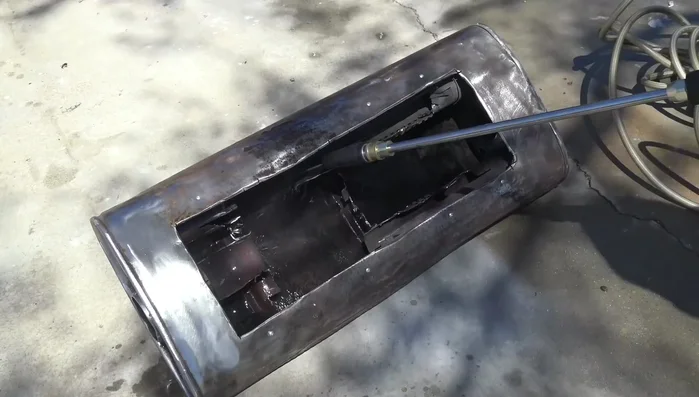
Initial Metal Preparation Surface Cleaning and Smoothing
- Remove rust using a wire brush on an angle grinder or a stripping disc on a cordless drill.
- Smooth rough cut edges with a flap disc on an angle grinder.
- Drill holes and use a pop riveter to secure loose layers of metal.
- Clean the metal thoroughly using a pressure washer.
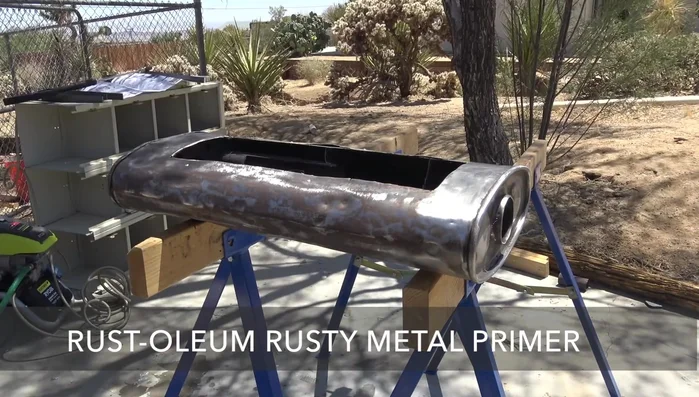
Surface Cleaning and Smoothing Priming and Painting
- Apply rust-oleum rusty metal primer.
- Apply finish paint.
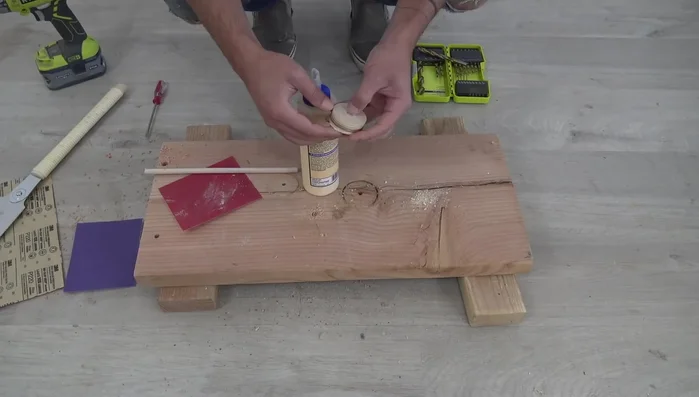
Priming and Painting Hole Repair and Sealing
- Create and install plugs to seal holes (using plywood, dowel, and acrylic sealer for larger holes, and plastic and hot glue for smaller, less visible holes).
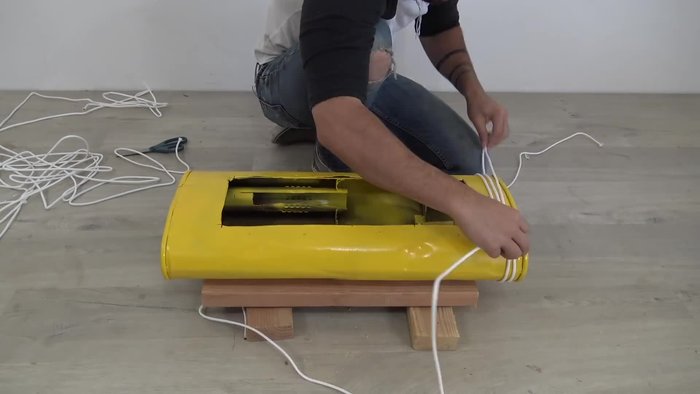
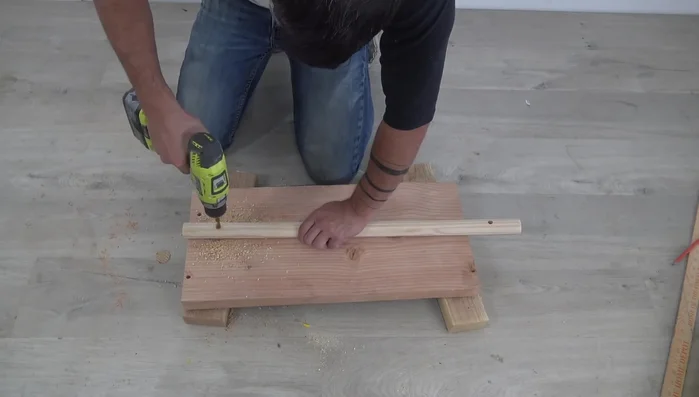
Hole Repair and Sealing Mounting and Hanging
- Prepare and attach hanging hardware (e.g., dowel, rope, and wall brackets).
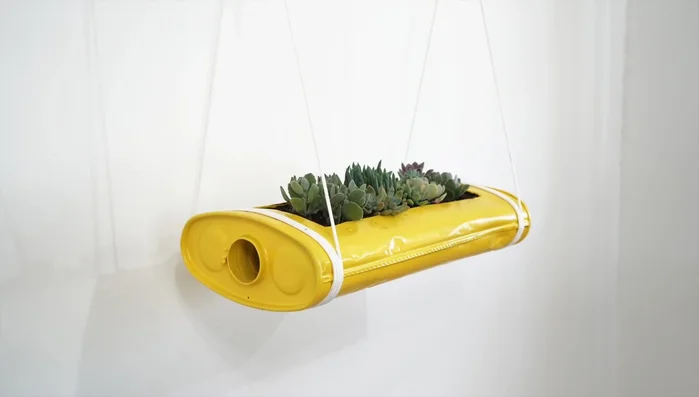
Mounting and Hanging Optional: Planting
- Add a layer of gravel for drainage before planting (if applicable).
- Plant succulents (or other suitable plants).
Optional: Planting
Read more: Miniature Spider Welding Tutorial: Crafting a Tiny Metal Arachnid
Tips
- For cutting steel, both an angle grinder and a reciprocating saw work well. The reciprocating saw is better for tight spaces, while the angle grinder is better for straight cuts.
- Use either a wire brush on an angle grinder or a stripping disc on a cordless drill to remove rust; choose whichever you're most comfortable with.
- A pop riveter is an easy and inexpensive way to connect metal pieces.
- Use a magnetic driver system to conveniently drive screws, especially when working with one hand.