A clogged bathroom drain can quickly transform a relaxing sanctuary into a frustrating inconvenience. Standing water, unpleasant odors, and the potential for bigger plumbing problems are all too common consequences of a malfunctioning drain assembly. Fortunately, replacing a bathroom drain isn't as daunting a task as it might seem. With the right tools and a little patience, even a novice DIY enthusiast can tackle this common plumbing issue and restore their bathroom to its former glory. A significant amount of time and money can be saved by performing this simple repair yourself.
This guide offers a comprehensive, step-by-step approach to replacing your bathroom drain assembly, covering everything from gathering necessary tools and materials to properly sealing the new unit. We'll walk you through each stage, providing clear instructions and helpful tips to ensure a successful and leak-free installation. Let's get started with the detailed step-by-step process outlined below.
Preparation and Safety Guidelines
- Plumber's putty
- Large channel lock wrench
- Bucket
- Turn off the water supply to the sink or tub BEFORE starting any work. Failure to do so can lead to flooding.
- Wear safety glasses to protect your eyes from splashing water or debris.
- Use plumber's putty or silicone sealant to ensure a watertight seal around the new drain assembly. Improper sealing can cause leaks.
Step-by-Step Instructions
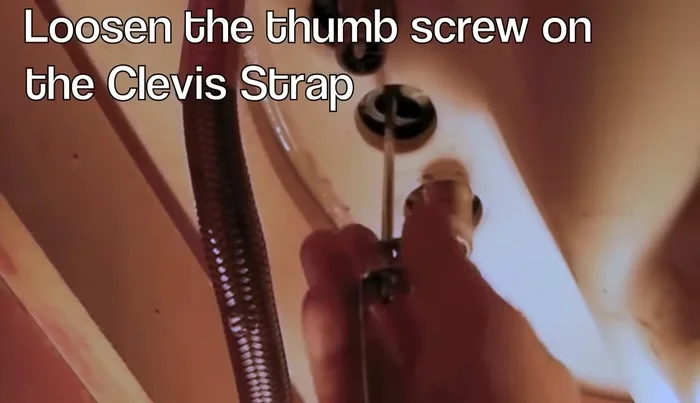
Disconnect the Drain
- Disconnect the drain handle from the faucet.
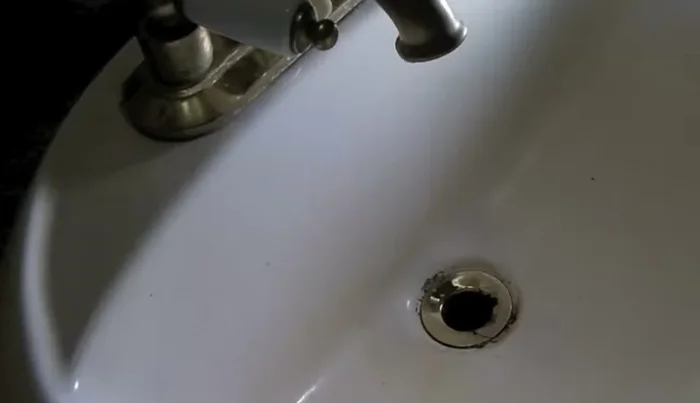
- Remove the large nut on the bottom of the drain using a channel lock wrench.
- Remove the drain assembly from the sink.

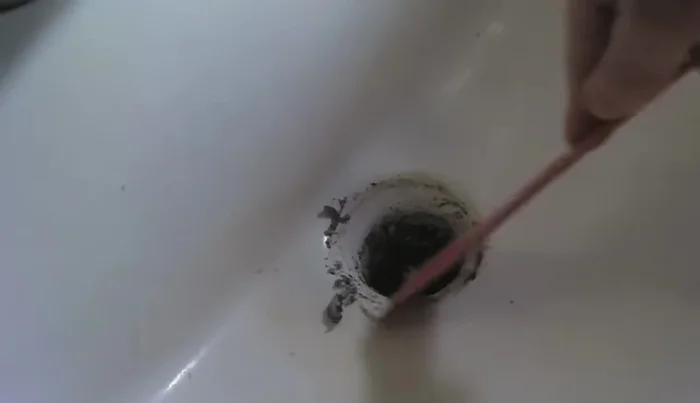
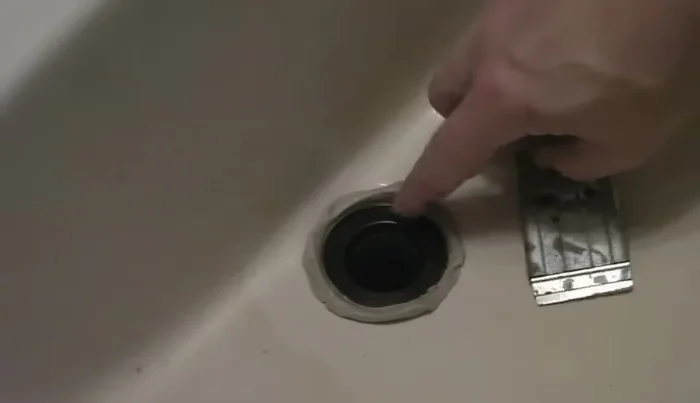
Disconnect the Drain Clean and Prepare the Sink
- Clean the old plumber's putty from the sink.
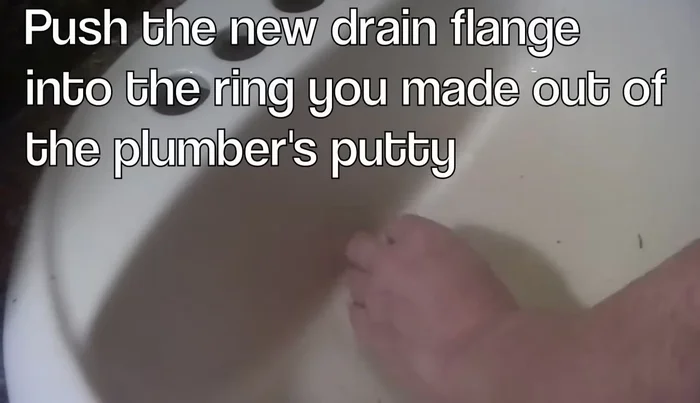
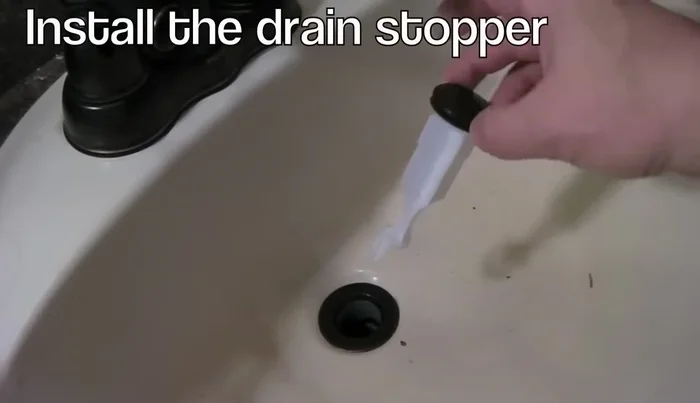
Clean and Prepare the Sink Apply Plumber's Putty and Install New Drain Assembly
- Apply new plumber's putty around the drain opening.
- Insert the new drain assembly into the sink and tighten.
Apply Plumber's Putty and Install New Drain Assembly Remove Excess Putty
- Remove excess plumber's putty.
Remove Excess Putty Install Drain Plug and Lever
- Install the drain plug and lever.
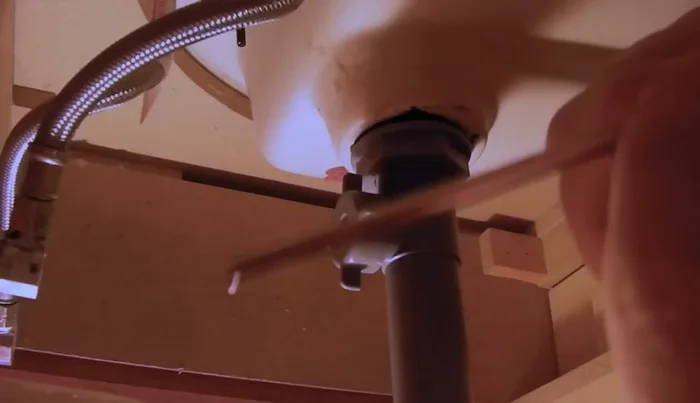
Install Drain Plug and Lever Reconnect Under-Sink Components
- Reconnect the drain assembly under the sink, tightening all connections.
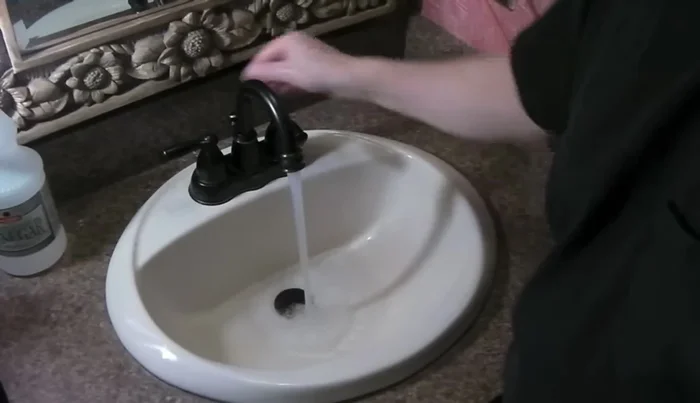
Reconnect Under-Sink Components Test for Leaks
- Test the drain to ensure no leaks.
Test for Leaks


Read more: Fixing a Leaky Toilet Tank: A Step-by-Step Guide
Tips
- Place a bucket under the drain to catch any water.
- Be careful not to scratch your sink when removing old putty.
- The plumber's putty doesn't need to be perfectly shaped; just create a seal.