A leaky dishwasher can be a major annoyance, leading to wasted water, potential water damage to your kitchen, and a hefty repair bill if left unaddressed. The constant dripping, the puddle under the appliance, the rising water bill – these are all telltale signs of a problem that needs fixing. Ignoring a leak only allows the damage to worsen, potentially affecting your floor, cabinets, and even causing mold growth. Fortunately, many dishwasher leaks are fixable with some basic tools and a bit of know-how. It's often a simpler problem than you might imagine.
This guide provides a clear, step-by-step process for identifying and repairing common dishwasher leaks. From checking the door seal to examining the water supply lines and drain hose, we'll walk you through the troubleshooting process, empowering you to tackle this frustrating issue and get your dishwasher back to working order. Let's dive into the steps needed to banish that persistent leak for good.
Preparation and Safety Guidelines
- flashlight
- screwdrivers
- towels
- wet/dry shop vac or container
- replacement seals/components
- Always disconnect the dishwasher from the power supply before attempting any repairs. Electricity and water are a dangerous combination.
- Turn off the water supply to the dishwasher using the shut-off valves under the sink. This prevents further water damage during repairs.
- If you are unsure about any step of the repair process, consult a qualified appliance repair technician. Improper repairs can worsen the problem or cause damage.
Step-by-Step Instructions
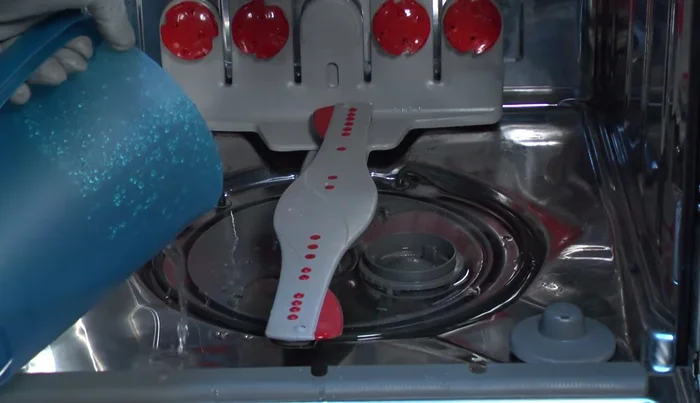
Check Door Seal
- Check the door gasket/seal for tears or missing pieces. Replace if necessary.

Check Door Seal Inspect Spray Arm and Tubes
- Inspect the spray arm for cracks or blockages. Ensure it rotates freely. Check tube connections for looseness.
Check Front Connections
- Examine the water supply line connection at the front of the dishwasher. Tighten or replace the seal if leaking.
- Check the drain hose connection to the drain pump for leaks. Tighten or replace if necessary.
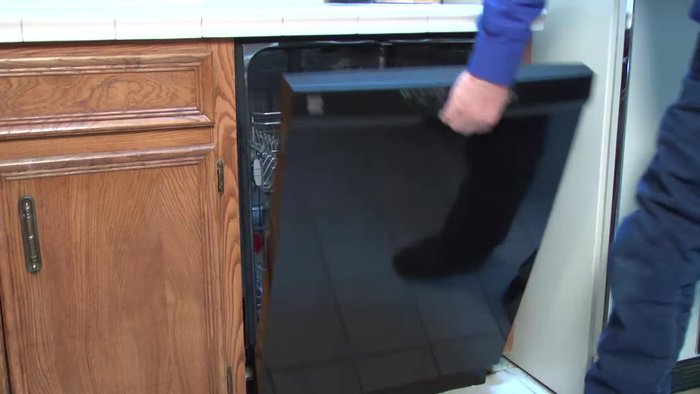
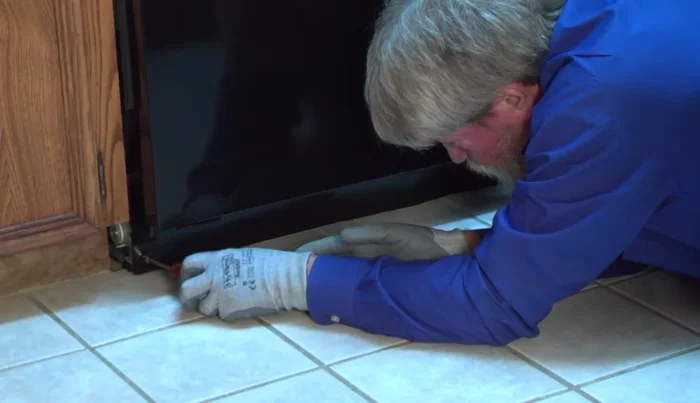
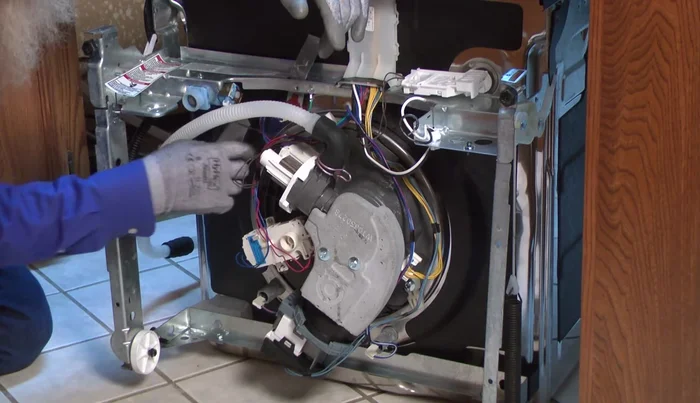
Check Front Connections Investigate Leaks Underneath
- If leaks persist under the dishwasher, remove the bottom panels to access bottom components.
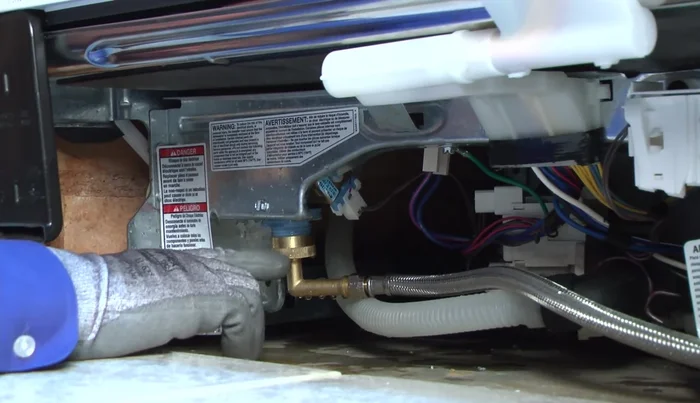
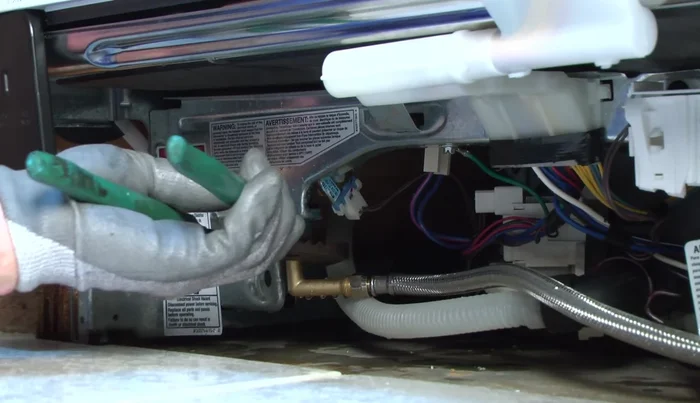
Investigate Leaks Underneath Inspect Bottom Components
- Inspect the bottom components (heating element, sump, diverter motor) for water trails or leaks. Replace any leaking components or seals.
Inspect Bottom Components Water Test for Hidden Leaks
- If the leak is not immediately visible, fill the dishwasher tub with water to pinpoint the source.
Water Test for Hidden Leaks Professional Help
- If you cannot find the leak, contact a Sears service technician to diagnose and repair the issue.
Professional Help
Read more: Fix Washing Machine Won't Spin: Quick & Easy Motor Coupler Replacement
Tips
- Always disconnect the electrical power before working on your dishwasher.
- Refer to your owner's manual for specific instructions on removing parts.
- Use a flashlight to better illuminate hard-to-see areas.
- Keep a wet/dry shop vac or container handy to remove water from the dishwasher.