A new door that doesn't quite fit can be a frustrating experience, leaving you with unsightly gaps and compromised security. Thankfully, you don't need to call in a professional and incur hefty costs to achieve a perfect fit. With a little patience and the right tools, you can master the art of DIY door trimming, transforming a poorly fitting door into a beautifully integrated part of your home. This satisfying project is more achievable than you think, even for complete beginners. Trimming a door to size is a valuable skill that saves money and provides a significant sense of accomplishment.
This beginner-friendly guide will walk you through each step of the process, providing clear instructions and helpful tips to ensure a successful outcome. From assessing the necessary adjustments to the final finishing touches, we'll cover everything you need to know to achieve a professionally-fitted door that enhances both the aesthetics and functionality of your home. Let's get started with our step-by-step guide to achieving a perfect fit!
Preparation and Safety Guidelines
- Circular saw (or hand saw with fine teeth)
- Tape measure
- Pencil
- Speed clamps
- Inflatable lifting bag
- Always disconnect power to any electrical wiring before working near it. Accidental shock can be serious or fatal.
- Wear safety glasses to protect your eyes from flying debris. Use a dust mask if you're working with materials that produce fine dust.
- Use caution when operating power tools. Ensure you understand how to use them safely and follow the manufacturer's instructions.
Step-by-Step Instructions
Identify Problem Areas
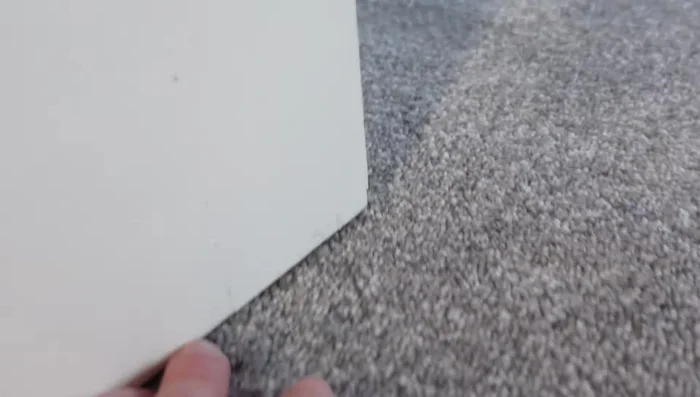
- Identify and mark the tight points on the door where it rubs against the floor.

Identify Problem Areas Prepare the Door
- Remove the door from its hinges.
Mark and Prepare for Cutting
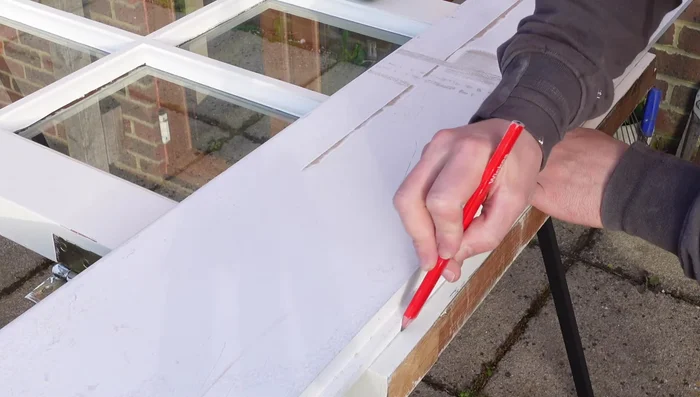
- Measure and mark the cutting line on the door, accounting for a 10-12 mm gap for clearance (12mm recommended for carpet).
- Secure a straight edge along the cutting line using clamps.
Mark and Prepare for Cutting Cut the Door
- the first cut goes halfway through the door's thickness to prevent splintering; the second cut completes the cut.
Cut the Door Finish the Cut
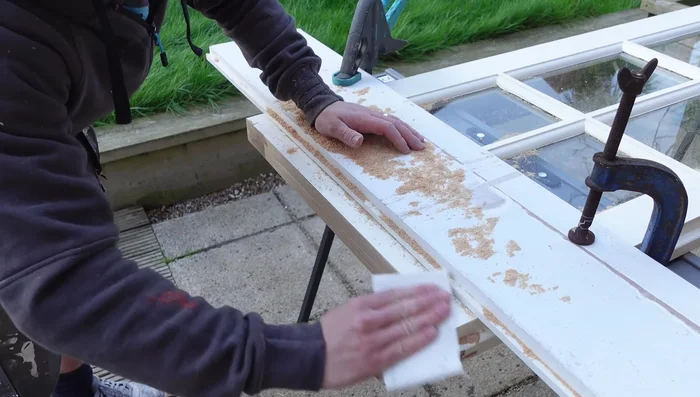
- Sand the cut edges for a smoother finish.
Finish the Cut Reinstall the Door
- Reinstall the door using an inflatable lifting bag to help align the hinges and provide support.

Read more: 3M Thinsulate Window Film Installation: A Step-by-Step Guide
Tips
- Don't cut the door down to the first mark you see; find the highest point of contact to ensure a consistent gap.
- Use a sharp, fine-toothed saw blade to minimize chipping.
- A 10-12 mm gap is ideal for most situations; adjust as needed depending on the flooring type.
- Use an inflatable lifting bag to easily align the hinges and support the door during reinstallation.
- Don't overtighten the screws when reattaching the hinges; this can cause them to snap.