Are you looking for a fun and rewarding DIY project that's perfect for teens and young adults? Learning to sew doesn't have to be intimidating, and creating your own fabric baskets is a fantastic way to develop valuable skills while expressing your personal style. These adorable and practical storage solutions are ideal for bedrooms, playrooms, or even dorm rooms, offering a stylish alternative to mass-produced containers. Plus, choosing your own fabrics allows for complete customization – think vibrant colours, playful patterns, or even repurposed materials! They’re surprisingly easy to make, even for beginners.
Forget expensive store-bought baskets; this easy sewing tutorial will guide you through the process of making your very own unique fabric baskets, step-by-step. From selecting your materials to the final stitching, we'll cover everything you need to know to create beautiful and functional storage that you can truly be proud of. Let's get started!
Preparation and Safety Guidelines
- Korean map (for pattern cutting)
- Quilted fabric
- Cotton fabric
- Universal ruler
- Rotary cutter
- Scissors
- Safety pins
- Sewing machine
- Quilting needle
- Universal needle
- Thread
- Dressmaker pins
- Standard foot
- Adult supervision is required, especially for younger children using scissors, needles, or the sewing machine.
- Always use sharp scissors to prevent fabric from fraying and to ensure clean cuts. Avoid using dull scissors which could lead to accidents.
- Be mindful of the type of fabric used. Some fabrics may be more difficult to work with than others, and some may fray easily. Choose a beginner-friendly fabric like cotton or canvas.
Step-by-Step Instructions
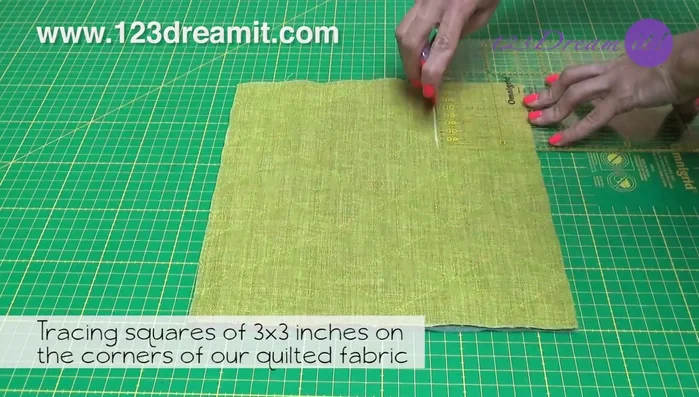
Prepare Fabric
- Trace 3x3 inch squares on the corners of the quilted fabric and cut them out.

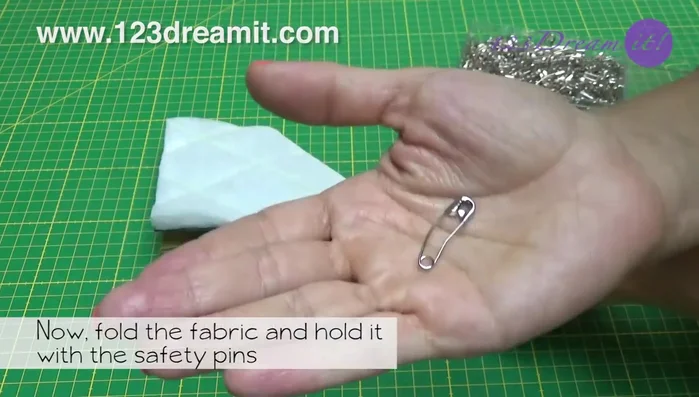
Prepare Fabric Create Quilted Base
- Fold the quilted fabric as shown, securing with safety pins. Sew the edges with a straight stitch using a quilting needle.
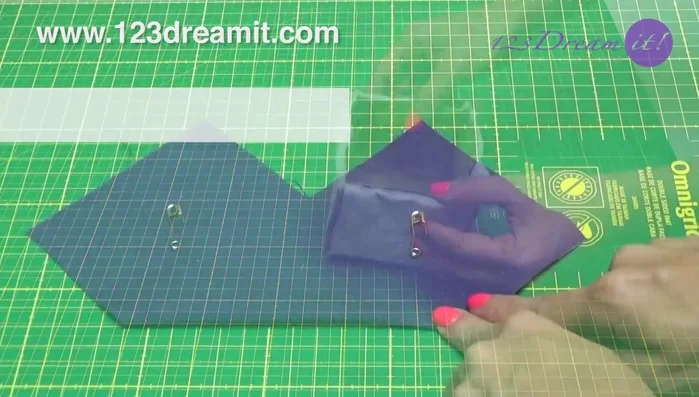
- Remove safety pins, open the fabric, and sew the edges to create the basket shape. Secure with safety pins and sew again to form the base.
Create Quilted Base Create Cotton Lining
- Repeat steps 1-3 with the cotton fabric, leaving a stitch slit on the right side. Use a universal needle.
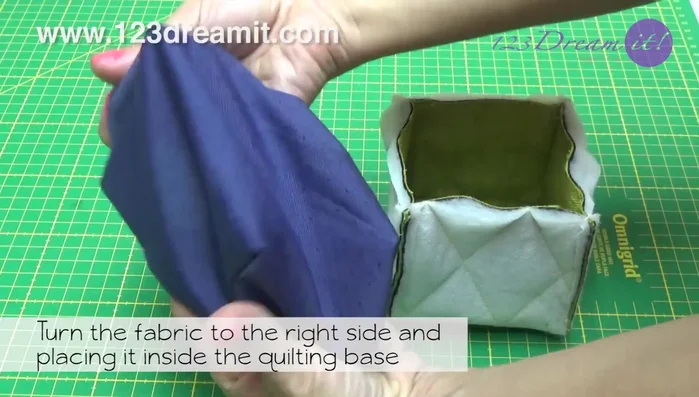
Create Cotton Lining Insert Lining and Secure
- Turn the cotton fabric right side out and place it inside the quilted base. Secure with safety pins and sew, leaving a stitch slit.
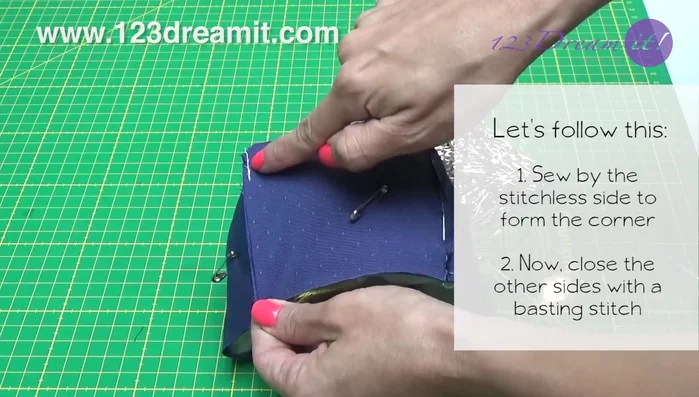
Insert Lining and Secure Sew and Secure Corners
- Sew the corners using a basting stitch (removable stitch).
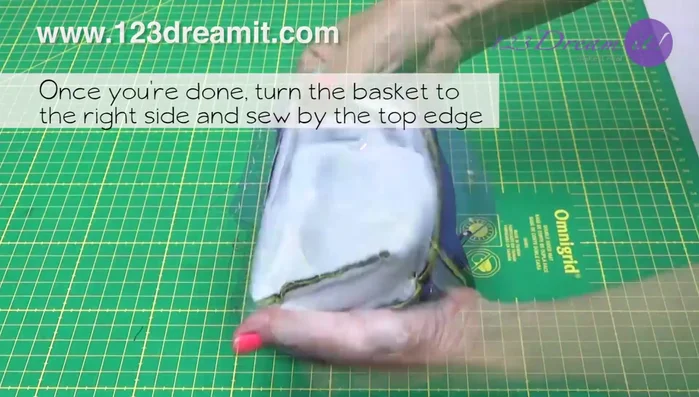
Sew and Secure Corners Finish Top Edge
- Turn the basket right side out, and sew the top edge. Use the quilting needle to sew close to the edge.
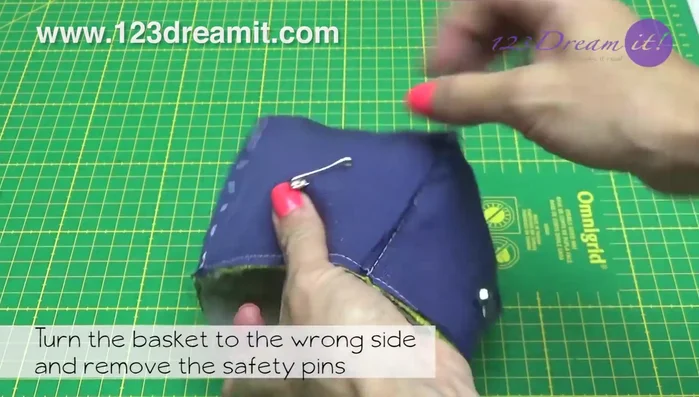
Finish Top Edge Remove Basting and Pins
- Turn the basket wrong side out, remove safety pins, and remove the basting stitches. Turn everything inside out.
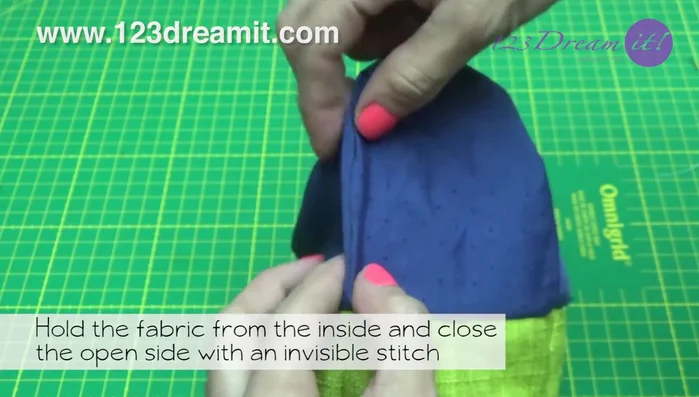
Remove Basting and Pins Close Opening
- Close the open side with an invisible stitch, working from the inside.
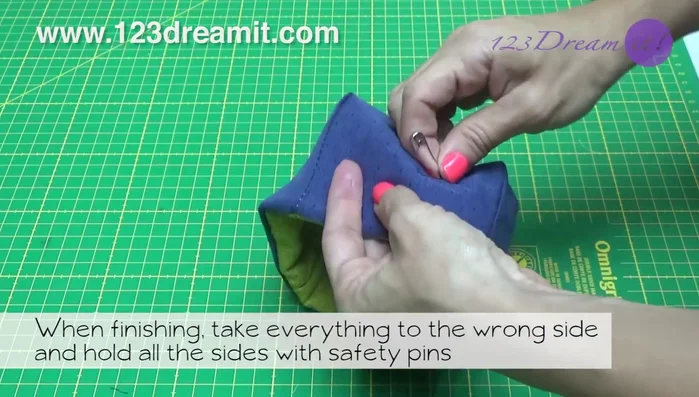
Close Opening Decorative Stitch and Finishing
- Turn the basket wrong side out, secure all sides with safety pins, and backstitch a half-inch from the edge for decoration (using quilting needle).
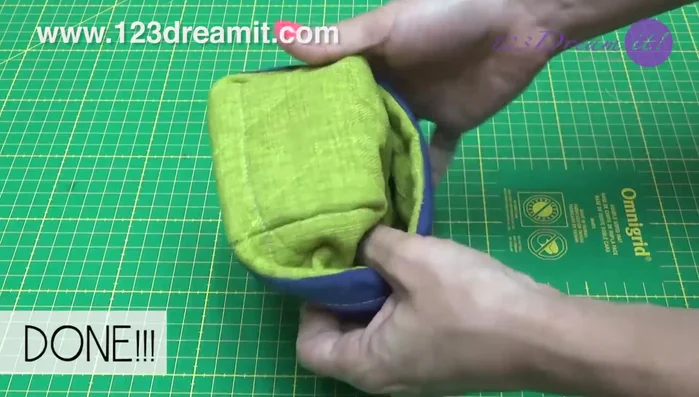
- Turn the basket right side out. Basket is complete.
Decorative Stitch and Finishing

Read more: DIY Vibrant Car Organizer: A Step-by-Step Quilting Tutorial
Tips
- Use a quilting needle for sewing multiple layers of fabric.
- A basting stitch is sufficient for temporary holding; it doesn't need to be perfect.