In today's world, conscious consumption is more important than ever. We're constantly bombarded with advertisements encouraging us to buy the latest and greatest, often overlooking the treasure trove of reusable materials right in our homes. This often leads to unnecessary waste and expense. But what if you could create something beautiful and functional without spending a single penny? This guide will show you how to transform everyday discarded items into charming, unique candle holders, adding a touch of rustic elegance to your home decor while minimizing your environmental impact. Forget expensive store-bought decorations!
This DIY project is incredibly easy and requires no special skills or tools, making it perfect for beginners and experienced crafters alike. We'll guide you through a simple, step-by-step process using readily available recycled materials, proving that creativity and sustainability can go hand-in-hand. Ready to upcycle and illuminate your space? Let's begin!
Preparation and Safety Guidelines
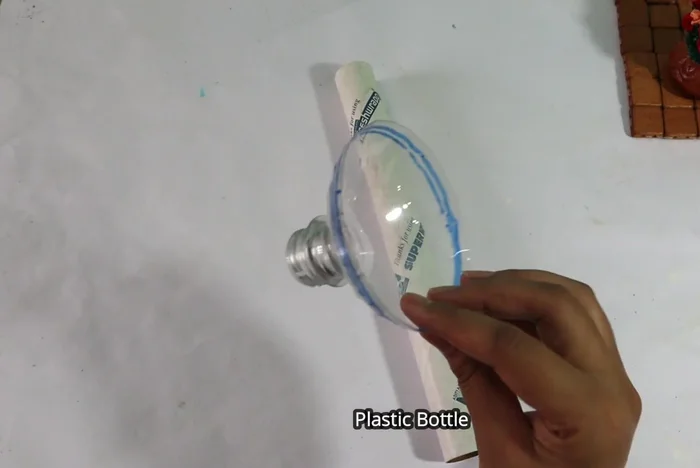
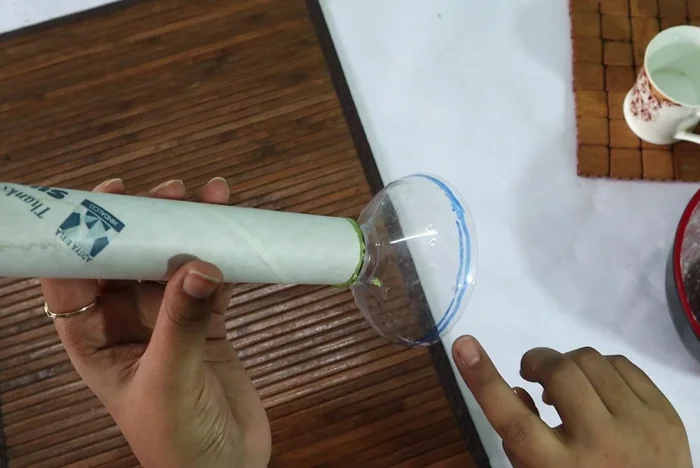
- Cardboard tube
- Plastic bottle pieces
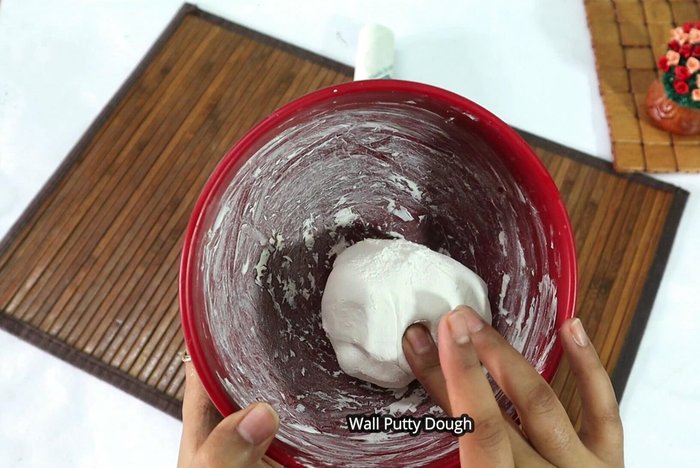
- Wall putty
- Water
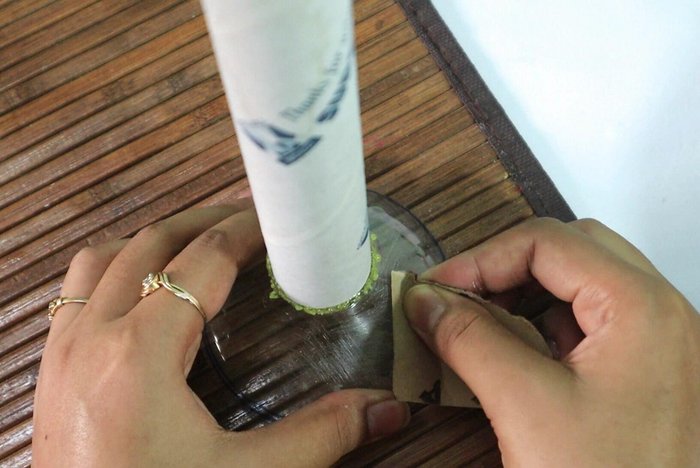
- Sandpaper
- Paint (optional)
- Cloth/rag
- Always supervise burning candles closely and never leave a burning candle unattended. Place candles on a stable, heat-resistant surface away from flammable materials.
- Use only candles appropriate for the size and material of your recycled candle holder. Avoid using candles that are too tall or wide, which could cause a fire hazard.
- Ensure adequate ventilation in the room where you're burning candles. Poor ventilation can lead to smoke buildup and health issues.
Step-by-Step Instructions
Gather and Prepare Materials
- Cut a cardboard tube and plastic bottle pieces to desired shapes and sizes.
- Sand the surface of the plastic bottle piece to ensure better adhesion of the wall putty.

Gather and Prepare Materials Mix and Prepare Wall Putty
- Mix one cup of wall putty with half a cup (or less) of water to create a smooth paste.
Mix and Prepare Wall Putty Apply and Shape the Putty Base
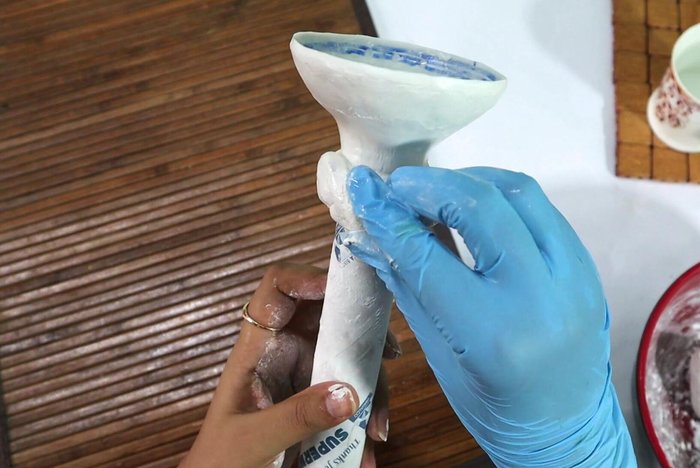
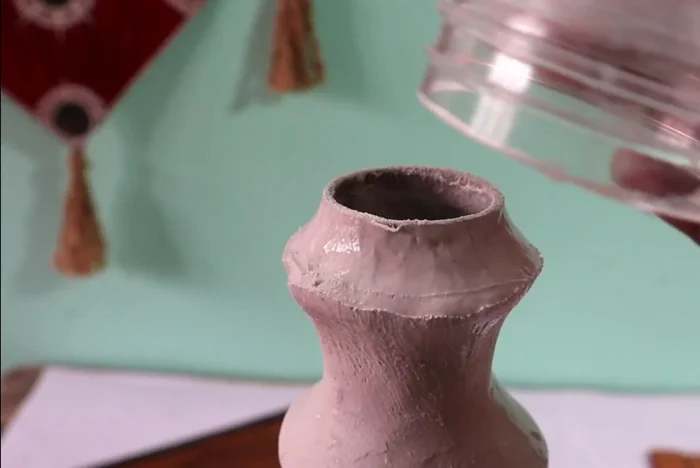
- Apply the putty to the bottle piece, pressing and smoothing it well. Work in small sections, allowing each to dry slightly before adding more. Use a card or similar tool to help shape the putty.
- Gradually build up the design, shaping the putty as you go. Allow ample drying time between layers. (This process may take 1-2 days).
Apply and Shape the Putty Base Attach the Top Piece
- Attach the top plastic bottle piece using wall putty and a cloth to ensure a secure bond.
Attach the Top Piece Finishing Touches
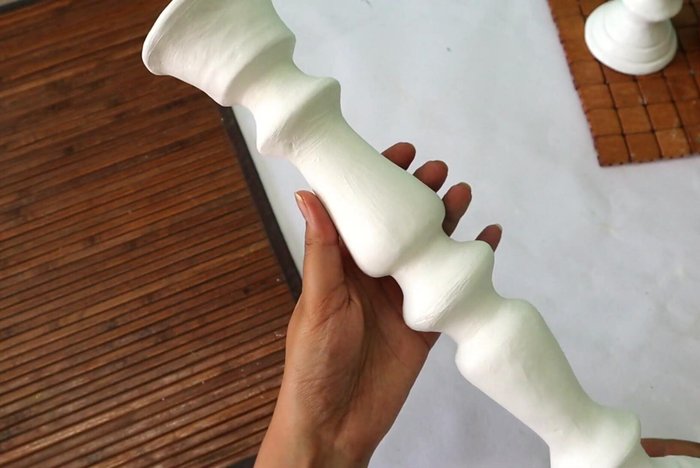
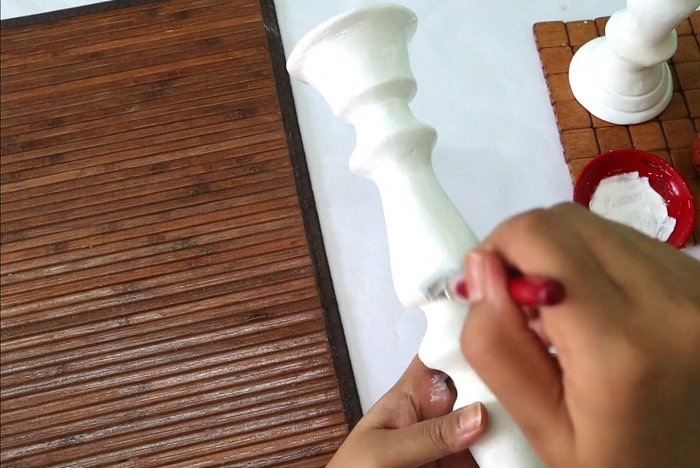
- Once completely dry, sand the entire candle holder to create a smooth surface.
- Paint the candle holder with your desired color (2-3 coats).
Finishing Touches
Read more: DIY King-Size Tufted Headboard: Budget-Friendly Guide
Tips
- Work in small sections and allow each layer of putty to dry slightly before continuing to avoid cracking.
- Take your time shaping the putty. The entire process may take 1-2 days.
- Use a cloth or rag to help apply the putty and ensure a smooth finish.
- Sanding after painting will help create an even smoother finish.