Nine people sharing one bathroom? Let's just say towel storage is a constant battle in our household. Every morning and evening it's a chaotic scramble for a clean, dry towel, often leading to damp piles on the floor and a general sense of bathroom pandemonium. We've tried everything – over-the-door organizers, floating shelves, even those space-saving towel racks that promised miracles (they didn't). The solution, it turned out, wasn't store-bought, but DIY! This project completely transformed our bathroom, turning a storage nightmare into a stylish and functional space.
The key? A custom-built towel rack, designed specifically for our needs and built with readily available materials. This wasn't some complex woodworking project requiring years of experience; in fact, it was surprisingly simple. Forget expensive, pre-fabricated solutions; we're sharing our step-by-step guide to creating your own space-saving towel rack, solving even the most chaotic bathroom storage crisis. Ready to transform your bathroom and reclaim your morning routine? Let's dive into the process!
Preparation and Safety Guidelines
- Wood board
- Hooks
- Drill
- Drill bits
- Measuring tape
- Level
- Pencil
- Screws
- Always use appropriate safety glasses and gloves when working with tools and materials. Wood can splinter, and some finishes may be irritating.
- Ensure all screws and wall anchors are securely fastened to the wall studs to support the weight of wet towels. Improper installation can lead to the rack collapsing.
- Before drilling into walls, check for any hidden electrical wiring or plumbing to prevent damage or injury.
Step-by-Step Instructions
Planning and Measurement
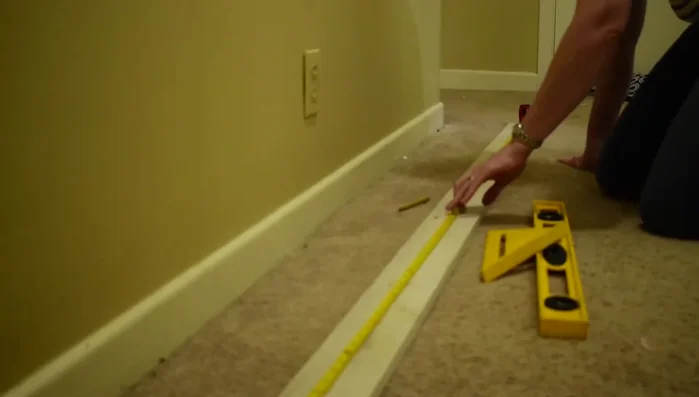
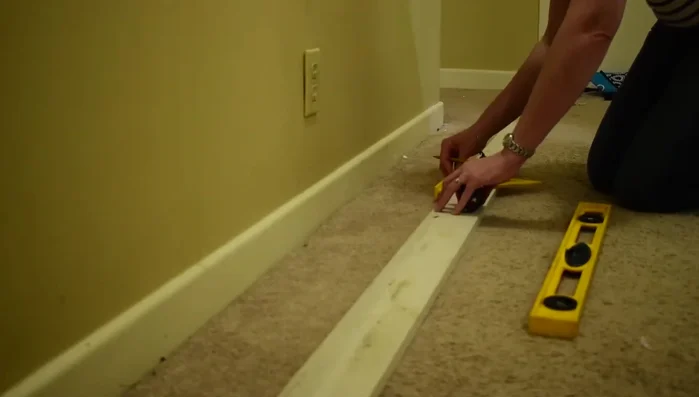
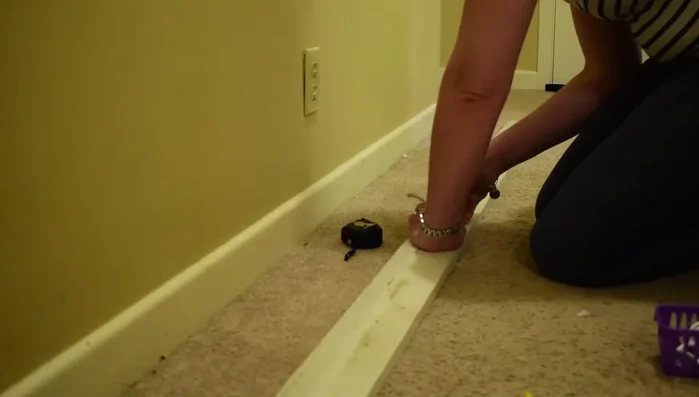
- Measure and mark the board:
- Measure the center lengthwise and by height. Mark every eight inches on center for hook placement.
- Locate wall studs in the bathroom.
- Mark stud locations on the board.

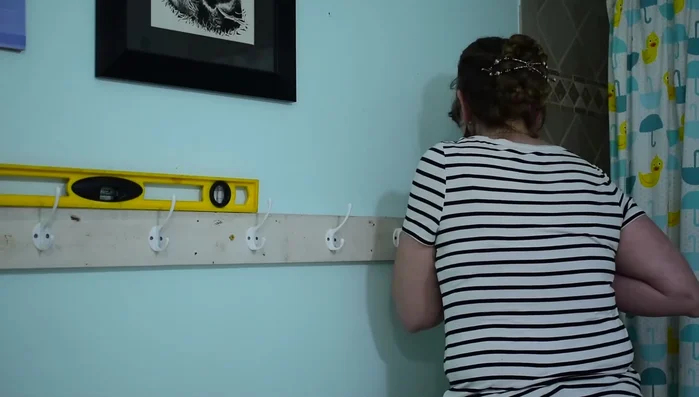
Planning and Measurement Hook Installation
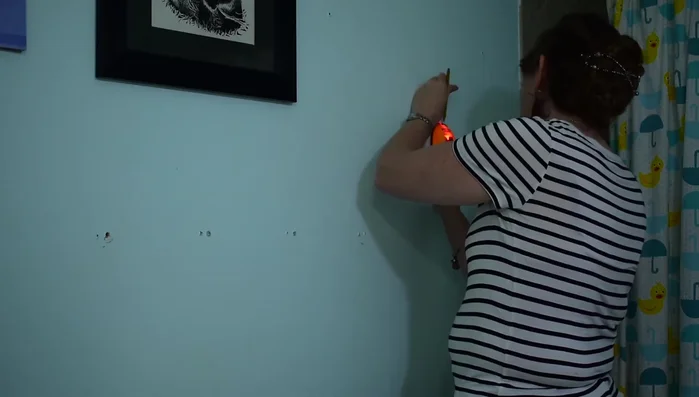
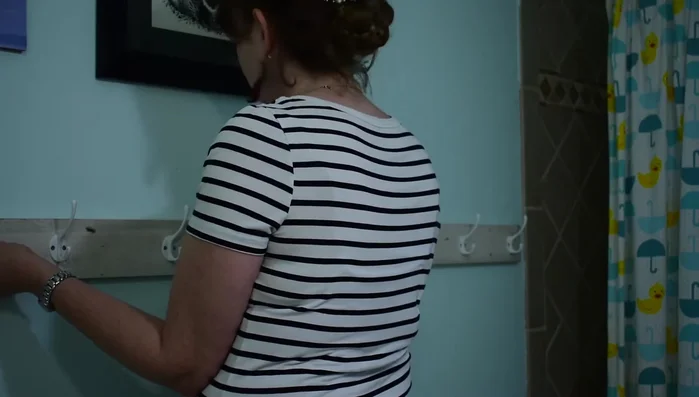
- Install the center hook first. Use a drill to create pilot holes.
- Install remaining hooks at 8-inch intervals.
Hook Installation Mounting the Board
- Pre-drill pilot holes for screws before attaching the board to the wall studs.
- Attach the board securely to the studs, ensuring it's level.
Mounting the Board

Read more: DIY Mason Jar Soap Dispensers: A Step-by-Step Guide with Two Stunning Designs
Tips
- A speed square is helpful for accurate measurements.
- Using a longer drill bit might make it easier to drill into the side of the board.
- Pre-drilling pilot holes is recommended, especially when working alone.