A broken window pane is more than just an eyesore; it's a security risk and a significant expense. Professional window repair can cost a fortune, easily exceeding $180 for a single pane replacement. But what if you could save that money and fix it yourself? This guide demonstrates how to tackle a broken window pane repair, transforming a frustrating problem into a satisfying DIY project that strengthens your home's security and boosts your savings. Forget the hefty repair bills and the hassle of scheduling appointments with professionals.
This surprisingly straightforward process empowers you to reclaim control and save a substantial amount of money. We'll walk you through every step, from carefully removing the broken pane to securely installing a replacement, ensuring a professional-looking finish. Ready to start saving? Let's dive into the detailed, step-by-step instructions below.
Preparation and Safety Guidelines
- Putty knife
- Razor blade
- Silicone
- Gloves
- Ladder (if necessary)
- Always wear safety glasses and gloves to protect yourself from broken glass shards and potential cuts.
- Use caution when handling the glass; broken pieces can be extremely sharp. Dispose of broken glass responsibly, wrapping it securely in thick cardboard or newspaper before discarding.
- If you are uncomfortable working with glass or are unsure about any step, it's best to consult a professional glazier to avoid injury and ensure a proper repair.
Step-by-Step Instructions
Prepare the Window
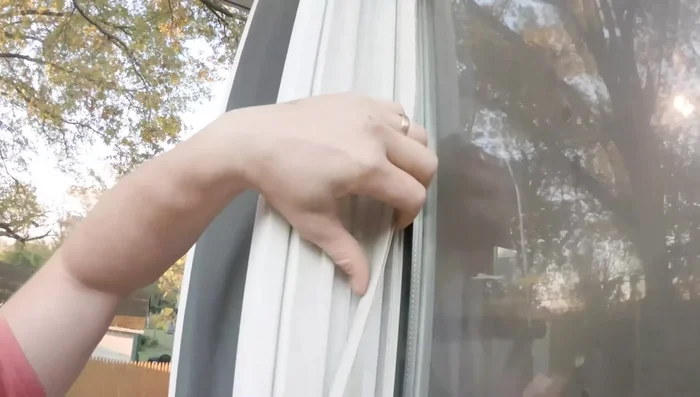
- Remove vinyl strips from the window casing using a putty knife. Pry gently, working up and down to avoid breaking them. If a strip is stuck, use the putty knife to get it far back in the groove before pulling.

Prepare the Window Remove Broken Pane
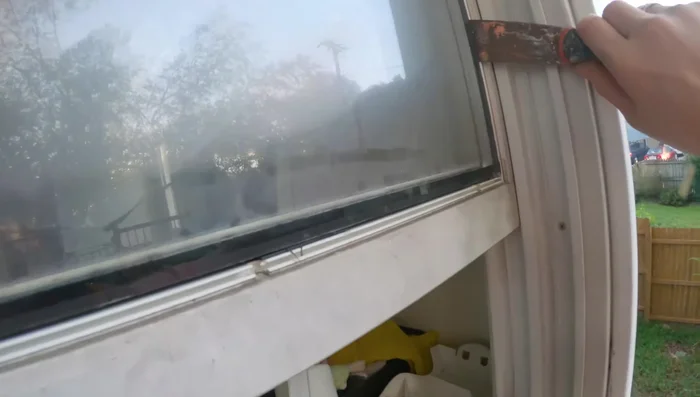
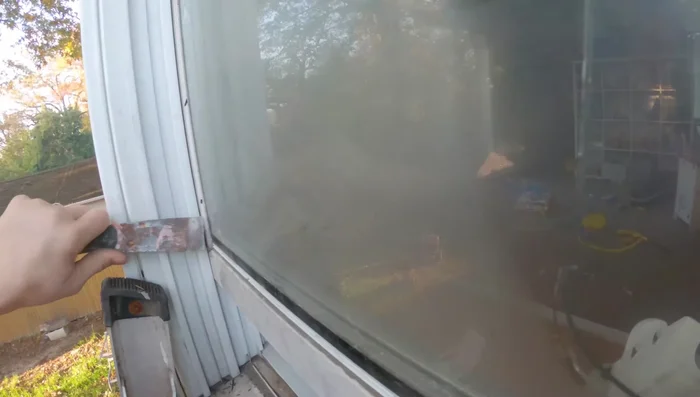
- Access the glass unit. Use a putty knife and razor blade to carefully separate the silicone or tape holding the glass in place. Work from both the inside and outside to completely loosen it.
- Remove the broken glass pane. Gently push and pull on the glass unit to remove it from the window frame after separating all the adhesive.
- Clean the window frame. Remove any remaining silicone or debris from the window frame using a razor blade (wear gloves!).
Remove Broken Pane Get Replacement Glass
- Measure the broken pane. Measure twice to ensure accuracy before purchasing a replacement.
- Purchase replacement glass. Check local hardware stores for availability of the correct size and cutting services. Calling ahead is recommended.
Get Replacement Glass Install New Pane
- Apply silicone sealant around the perimeter of the new glass unit. Ensure the frame is clean before applying the silicone.
- Insert the new glass pane. Carefully install the new glass unit into the frame, pressing firmly to ensure a good seal.
- Reinstall vinyl strips. Once the glass is in place, put the vinyl strips back on the window casing.

Read more: 3M Thinsulate Window Film Installation: A Step-by-Step Guide
Tips
- Work slowly and carefully to avoid breaking the vinyl strips or damaging the window frame.
- Wear gloves when using a razor blade to avoid cuts.
- Call ahead to your local hardware store to ensure they have the correct size of glass and will cut it to your specifications.
- Clean the window frame thoroughly before applying new silicone to ensure a proper seal.