A broken or outdated doorknob can be a frustrating inconvenience, hindering your home's security and overall aesthetic appeal. Replacing a doorknob, however, doesn't have to be a daunting task reserved for professional handymen. With the right tools and a clear understanding of the process, installing a new doorknob is surprisingly simple and can be completed in a short amount of time, saving you both money and the hassle of hiring someone else. This is especially true if you follow a step-by-step guide that breaks down the process into manageable parts.
This guide offers a straightforward and comprehensive approach to doorknob installation, perfect for beginners and experienced DIY enthusiasts alike. We'll walk you through each stage, from removing the old doorknob to securing the new one, ensuring a secure and functional fit. Ready to get started? Let's dive into the step-by-step process below.
Preparation and Safety Guidelines
- Screwdriver (Phillips head and possibly a power drill)
- Leveler
- Quick Set Doorknob Assembly Set
- Always turn off the power to the door circuit breaker before beginning any electrical work, if applicable (e.g., for electronic door locks). Failure to do so could result in serious injury or death.
- Use the correct type of screws for your door and doorknob. Using screws that are too long can damage the door or the door frame. Using screws that are too short will result in a loose and insecure doorknob.
- If you are unsure about any step of the installation process, consult a qualified professional. Improper installation can lead to security vulnerabilities or damage to your door.
Step-by-Step Instructions
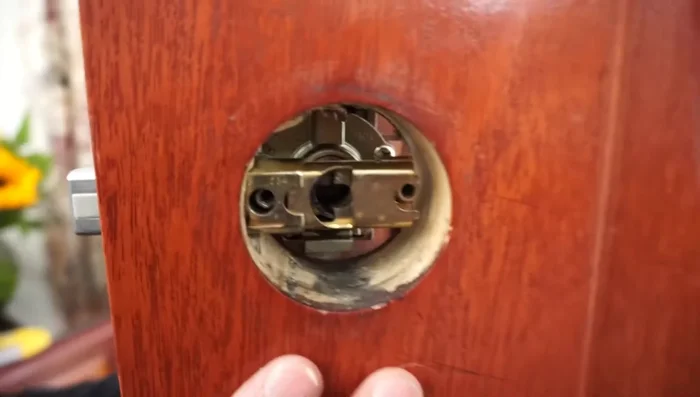
Prepare the Door and Latch Mechanism
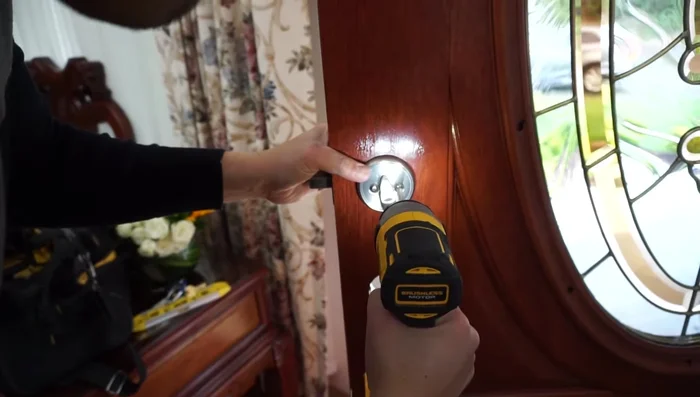
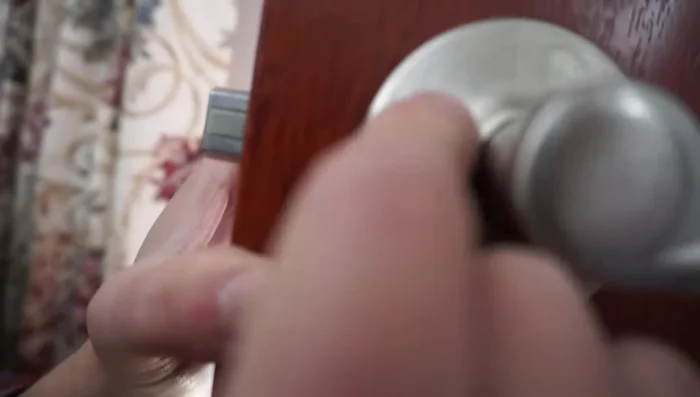
- If necessary, drill a hole for the latch mechanism (ensure you tape the other side of the door to prevent blowouts).

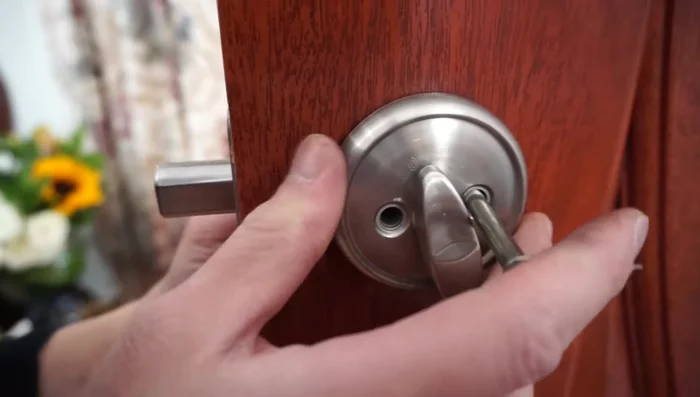
Prepare the Door and Latch Mechanism Install the Latch and Deadbolt
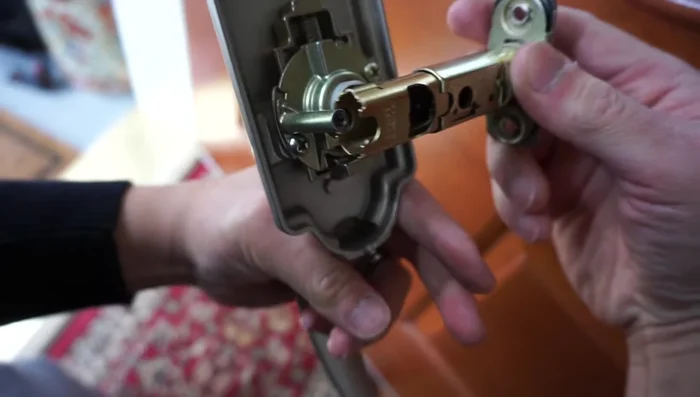
- Insert the latch mechanism, ensuring the 'up' marking is facing upwards. Insert the deadbolt, also ensuring the 'up' marking is facing upwards.
- Align the deadbolt rod with the latch, making sure it's properly aligned.
- Align the other half of the deadbolt with the half-moon shape on the latch. Before fully tightening, test the latch mechanism to ensure it works smoothly in both locked and unlocked positions.
- Hand-tighten the bolts, ensuring the 'lock' marking is at the top. Do not fully tighten yet; this allows for adjustment.
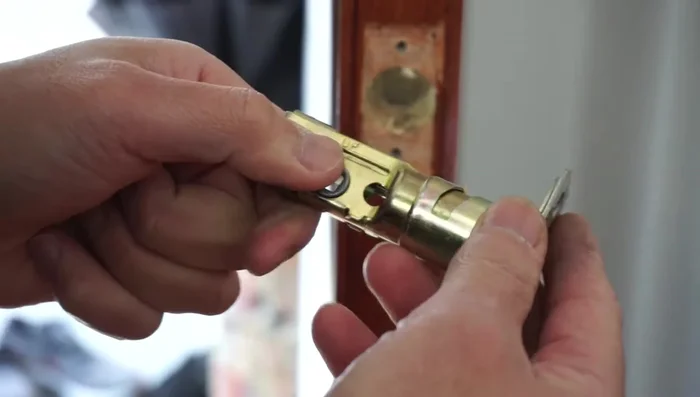
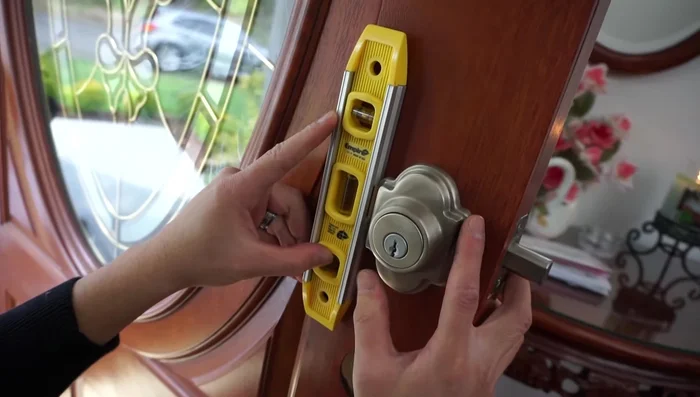
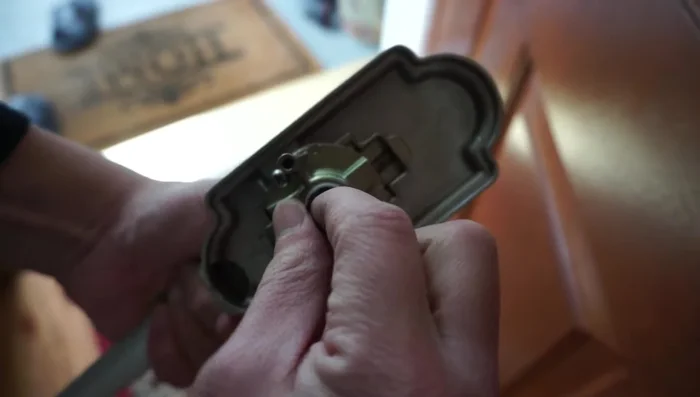
Install the Latch and Deadbolt Align and Secure the Deadbolt
- Use a leveler to ensure the deadbolt is perfectly horizontal and aligned before fully tightening the screws.
- Fully tighten the deadbolt screws.
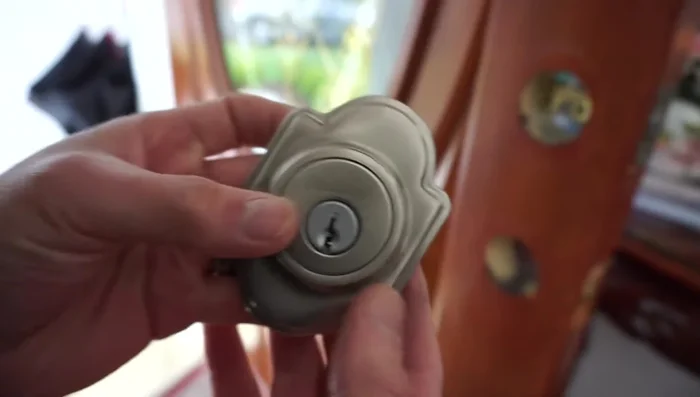
Align and Secure the Deadbolt Install the Doorknob Handles
- Insert the doorknob handle through the latch, aligning it with the half-moon shape. Attach the other doorknob and test the latch again.
- Hand-tighten the screws for the doorknob, ensuring proper alignment. Use a leveler to ensure everything is level before tightening fully.
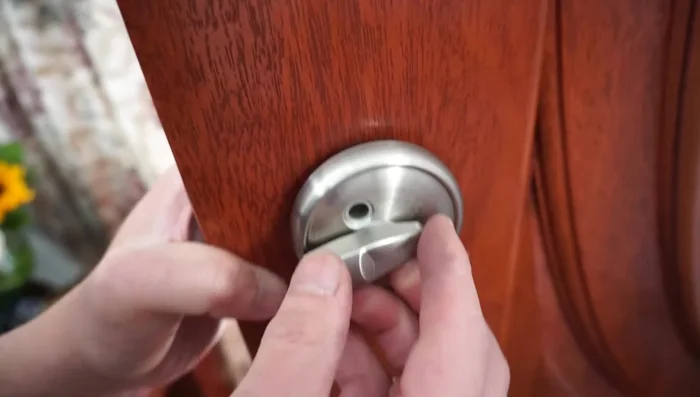
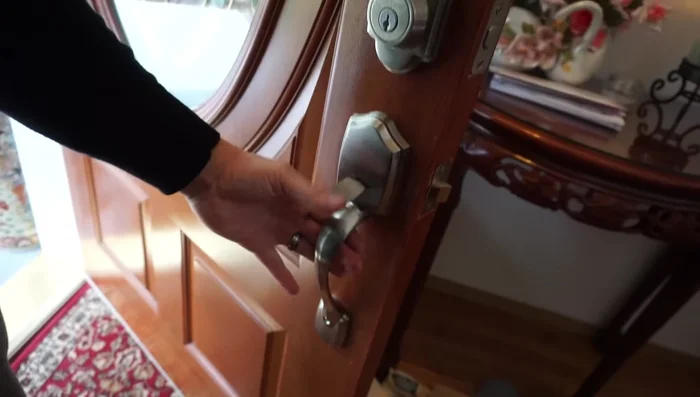
Install the Doorknob Handles Finalize and Test
- Test the doorknob's mechanism and adjust the half-moon-shaped rod to the left or right depending on whether your door is left or right-handed (this determines the latch position).
- Tighten all screws and test the functionality of the entire assembly. Ensure the door locks and unlocks correctly.
Finalize and Test
Read more: 3M Thinsulate Window Film Installation: A Step-by-Step Guide
Tips
- Always check the orientation markings ('up' and 'lock') on the latch and deadbolt before tightening.
- Test the latch mechanism before fully tightening any screws. This ensures proper alignment and functionality.
- Use a leveler to ensure that the deadbolt and doorknob are installed horizontally and aligned correctly.
- Don't overtighten screws; hand-tighten initially to allow for adjustments before fully tightening.
- The half-moon mechanism on the doorknob can be adjusted for left-handed or right-handed doors. Determine your door’s swing direction to ensure the latch is positioned correctly.