The Frigidaire Gallery refrigerator, with its sleek design and advanced features, is a coveted appliance. However, like any machine, its ice maker can occasionally malfunction, leaving you with an empty ice bin and a frustrating inconvenience. From the simple fixes to more complex troubleshooting, dealing with a broken ice maker can feel overwhelming. This is especially true given the intricacies of the Frigidaire Gallery's technology, often leaving owners unsure where to even begin. Don't despair! A non-functional ice maker doesn't mean a costly repair bill.
This definitive guide provides a comprehensive, step-by-step approach to diagnosing and resolving common Frigidaire Gallery refrigerator ice maker problems. We’ll cover everything from checking the water supply and filter to examining the ice maker’s internal components, guiding you through each potential issue with clear instructions and helpful images. Ready to get your ice maker back in action? Let's dive into the detailed troubleshooting process.
Preparation and Safety Guidelines
- Phillips head screwdriver
- Quarter inch nut driver
- Flathead screwdriver
- Scissors
- Blow dryer
- Always unplug the refrigerator from the power outlet before attempting any repairs. Failure to do so could result in electric shock.
- Never attempt to force any parts. If a component is jammed or broken, consult a repair manual or professional for assistance.
- Water lines can contain high pressure. Turn off the water supply to the refrigerator before disconnecting or working on any water-related components of the ice maker.
Step-by-Step Instructions
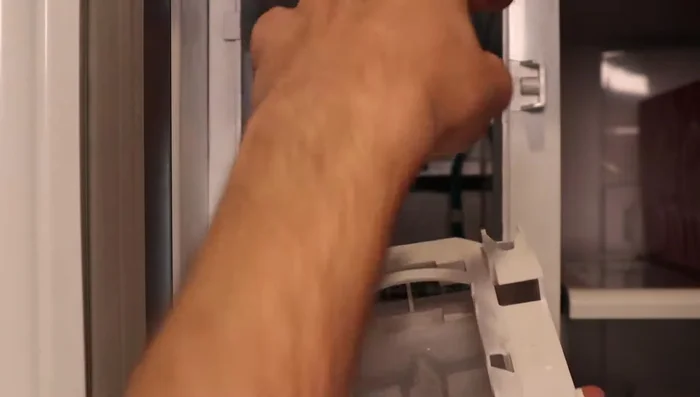
Power Down and Access
- Turn off the refrigerator power.
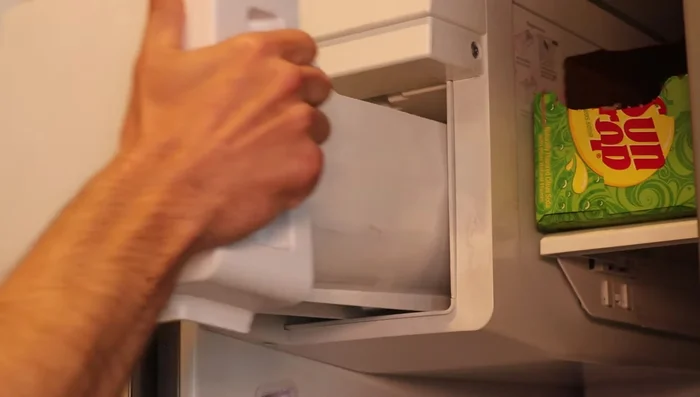
- Remove the ice tray.
- Remove two screws securing the ice maker access panel.
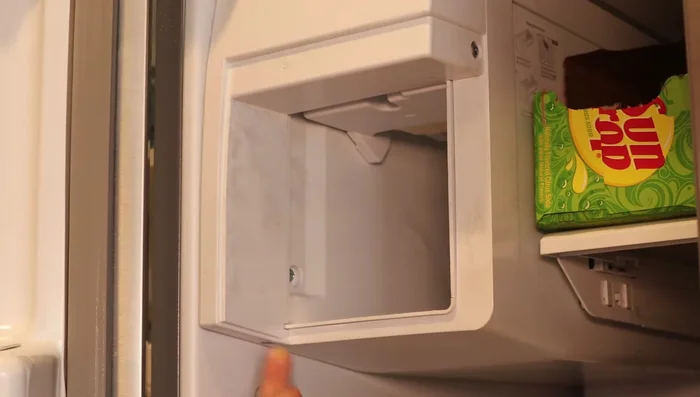
- Remove the front plastic tray.

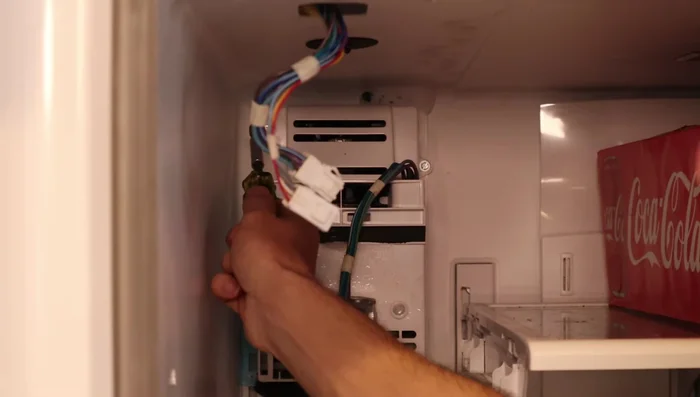
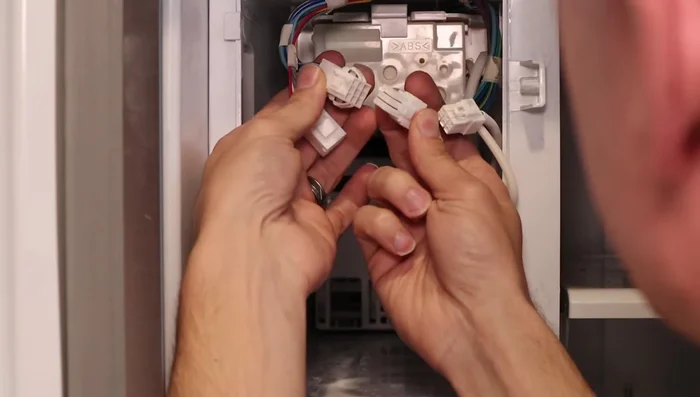
Power Down and Access Remove Ice Maker
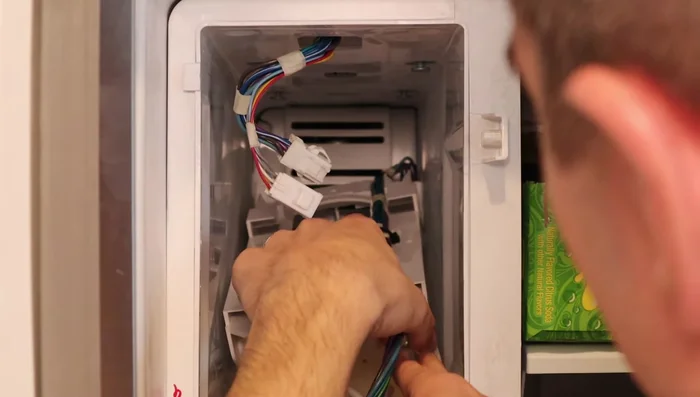
- Disconnect the nine-pin and six-pin connectors.
- Remove the ice tray assembly and rotating motor.
- Remove four bolts and plastic tracks securing the ice tray.
- Remove zip ties securing wires to the tray.
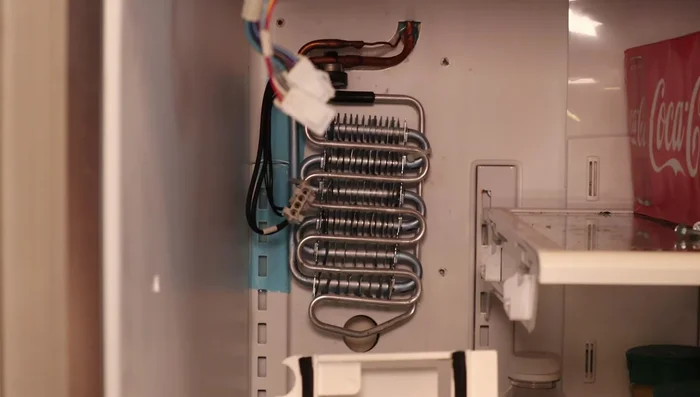
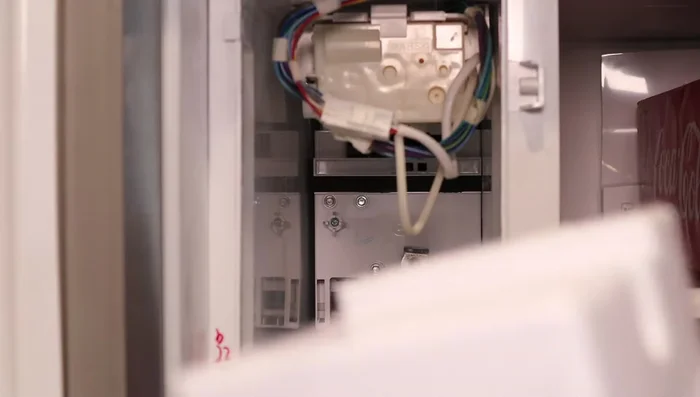
Remove Ice Maker - Remove three screws securing the ice maker unit from the back.
- Remove the ice maker unit, noting ice buildup.
Remove Ice Maker Clean and Defrost
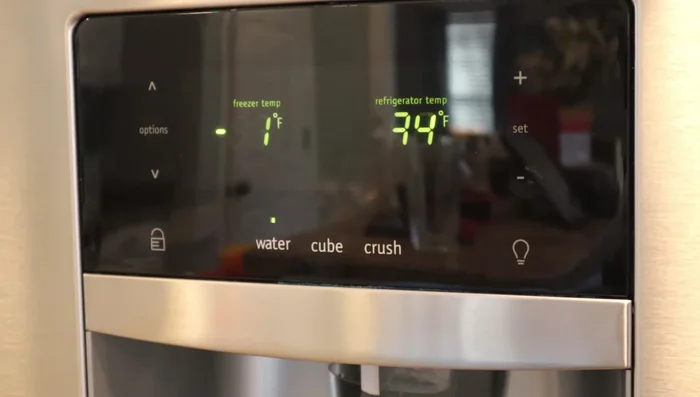
- Defrost the ice maker unit using the refrigerator's built-in defrost function (hold plus and minus buttons until 'DF' appears) and/or a blow dryer.
- Remove ice buildup from the drain hole.
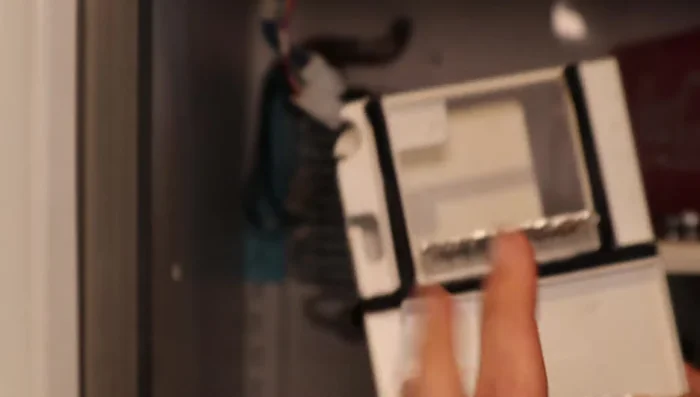
Clean and Defrost Reassemble Ice Maker
- Reinstall the coil cover, ensuring proper alignment and connection.
- Reinstall the fan and motor assembly.
- Reinstall the ice maker case, feeding cables and connectors through the appropriate holes.
- Reinstall the ice tray, securing it with bolts and tracks.
Reassemble Ice Maker - Reconnect all wires (9-pin and 6-pin connectors).
- Reinstall the small plastic cover over the wires.
- Reinstall the top panel, securing it with screws.
Reassemble Ice Maker Power Up
- Turn the refrigerator power back on.
Power Up

Read more: Fix Washing Machine Won't Spin: Quick & Easy Motor Coupler Replacement
Tips
- Be careful with exposed wires when disconnecting connectors.
- Use a blow dryer to melt ice, but be mindful of the built-in defrost function.
- Ensure all connections are secure before turning the refrigerator back on.
- Thoroughly dry the area to prevent ice from reforming.