A leaky toilet is more than just an annoying drip; it's a significant source of wasted water and can lead to surprisingly high water bills. That constant, persistent drip, drip, drip can not only drive you crazy but also significantly impact your household budget and contribute to unnecessary water consumption. Ignoring a leaky toilet is a costly mistake, both financially and environmentally. Furthermore, the unseen damage from prolonged leaks can lead to serious and expensive plumbing problems down the line. Addressing a leak promptly is crucial for maintaining a functional and efficient plumbing system.
Fortunately, fixing a leaky toilet is often a manageable DIY project, even for those with limited plumbing experience. This step-by-step guide will walk you through the common causes of toilet leaks and provide clear instructions on how to effectively resolve them, saving you money and protecting our precious water resources. Let's dive into the process and get that annoying leak under control!
Preparation and Safety Guidelines
- Adjustable pliers
- Shop vac
- New fill valve (if needed)
- New flapper (if needed)
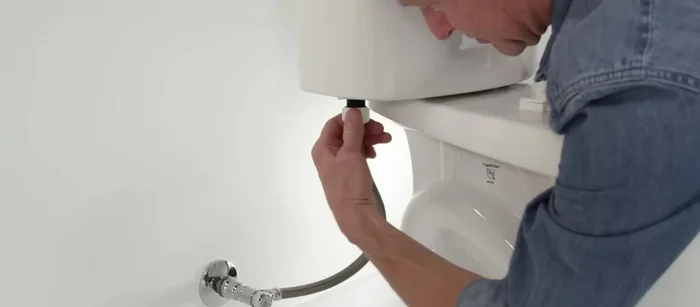
- Turn off the water supply to the toilet before starting any repairs. This is crucial to prevent further water damage and making the job easier.
- Wear appropriate safety gear, including gloves, to protect your hands from bacteria and potential irritants.
- If you are uncomfortable or unsure about any step, consult a qualified plumber. Attempting complex repairs without the necessary skills could worsen the problem or cause damage.
Step-by-Step Instructions
Prepare for Repair
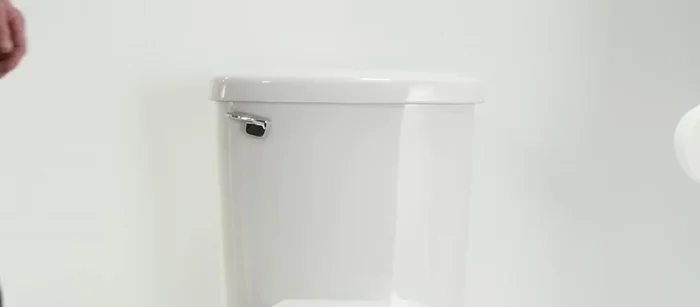
- Remove the toilet tank lid and safely place it aside.
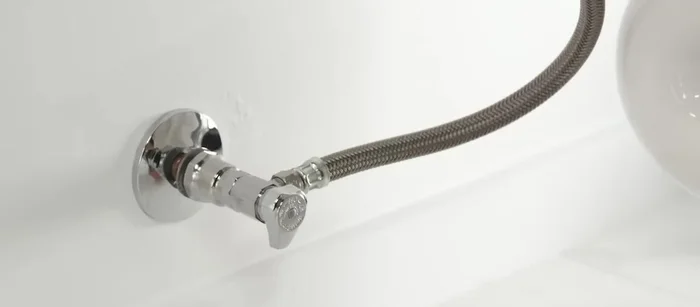
- Turn off the water supply at the stop valve.
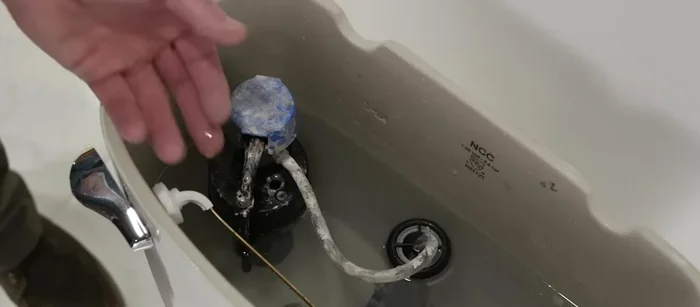
- Flush the toilet and remove as much water as possible, using a shop vac for excess water.

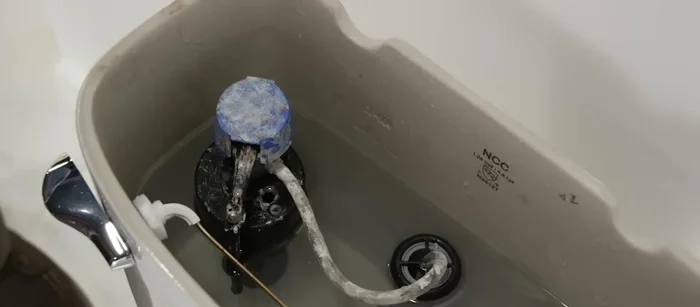
Prepare for Repair Diagnose the Leak Source
- Fill valve or flapper.
- If water constantly runs into the overflow tube, the fill valve might need adjustment or replacement.
- Lift the float cup; if the water flow stops, adjustment might suffice. Otherwise, replace the fill valve.
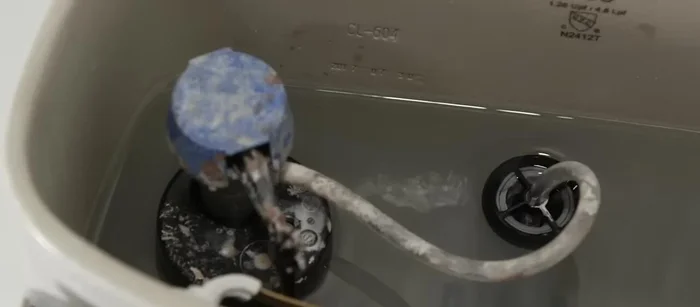
Diagnose the Leak Source Replace the Fill Valve
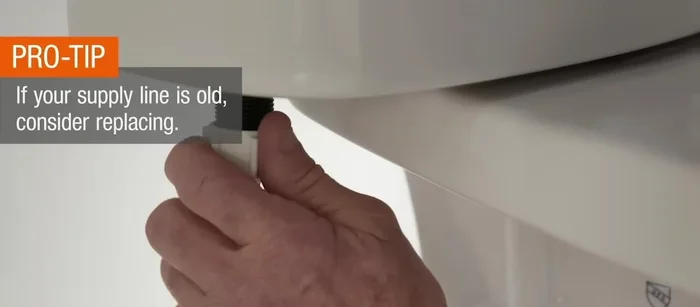
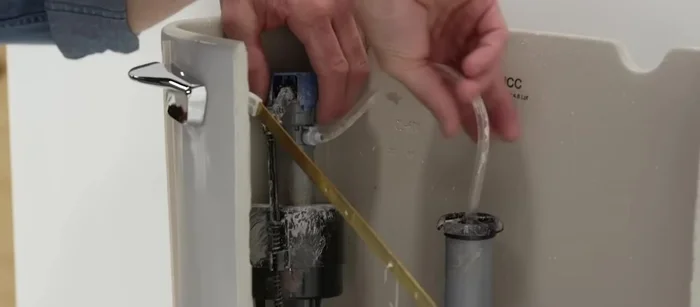
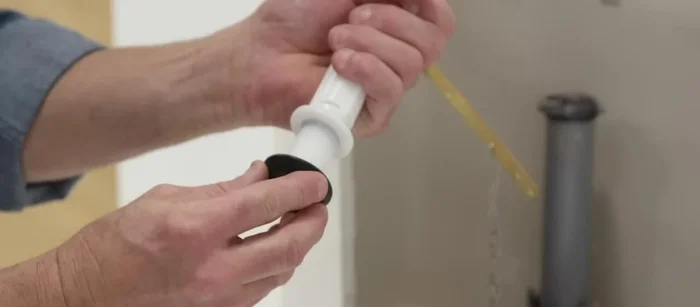
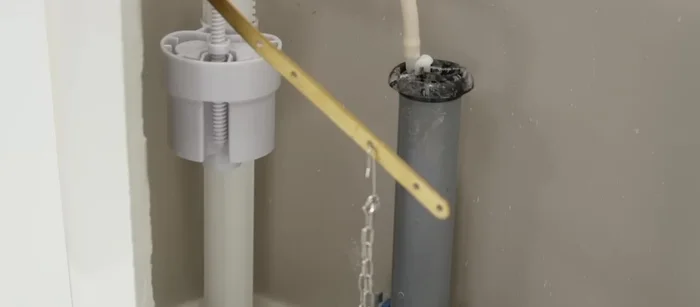
- Loosen and remove the supply nut at the bottom of the tank, then remove the fill valve retaining nut.
- Remove the fill tube from the overflow and lift out the fill valve.
- Install the new fill valve, placing the rubber washer correctly and securing it with the retaining nut.
- Reattach the supply line nut, and attach the fill valve tube to the overflow tube. Turn the water supply back on.
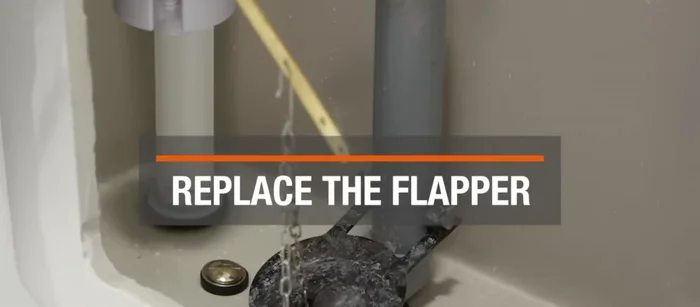
Replace the Fill Valve Replace the Flapper
- Turn off the water supply, remove the old flapper, and install a new one.
- Attach the chain to the flush handle lever, ensuring it doesn't pull the flapper open. Turn the water supply back on and flush.
- Adjust the chain length as needed, and replace the toilet tank lid.
Replace the Flapper


Read more: Fixing a Leaky Toilet Tank: A Step-by-Step Guide
Tips
- If water runs constantly into the tank and into the overflow tube, you most likely have a fill valve issue.
- If water intermittently runs but doesn't flow into the overflow, you likely need a new flapper.
- When replacing the fill valve, be careful not to overtighten the retaining nut.
- Adjust the flapper chain length as needed to ensure proper seating.