Origami, the ancient art of paper folding, offers a vast world of intricate designs, but sometimes simplicity is key. The Origami Speed Bolt stands out as a remarkably easy yet effective model, perfect for beginners and seasoned folders alike. Its clean lines and surprisingly strong structure make it ideal for a variety of applications, from decorative elements to functional uses like securing small packages or creating playful toys. This versatile model requires minimal folds, making it achievable even for those new to paper manipulation, and results in a striking, geometric shape.
Forget complicated diagrams and frustrating instructions. This guide presents the easiest and most efficient method for creating the Origami Speed Bolt, ensuring a satisfying and quick folding experience. Ready to learn how to create this stunning little creation? Let's dive into the simple, step-by-step instructions below.
Preparation and Safety Guidelines
- A4 sheet of paper (or any paper rectangle with the same ratio)
- Use sharp, high-quality scissors to avoid tearing the paper. Dull scissors can lead to inaccurate folds and frustration.
- Work on a clean, flat surface to prevent creases from transferring to your model. A smooth, hard table is ideal.
- Be patient! Origami takes practice. Don't get discouraged if your first few attempts aren't perfect. Focus on understanding each step before moving on.
Step-by-Step Instructions
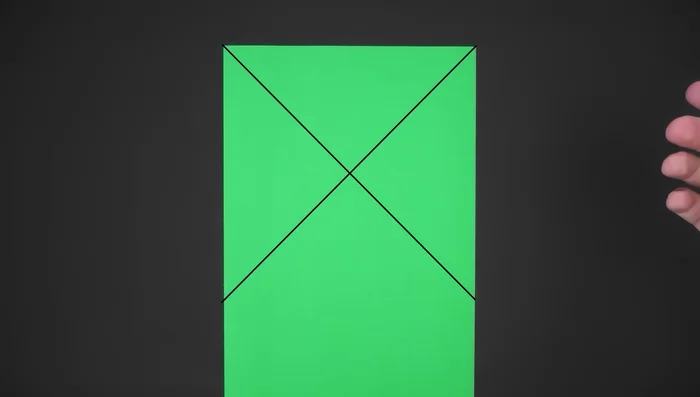
Initial Creases
- Rotate the paper and fold an X on the top side. Bring the top edge to the left, unfold, and fold it to the right.
- Turn the paper over and fold the X in half horizontally. Unfold.
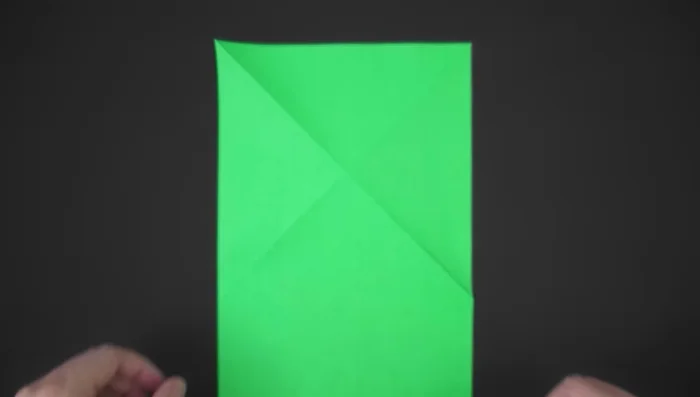
- Fold the paper in half vertically. Bring the right side to the left, unfold.

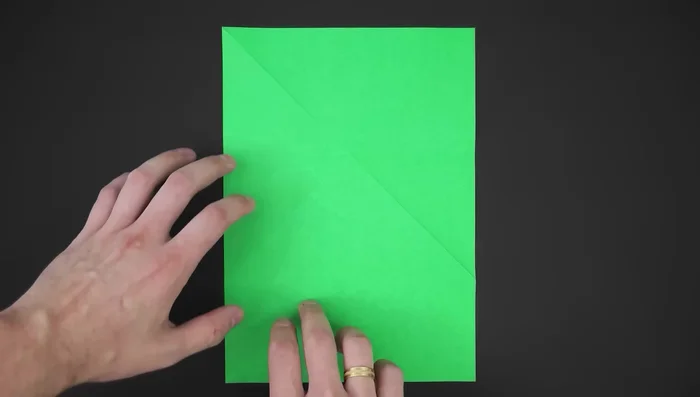
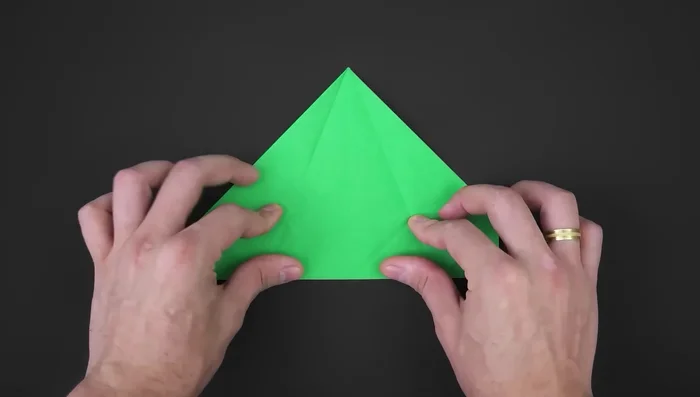
Initial Creases Forming the Basic Triangle
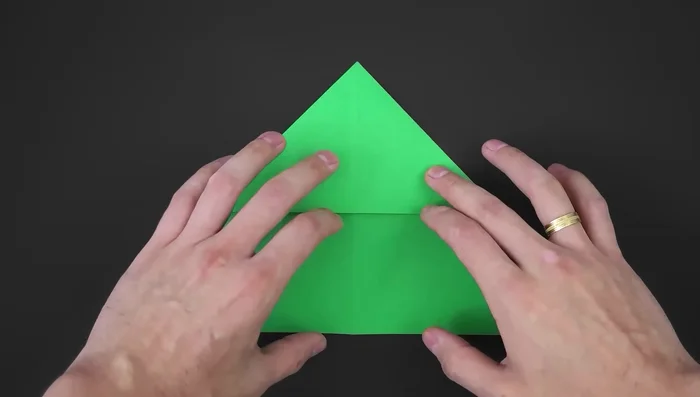
- Press the center of the X and bring the two sides to the middle. Lower and flatten the top layer, turning the top side into a triangle.
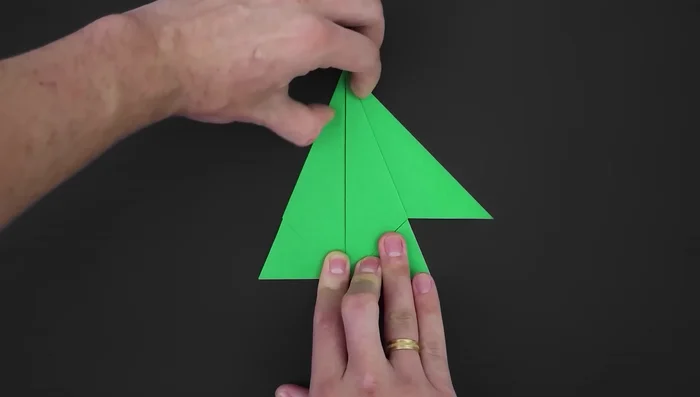
Forming the Basic Triangle Creating Diagonal Creases
- Fold the remaining paper in half, and flip the paper over.
- Fold creating two diagonals. Bring the right side to the middle, make a crease; repeat on the left side. Fold the paper along these two small diagonal lines.
Creating Diagonal Creases Folding Side Flaps
- Fold the right side, unfold; fold the left side, unfold. Fold the two remaining corners, aligning perfectly with the layer below.
- Unfold both, open the middle part, and fold the corners using the marks. Close the two sides.
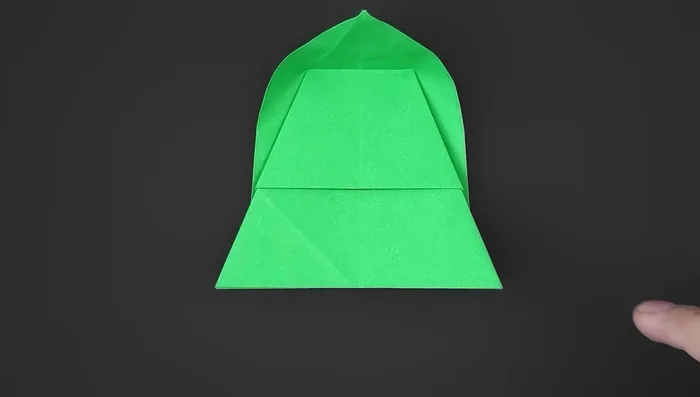
Folding Side Flaps Folding the Top Triangle
- Fold the remaining flaps, unfold, and turn over. Fold the middle triangle in half by bringing the top corner down to the edge.
Folding the Top Triangle Shaping the Bolt (Part 1)
- Bring the top layer behind the middle part, aligning the diagonal edge with a specific point. Flatten and reinforce on the other side. Repeat on the other side.
Shaping the Bolt (Part 1) Shaping the Bolt (Part 2)
- Fold the remaining paper at the bottom, aligning with the layers below, using the two corners as a reference.
- Unfold. Separate the inner layer, bring one part behind the other, align, and reinforce. Repeat on the other side.
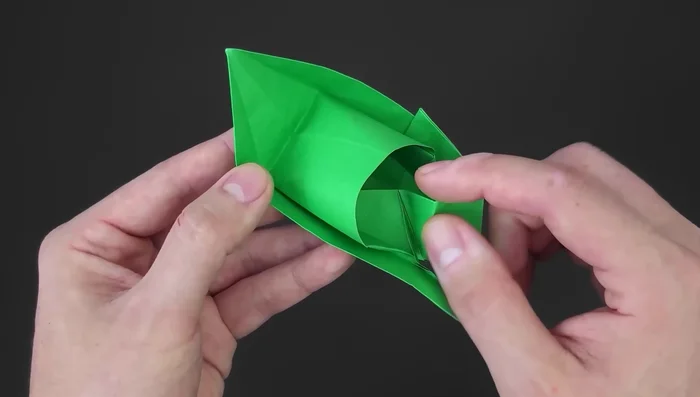
Shaping the Bolt (Part 2) Final Adjustments & Refinement
- Adjust the front and back parts to make them rectangular. Make the bottom part rectangular.
- Unfold the paper, place it between the inner layers to hide the part and make it neater. Repeat on the other side.
Final Adjustments & Refinement


Read more: DIY King-Size Tufted Headboard: Budget-Friendly Guide
Tips
- Pay close attention to aligning folds with existing layers for a clean finish.
- The steps involving bringing layers behind others (steps 10 & 12) might require practice. Watch carefully and try to replicate the actions shown in the video.