Transform your bathroom into a charming rustic haven with this easy DIY farmhouse shelf project! Forget expensive, generic store-bought shelving; with just a few simple materials and a little elbow grease, you can craft a beautiful, personalized shelf that perfectly complements your space. Imagine the satisfying feeling of creating something beautiful and functional for your home, all while saving money and adding a unique touch of character. This project is perfect for beginners, requiring minimal tools and expertise, and the end result is a stunning addition to any bathroom, adding both practicality and aesthetic appeal.
Ready to get started on creating your rustic farmhouse bathroom shelf? This step-by-step tutorial will guide you through the entire process, from selecting the perfect wood to the final finishing touches, ensuring you achieve a professional-looking shelf you'll be proud to display. Let's dive in and create something truly special!
Preparation and Safety Guidelines
- Wooden boards (various sizes)
- Wood stain (classic gray)
- Sandpaper
- Drill
- Rope
- Nails or drywall screws
- Always wear safety glasses to protect your eyes from flying debris when sawing, sanding, or using power tools.
- Ensure the shelf is securely attached to the wall studs using appropriate wall anchors for the weight of the items you plan to place on it. Improper installation can lead to the shelf falling and causing injury or damage.
- If using stain or paint, work in a well-ventilated area and follow the manufacturer's safety instructions carefully. Use gloves to protect your skin.
Step-by-Step Instructions
Prepare the Boards
- Cut three shelf boards (5.25 inches wide x 18 inches long) and two side boards (2 inches wide x 4 inches deep x 20 inches long).

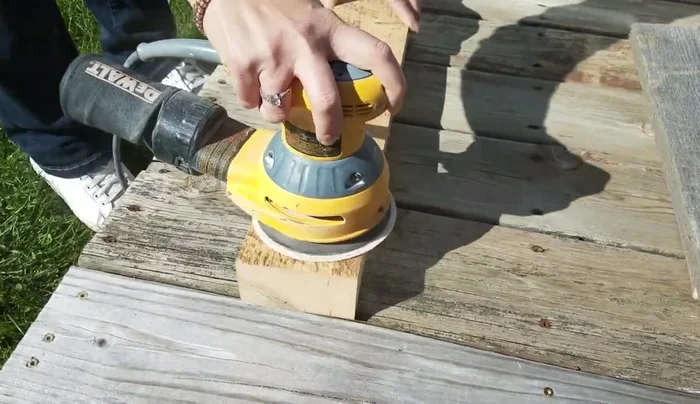
Prepare the Boards Sand and Stain
- Sand all boards smooth. Stain all boards, including the cut edges, with a classic gray stain for a rustic look. Address any water damage before staining.
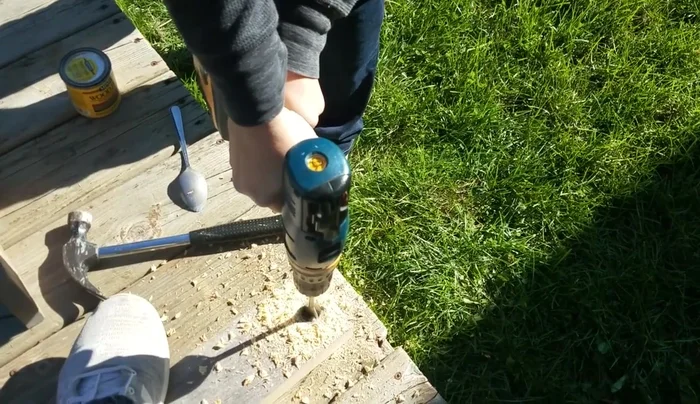
Sand and Stain Drill Holes for Rope
- Drill one-inch holes on both sides of the thicker side boards to thread rope through.
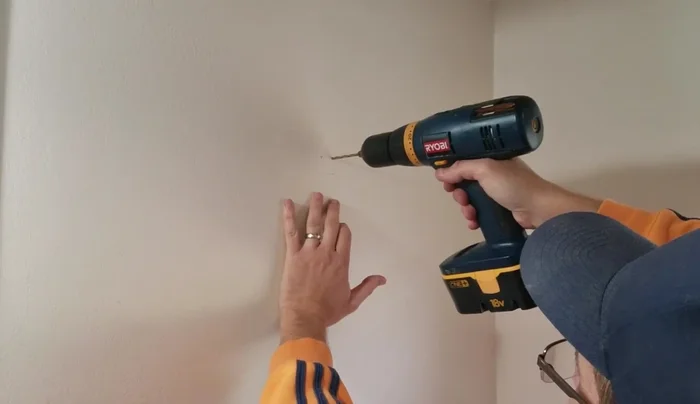
Drill Holes for Rope Pre-drill Wall Holes
- Pre-drill holes in the wall where the shelf supports will be mounted for easier installation.
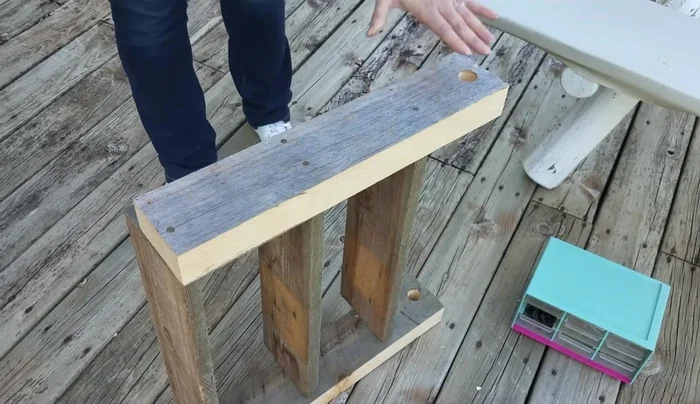
Pre-drill Wall Holes Assemble the Shelf
- Attach the shelf boards to the side boards, spacing them about 6 inches apart. Set the shelves slightly forward (3/8 inch) for better object placement. Secure with nails or drywall screws, using drywall screws for added support.
Assemble the Shelf Hang the Shelf
- Mount the assembled shelf to the wall using the pre-drilled holes and appropriate fasteners.
Hang the Shelf


Read more: DIY Mason Jar Soap Dispensers: A Step-by-Step Guide with Two Stunning Designs
Tips
- Involve your family: The video shows the creator involving her husband and son in the process, making it a fun family project.
- Use drywall screws for extra support: Secure the shelf using drywall screws for increased stability, especially given its weight.
- Set shelves slightly forward: Setting the shelves forward gives additional space for placing items.