Transforming your shower from drab to fab starts with a solid foundation, and that foundation often includes a Schluter Kerdi drain. Known for their watertight seal and sleek design, Kerdi drains can seem intimidating for DIY beginners. However, with the right guidance, installing one can be surprisingly straightforward, even enjoyable! This isn't some advanced plumbing feat reserved for professionals; you absolutely have the capability to achieve a professional-looking result. Forget those complicated, leaky shower pans of the past.
This guide offers a simplified, step-by-step process designed to demystify Kerdi drain installation, making it accessible to even the most novice DIY enthusiast. We'll walk you through each stage, from preparing the subfloor to the final waterproofing, ensuring you're confident and comfortable throughout the entire installation. Let's get started and dive into the detailed, easy-to-follow instructions!
Preparation and Safety Guidelines
- Schluter Kerdi drain
- PVC or ABS pipes
- Reed pipe cutter
- Internal pipe cutter
- Drill
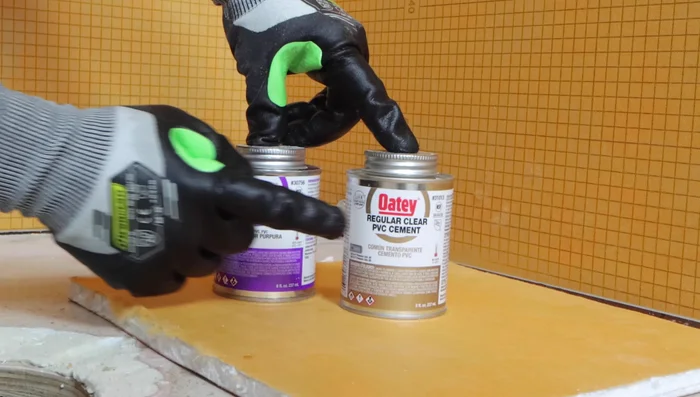
- Primer (e.g., OD Purple)
- PVC cement
- Schluter offset
- Thinset
- Chamfering tool
- Foam spacers (gray)
- Measuring tape
- Level
- Always wear appropriate safety gear, including eye protection and gloves, when working with sharp tools and potentially harsh chemicals like thinset mortar.
- Ensure proper waterproofing underneath the Kerdi drain. A leak behind the drain is catastrophic. Follow Schluter's instructions meticulously for a waterproof membrane.
- Before grouting, thoroughly check the drain's alignment and ensure there are no gaps between the Kerdi membrane and the drain flange. A gap will compromise waterproofing.
Step-by-Step Instructions
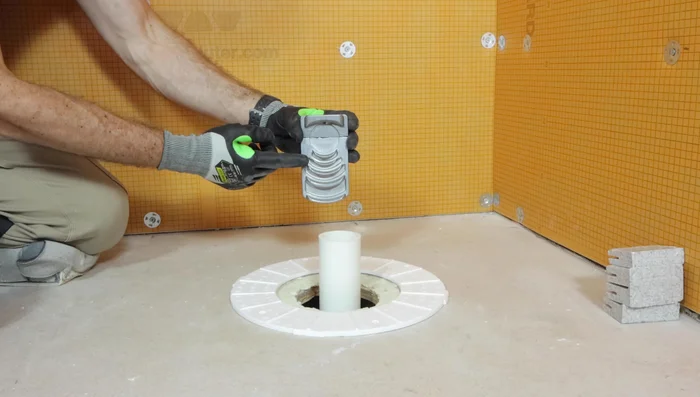
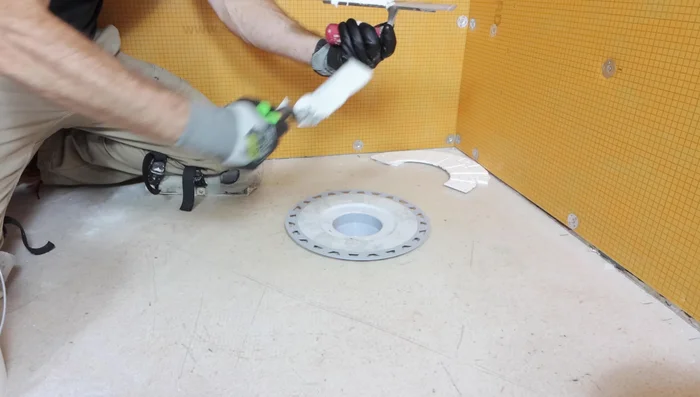
Prepare the Drain Pipe
- Cut the riser pipe coming up from the floor to approximately 4-5 inches using a pipe cutter.
- Chamfer the top of the riser pipe.
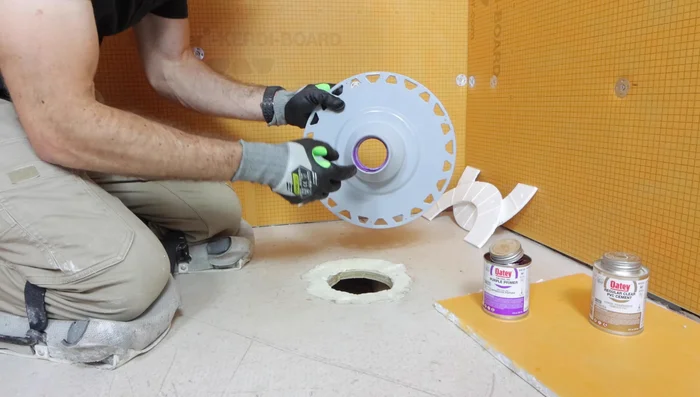
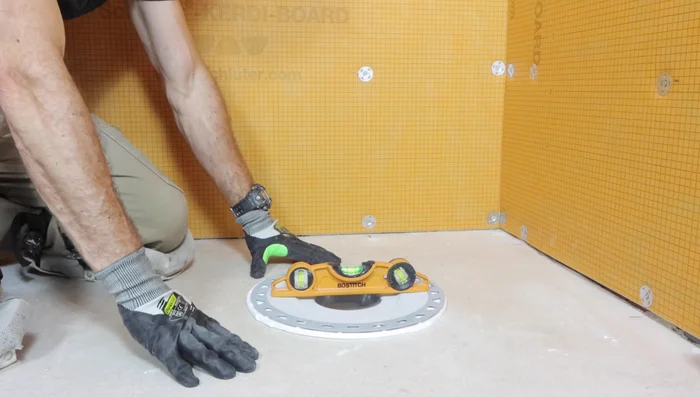
- Fit the drain and ensure it is level. Measure from the bonding flange to the top of the foam insert to determine the amount of pipe to cut off.
- Use an adjustable internal pipe cutter to precisely cut the pipe to the measured length.

Prepare the Drain Pipe - Chamfer the newly cut pipe end.
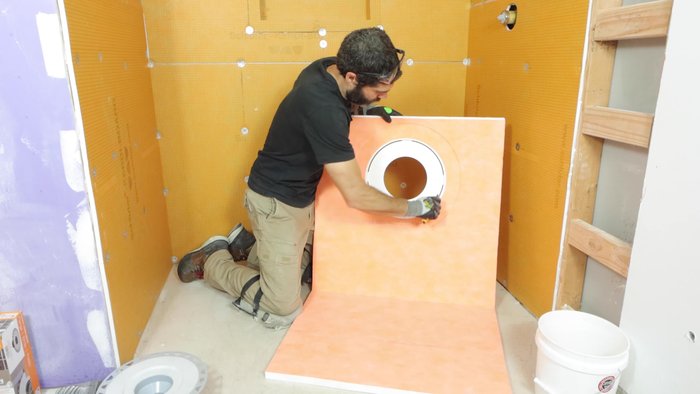
Prepare the Drain Pipe Prepare the Substrate and Spacers
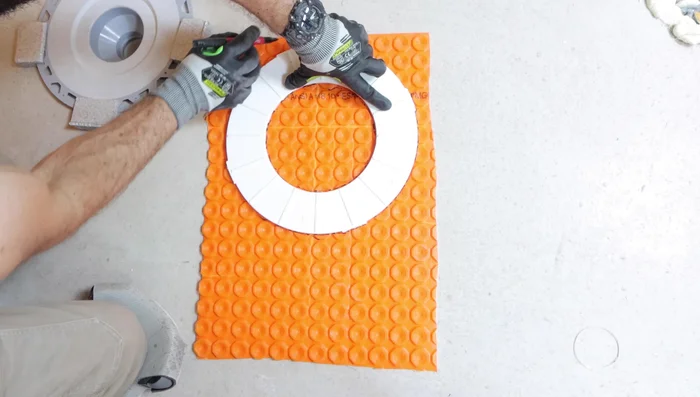
- Cut out the foam insert from the Schluter shower tray (if using a tray).
- Place the foam spacer (from the tray or use gray spacers) on the floor, ensuring they face upwards.
- If using Schluter Ditra Heat, cut out a Ditra heat doughnut in the shape of the foam insert to use as a spacer under the foam insert to accommodate the heating mat.
- Clean the substrate/floor.
Prepare the Substrate and Spacers Prime and Connect the Drain Pipe
- Prime the drain fitting and pipe with PVC primer (four to five revolutions).
- Apply PVC cement to the drain pipe and fitting, then connect, twisting a quarter turn to ensure a secure seal.
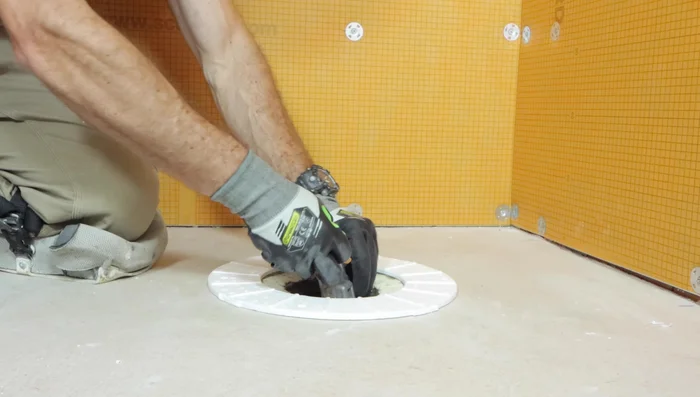
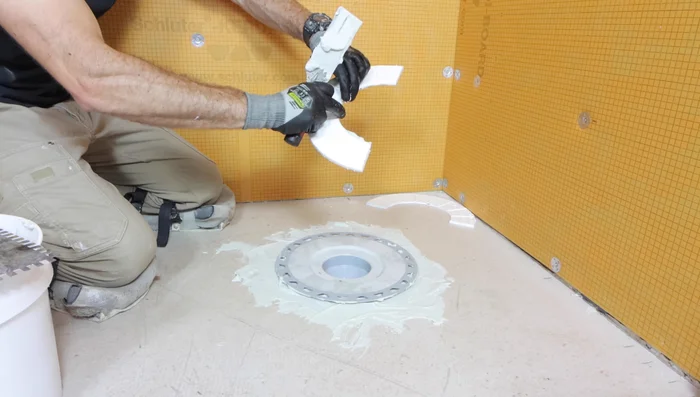
Prime and Connect the Drain Pipe Install the Drain
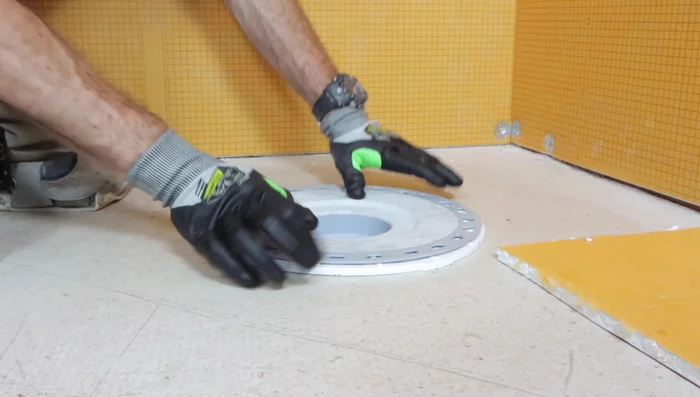
- Dry fit the drain to check for proper fit and level.
- Immediately place the spacers and push the drain down onto the pipe ensuring it is level.
- Apply thinset to the underside of the bonding flange, ensuring copious amounts between the flange and the floor.
- Apply thinset to the top and bottom of the halved foam insert and place it between the floor and the drain for support.
Install the Drain - Clean excess thinset and allow to set before installing the shower tray.
Install the Drain


Read more: Fixing a Leaky Toilet Tank: A Step-by-Step Guide
Tips
- Use a manual pipe cutter for a square cut.
- Chamfering the pipe allows for a better fit.
- Leveling the drain is critical for proper drainage.
- Use copious amounts of thinset to support the drain and ensure a secure bond.
- Do not skip the step of adding the foam insert or spacer underneath the drain to prevent cracking or damage.