Upgrading your kitchen faucet can dramatically enhance both the functionality and aesthetic appeal of your sink area. A single-hole faucet, with its sleek and modern design, is a popular choice for many homeowners looking to refresh their kitchen. Installing one yourself can save you a significant amount of money compared to hiring a plumber, and the process is surprisingly straightforward for those with even basic DIY skills. This is especially true if you are replacing an existing single-hole faucet; the process is similar and often simpler than installing a faucet into a new sink.
This step-by-step guide will walk you through each stage of installing a single-hole kitchen faucet, from turning off the water supply to tightening the final connection. Whether you're a seasoned DIY enthusiast or a complete beginner, we'll provide clear instructions and helpful tips to ensure a smooth and successful installation, leaving you with a sparkling new faucet you can be proud of.
Preparation and Safety Guidelines
- Open-ended adjustable wrenches
- Basin wrench (or crescent wrench)
- Phillips head screwdriver
- Bucket
- Cleaning product
- Brass adapters (if needed)
- Always turn off the water supply to the sink before beginning any work. Failure to do so could result in a significant water leak.
- Wear safety glasses to protect your eyes from splashing water or debris.
- If you are unsure about any step of the installation process, consult a qualified plumber.
Step-by-Step Instructions
Preparation
- Shut off the angle stops underneath the sink.
- Open the faucet hot and cold side to relieve excess water.
Remove Old Faucet
- Remove the old faucet. This may vary depending on the model.
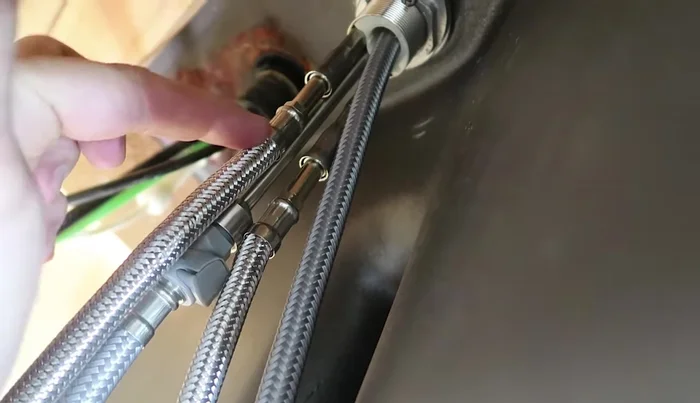
- Disconnect the Flex connectors from the faucet using adjustable wrenches.
- Remove the faucet from the sink using a basin wrench or crescent wrench.
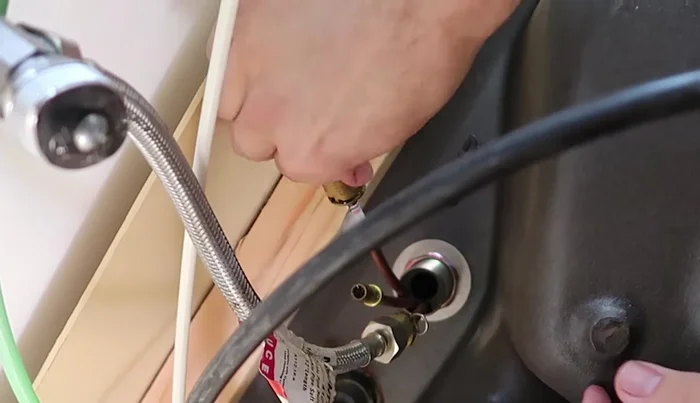
- Remove the old Flex connectors from the angle stops.

Remove Old Faucet Clean and Prepare
- Clean the sink hole.
Prepare New Faucet
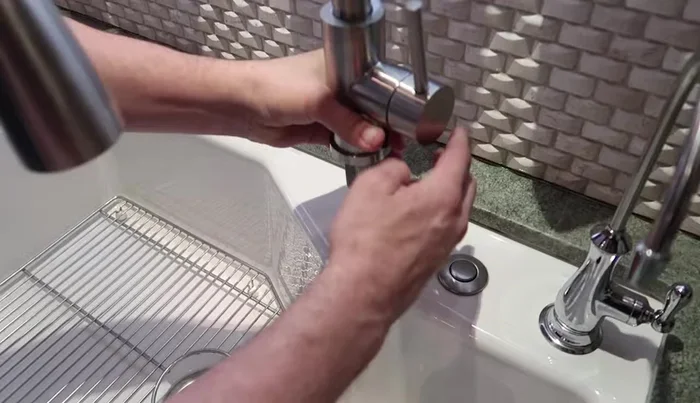
- Prepare the new faucet by removing the nut, washer, and gasket.
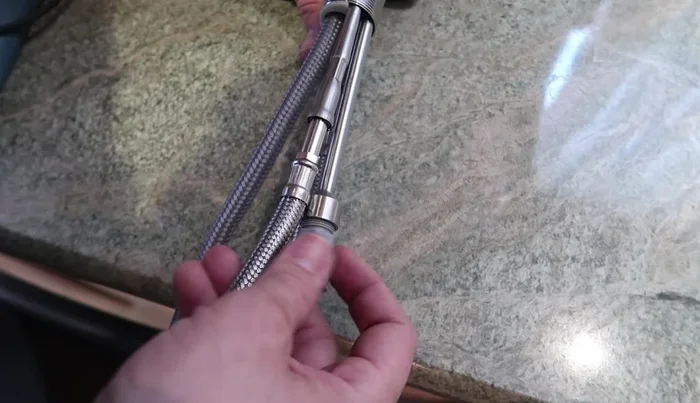
- Connect the Flex connectors to the faucet outside the sink (recommended).
Prepare New Faucet Install New Faucet
- Install the faucet into the sink hole.
- Secure the faucet with the nut, washer, and gasket. Tighten the screws on the nut evenly.
Install New Faucet Connect Water Lines
- Reconnect the plastic hose connector.
- Attach the weight to the pullout hose.
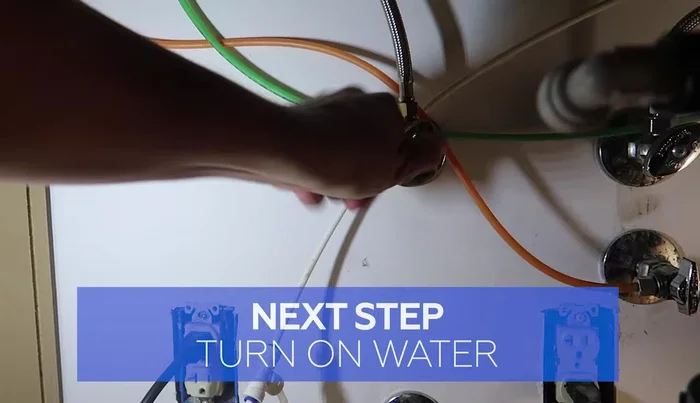
- Connect the hot and cold water lines to the angle stops using brass adapters if necessary.
Connect Water Lines Test and Finalize
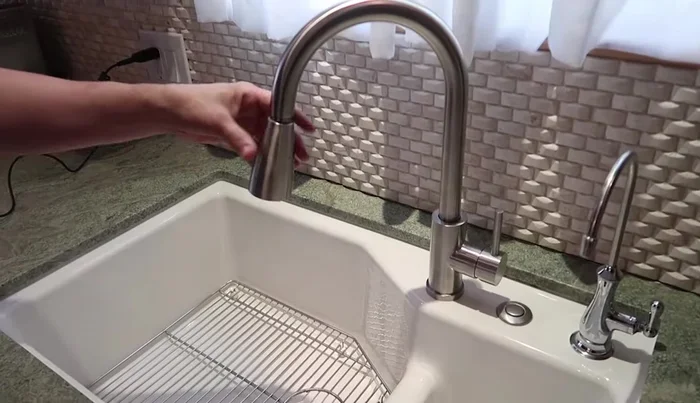
- Turn on the angle stops and check for leaks.
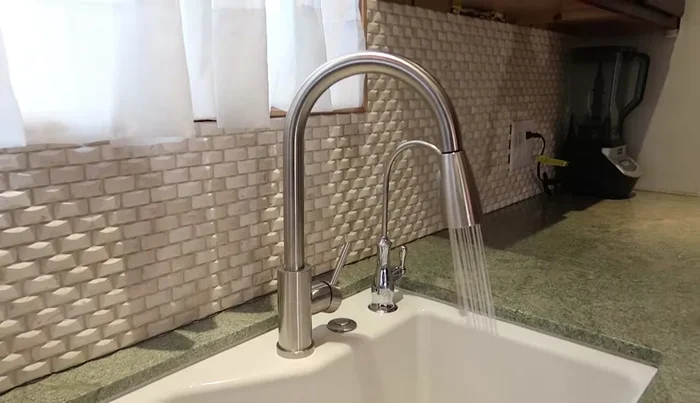
- Flush the faucet with hot and cold water to clear debris.
- Test the faucet.
Test and Finalize


Read more: Fixing a Leaky Toilet Tank: A Step-by-Step Guide
Tips
- If unsure where the shutoffs are, follow the Flex connector from the top of the faucet.
- Use a basin wrench for easier removal of the faucet.
- It's easier to install the Flex connectors to the faucet before installing the faucet itself.
- Tighten the screws on the faucet nut evenly to prevent leaks.
- Place the weight a couple of inches from the bottom of the hose to prevent banging against the cabinet.