A Whirlpool dryer refusing to start can be incredibly frustrating, leaving you with a pile of damp laundry and a hefty laundry bill. The inconvenience is compounded by the complex inner workings of these appliances, often making it difficult to pinpoint the problem without professional help. However, before you call an expensive repairman, consider troubleshooting the issue yourself. Many common problems leading to a non-starting dryer can be easily solved with some basic checks and simple fixes.
This guide provides a straightforward, step-by-step approach to diagnosing why your Whirlpool dryer won't turn on. We'll walk you through the most common culprits, from simple power issues to more intricate component malfunctions, guiding you toward a solution and avoiding costly repairs if possible. Let's get started and get your dryer spinning again!
Preparation and Safety Guidelines
- Multimeter
- Screwdrivers (Phillips and Hex)
- Pliers
- Putty Knife
- Dryer Cleaning Kit (optional)
- Always unplug the dryer from the electrical outlet before attempting any repairs. Failure to do so could result in serious electric shock.
- Never attempt repairs if you are not comfortable working with household appliances and electrical components. Consult a qualified appliance repair technician if needed.
- If you smell burning or hear unusual noises during troubleshooting, immediately stop and disconnect the dryer. These could indicate a serious malfunction requiring professional assistance.
Step-by-Step Instructions
Initial Checks
- Check the timer and door switch.
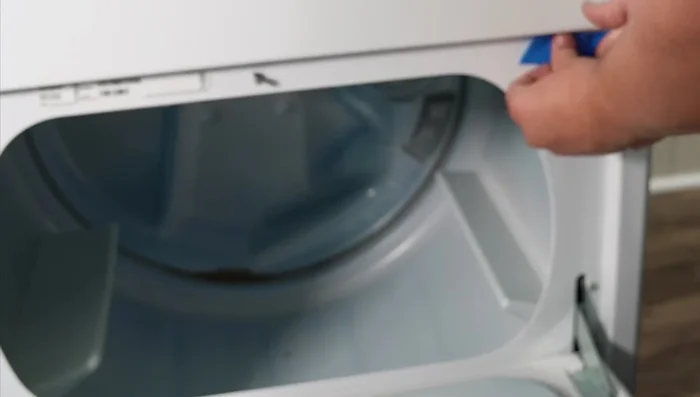
Door Switch Test
- Test the door switch (visual inspection and multimeter continuity test).

Door Switch Test Motor Isolation Test
- Test if the dryer runs with the door taped open and the drum manually spun; this helps isolate motor issues.
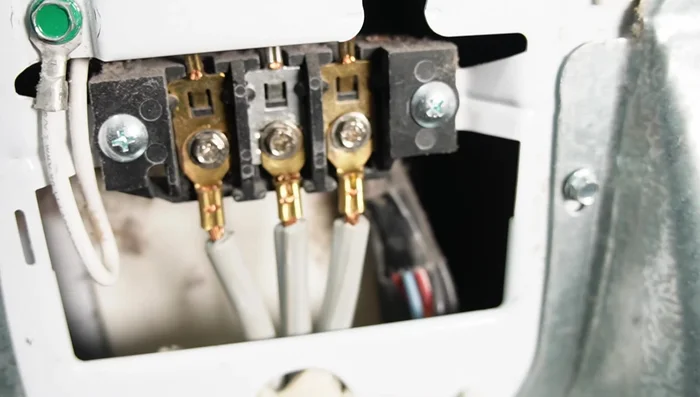
Motor Isolation Test Power Supply Check
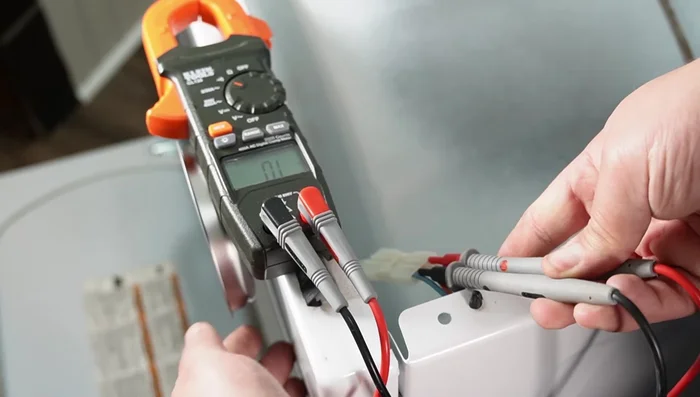
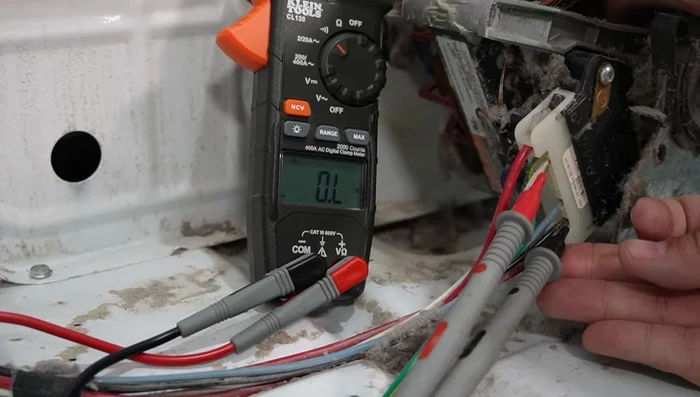
- Inspect and test the electrical terminal block (visual inspection and multimeter voltage test).
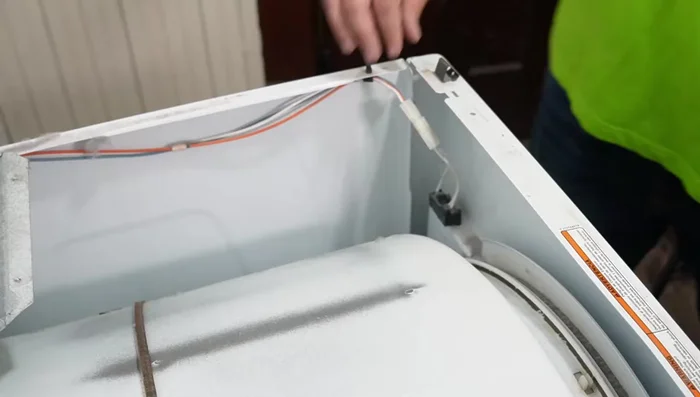
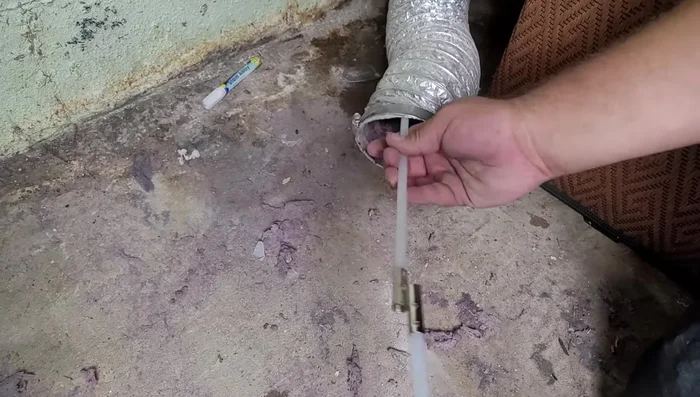
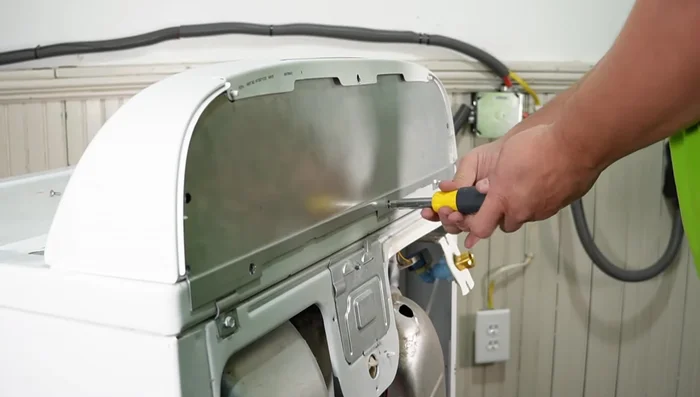
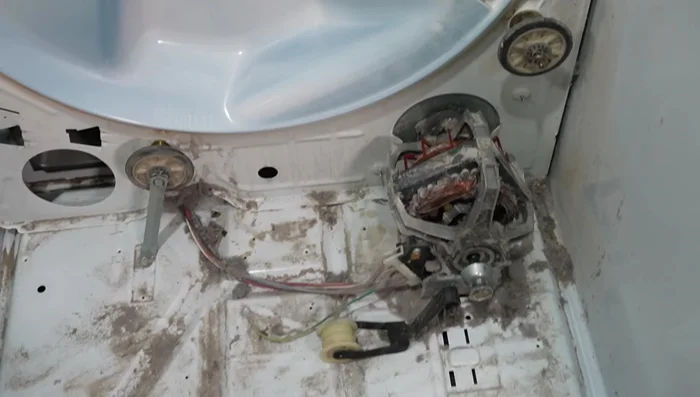
Power Supply Check Back Panel Access and Component Inspection
- Access the back panel and inspect the components (heating system, blower housing, thermal fuse, and thermostat).
Thermal Fuse Test
- Test the thermal fuse (multimeter continuity test).
Thermal Fuse Test Dryer Cleaning
- Clean the dryer thoroughly (vent housing, blower housing, lint filter, blower wheel).
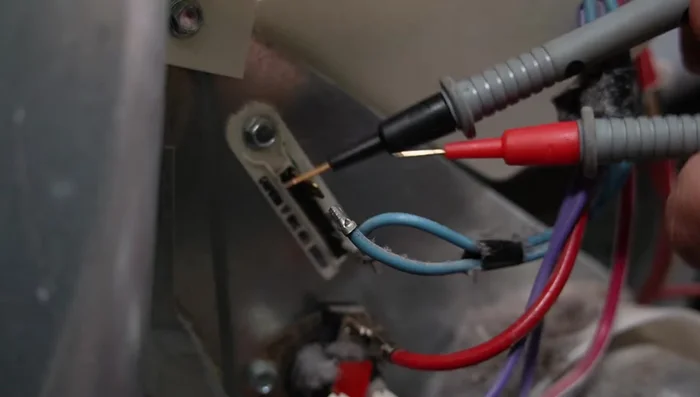
Dryer Cleaning Start Button Test
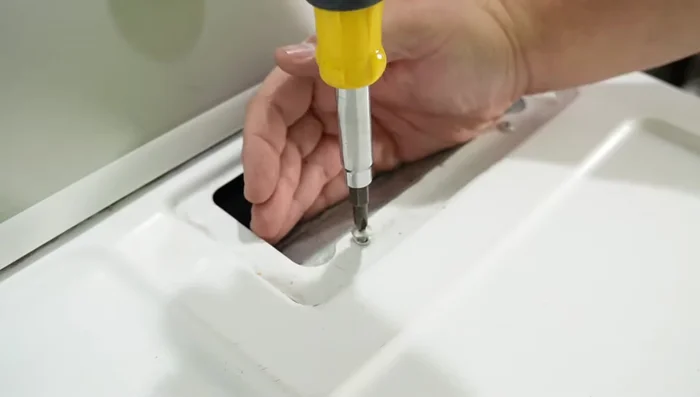
- Test the start button (multimeter continuity test).
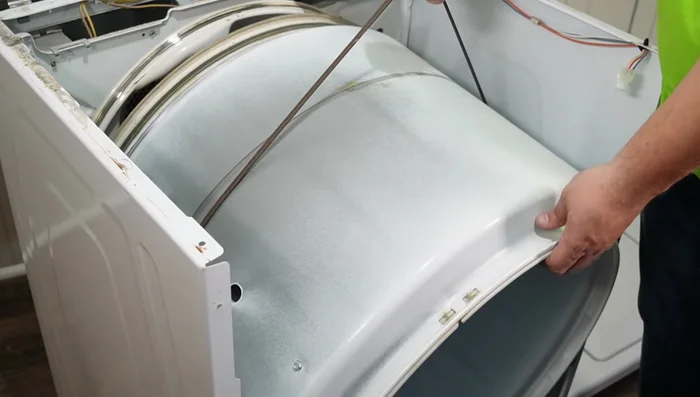
Start Button Test Front Panel Access and Belt Inspection
- Access the front of the dryer and inspect the belt.
Front Panel Access and Belt Inspection Front Panel Removal and Component Inspection/Replacement
- Remove the dryer front panel and inspect/replace the door switch, idler pulley and belt.
Front Panel Removal and Component Inspection/Replacement Drum and Component Inspection
- Inspect the dryer drum and components (wheels, motor, idler pulley).
Drum and Component Inspection Dryer Motor Test
- Test the dryer motor (ohm resistance test and centrifugal switch test).
Dryer Motor Test Reassembly
- Reassemble the dryer.
Reassembly
Read more: Fix Washing Machine Won't Spin: Quick & Easy Motor Coupler Replacement
Tips
- Always check the simple things first: is the timer on? Does the light activate when the door is opened?
- A bad door switch often lacks an audible click and doesn't snap back into place.
- Carefully remove and save all screws during disassembly.
- Be cautious when removing screws near the blower housing; they can easily fall into the unit.
- Use a small screwdriver to release stubborn wire harnesses.