Dealing with a stubbornly stuck or rattling window can be incredibly frustrating, often stemming from a faulty window balancer. These seemingly small components are crucial for smooth window operation, providing the necessary counterweight and allowing for effortless opening and closing. A broken or worn-out balancer not only impacts the functionality of your window but can also compromise its security and energy efficiency, leading to drafts and potential damage. Ignoring the problem will only exacerbate the issue, potentially requiring more extensive and costly repairs down the line.
Replacing a window balancer is a surprisingly manageable DIY task, saving you the expense of hiring a professional. This guide will walk you through the process step-by-step, providing clear instructions and helpful tips to ensure a successful repair. Let's get started with a simple, straightforward approach to restoring your window's smooth operation.
Preparation and Safety Guidelines
- Flathead screwdriver
- Safety glasses
- Gloves
- Always disconnect the window from its operating mechanism (e.g., disconnect the sash from the tracks) before attempting any repairs. This prevents accidental injury from a falling window.
- Use appropriate safety equipment, such as gloves and safety glasses, to protect yourself from sharp edges or potential debris.
- If you are uncomfortable performing this task yourself, or if you encounter unexpected difficulties, contact a qualified window repair professional.
Step-by-Step Instructions
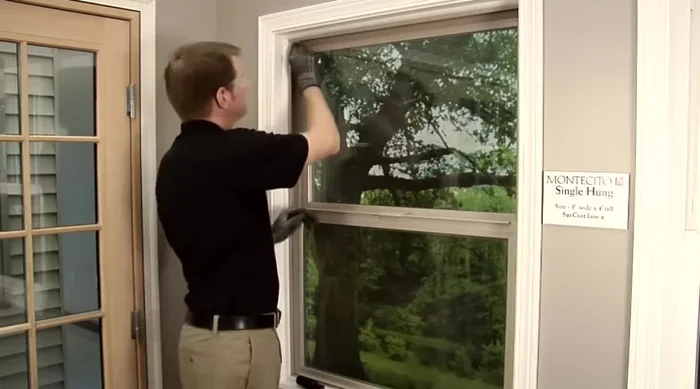
Prepare the Window
- Remove the takeout clips on either side of the window jam using a flathead screwdriver at a 45° angle.
- Remove the sash stops located in the top corners of the window.

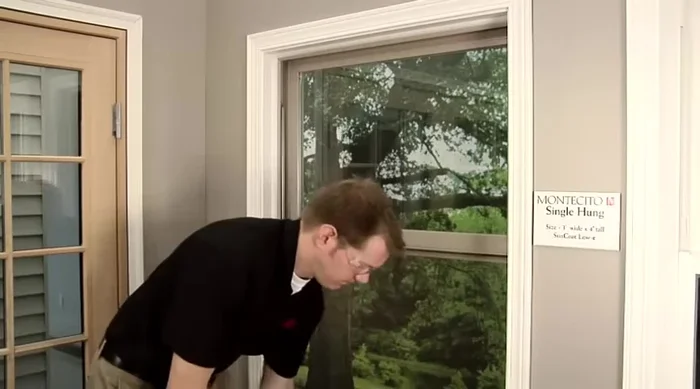
Prepare the Window Remove the Sash
- Slide the sash up until it disengages from the takeout clips. Ensure both sides catch on the takeout clips.
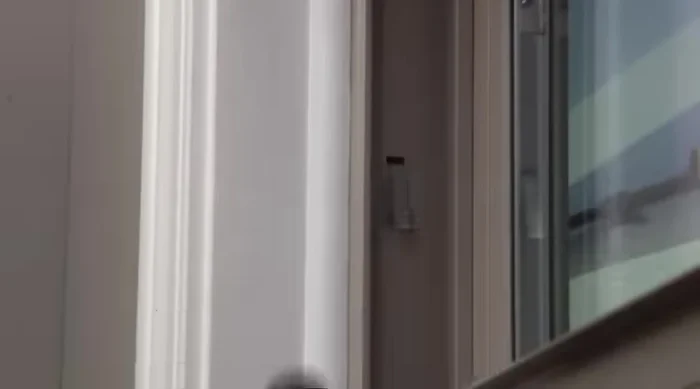
Remove the Balancer
- Slide the sash to one side to access and remove the spring-loaded balancer (use caution).
- To remove the balancer, push it down and then slide it back up.
Remove the Balancer Install the New Balancer
- To reinstall, place the hook at the bottom of the balancer into the window jam and press down (it's spring-loaded, so expect resistance). Push the top portion up and ensure the tab goes on the outside of the balancer.
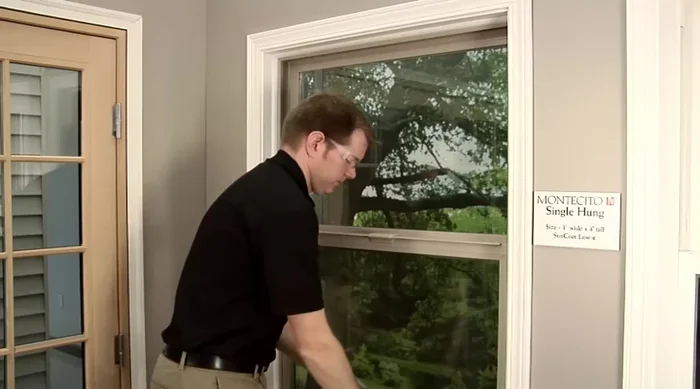
Install the New Balancer Reinstall the Sash
- Reinstall the sash by placing it above the bottom of the balancer, lining it up, pushing it in, and balancing it back and forth until both sides catch.
- Slide the sash down about an inch or two. Ensure you don't see the balancer or any metal on either side of the spring.
- Push in both takeout clips and bring the sash down.
- Reinstall the sash stops.
Reinstall the Sash


Read more: 3M Thinsulate Window Film Installation: A Step-by-Step Guide
Tips
- Use caution when handling the spring-loaded balancer.
- Expect resistance when pushing down on the spring-loaded balancer during reinstallation.