A wobbly chair can be more than just an annoyance; it's a potential hazard. That familiar creak announcing the imminent collapse of a cherished heirloom or hardworking kitchen chair is a call to action. But fear not, the solution doesn't require a frantic search for a replacement. With a little know-how and the right materials, you can restore your chair to its former glory and enjoy its steadfast support for years to come. This article focuses on a particularly robust repair method using readily available steel and epoxy resin, offering superior strength and longevity compared to traditional wood glue fixes.
Forget flimsy repairs destined to fail! This guide will demonstrate a strong, reliable method for fixing broken chair rungs. We’ll walk you through each step, from preparing the damaged area and selecting the appropriate steel reinforcement to mixing the epoxy and ensuring a secure, lasting bond. Let's get started and learn how to revitalize your wobbly chair with a repair that's built to last.
Preparation and Safety Guidelines
- Drill
- Drill bits (pilot hole bit, larger bit)
- Drywall screws (3 inch)
- Epoxy (two-part, strong adhesive)
- Clamps
- Denatured alcohol
- Gloves
- Varnish/Lacquer (for touch-up)
- Putty knife
- Always wear safety glasses to protect your eyes from flying debris during drilling and sanding.
- Ensure the chair is stable and won't tip over while you're working on it. Use clamps or ask for assistance if needed.
- Use proper ventilation when working with epoxy as the fumes can be harmful. Wear a respirator if necessary.
Step-by-Step Instructions
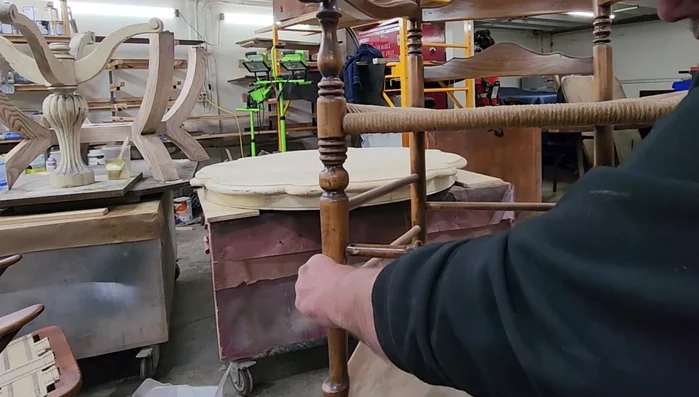
Assessment and Preparation
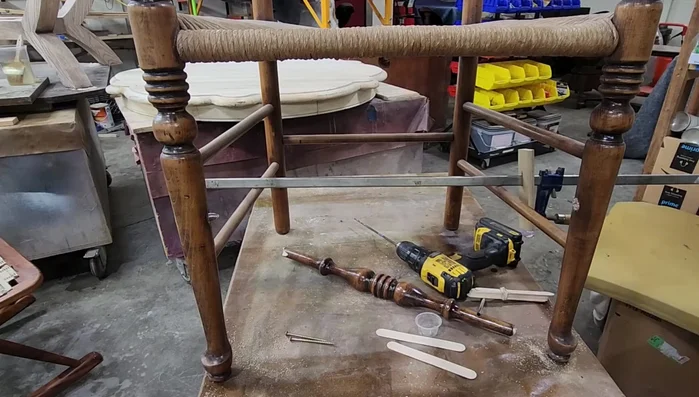
- Test fit the broken rung to assess the damage and determine the repair approach.
- Prepare the epoxy according to manufacturer's instructions. A strong epoxy (like a quick-cure epoxy) is recommended.
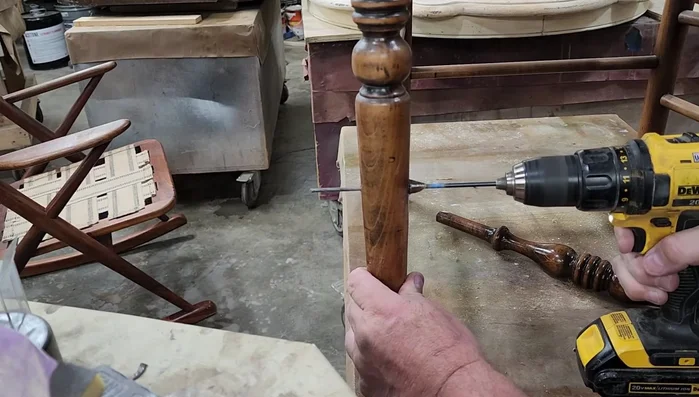
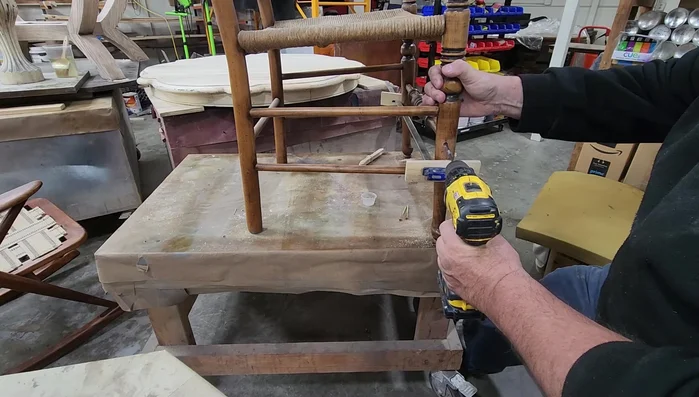
- Drill pilot holes into the spindle from the outside of the chair leg to prevent splitting when inserting the screws.

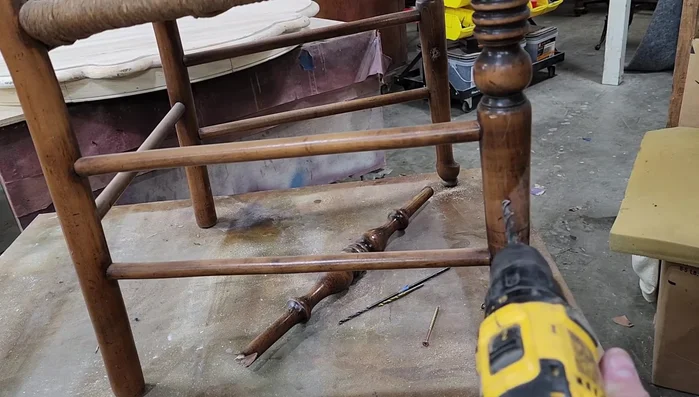
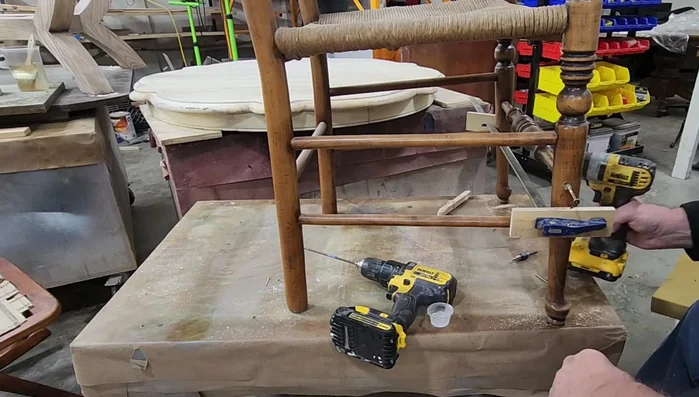
Assessment and Preparation Drilling Pilot Holes
- Drill a pilot hole through the broken rung, centering it on the spindle.
- Drill a corresponding pilot hole from the other side of the chair leg, ensuring alignment with the hole in the rung.
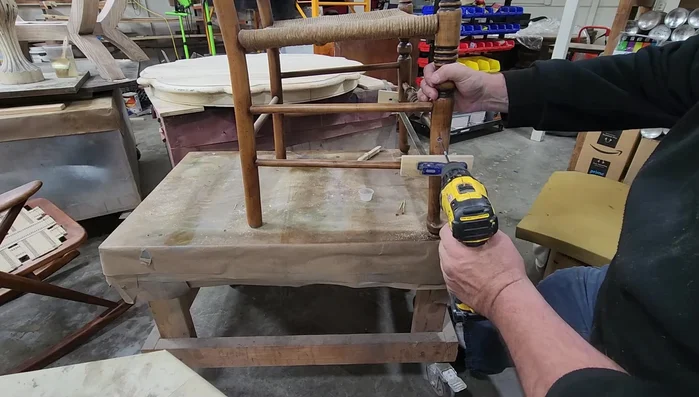
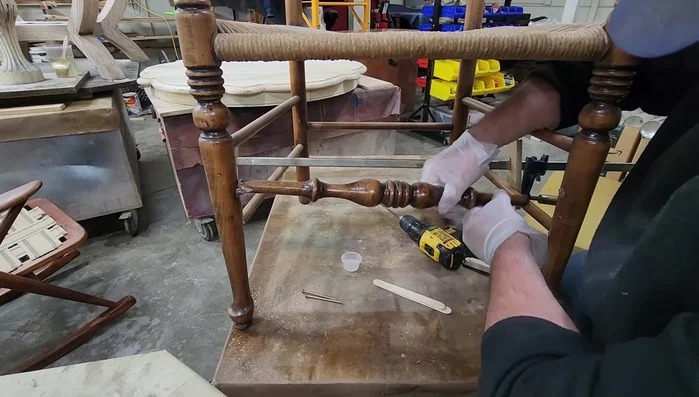
Drilling Pilot Holes Epoxy Application and Joining
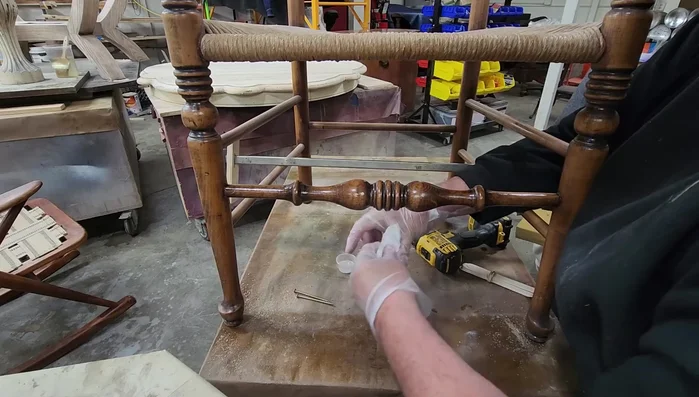
- Apply epoxy generously to both the broken surfaces of the rung and the chair leg, ensuring complete coverage.
- Insert the broken rung into the chair leg, aligning it carefully.
- Use a clamp to hold the pieces firmly in place while the epoxy sets.
- Coat the screws with epoxy before inserting them, for added strength and to prevent splitting.
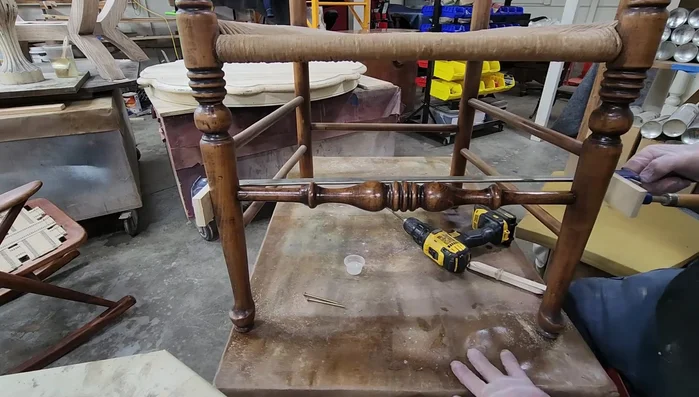
Epoxy Application and Joining Cleanup and Curing
- Clean excess epoxy with denatured alcohol.
- Allow the epoxy to fully cure (at least overnight).
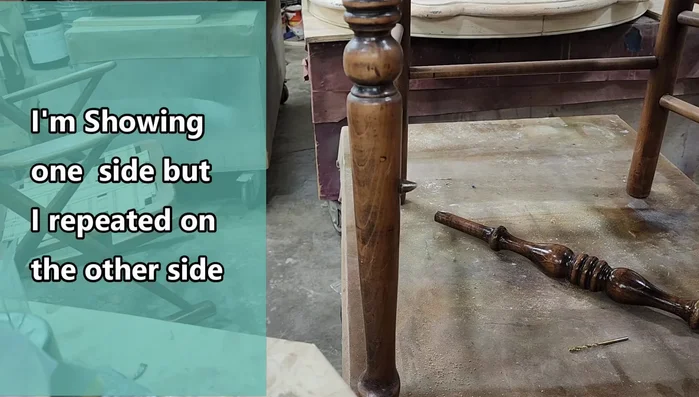
Cleanup and Curing Finishing Touches
- Fill screw holes with epoxy putty.
- Apply a touch-up coat of varnish or lacquer.
Finishing Touches


Read more: Silence that Squeaky Bed: A Complete Fix-It Guide
Tips
- Use a strong epoxy adhesive for a durable repair. Yellow or wood glue isn't sufficient for this type of repair.
- Always apply adhesive to both surfaces being joined for maximum adhesion.
- Wear gloves to avoid getting epoxy on your hands and spreading it where you don't want it.
- Use pilot holes to prevent splitting the wood when inserting screws.
- Coating screws with epoxy before insertion improves strength and prevents damage to the wood.