The harsh glare of the sun can wreak havoc on even the sturdiest of dining tables, leaving behind a faded, cracked, and generally unsightly surface. That beloved family heirloom or cherished secondhand find doesn't have to end up relegated to the garage; with a little elbow grease and the right approach, you can revitalize its beauty. This guide focuses on the rewarding process of restoring a sun-damaged dining table, breathing new life into a piece of furniture that holds countless memories. We'll tackle the challenges of faded finishes and sun-bleached wood, transforming a tired table back into a centerpiece you'll be proud to display.
This step-by-step restoration project covers everything from safely stripping away the old finish to meticulously sanding the wood and applying a beautiful, protective new coat. We'll explore the tools and materials you'll need, offer practical tips and tricks to achieve professional-looking results, and highlight crucial techniques to ensure a smooth and long-lasting finish. Let's get started and transform that sun-damaged table into a stunning centerpiece once more!
Preparation and Safety Guidelines
- Gel stripper
- Steel wool
- Lacquer thinner
- Orbital disk sander
- Sandpaper (150 and 220 grit)
- Stain
- Sealer
- Toner (optional)
- Topcoat
- Windex
- Shellac
- TransTint dye (brown mahogany)
- Alcohol
- Furniture polish
- Air hose
- Rag
- Always wear appropriate safety gear: This includes a respirator mask to avoid inhaling sanding dust and chemical fumes, safety glasses to protect your eyes from flying debris, and gloves to protect your skin from chemicals and splinters.
- Work in a well-ventilated area: Stripping and sanding produce significant dust and fumes that can be harmful. Open windows and doors, or use a respirator with appropriate filters.
- Dispose of chemicals and waste properly: Stripping chemicals and sanding dust are hazardous waste. Check your local regulations for proper disposal methods to prevent environmental damage.
Step-by-Step Instructions
Stripping the Old Finish
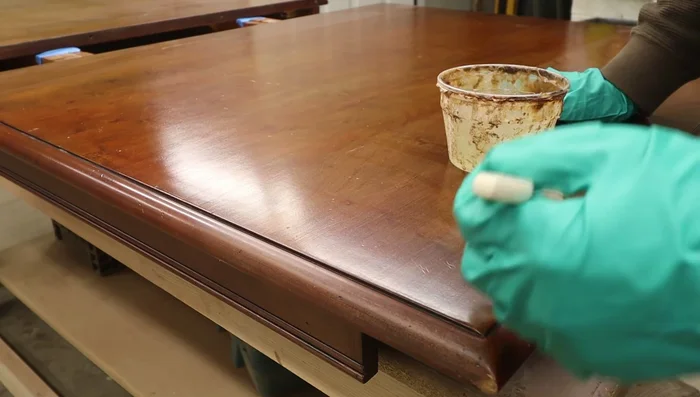
- Apply gel stripper to the table's surface. Two passes are recommended for thorough removal of the old finish.
- Clean the stripped surface with steel wool and lacquer thinner to ensure complete finish removal.

Stripping the Old Finish Sanding the Tabletop
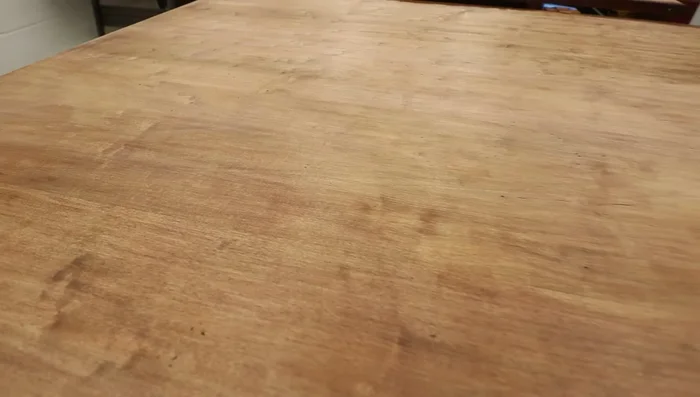
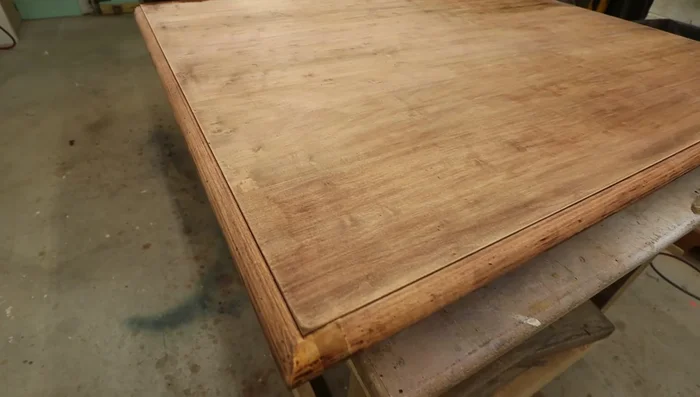
- Sand the table using an orbital disk sander with 150-grit sandpaper, followed by hand sanding with 150-grit and then 220-grit sandpaper.
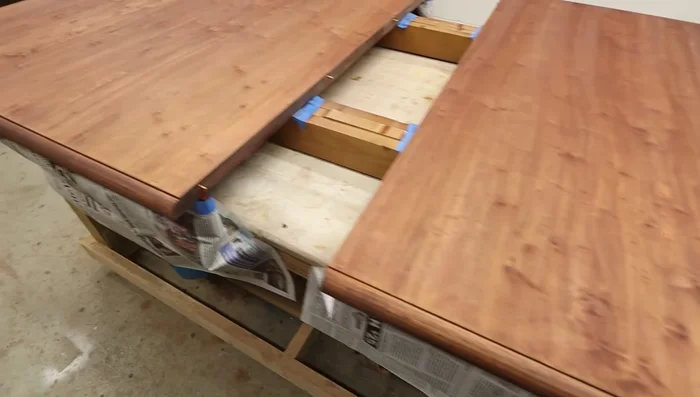
Sanding the Tabletop Staining and Sealing the Tabletop
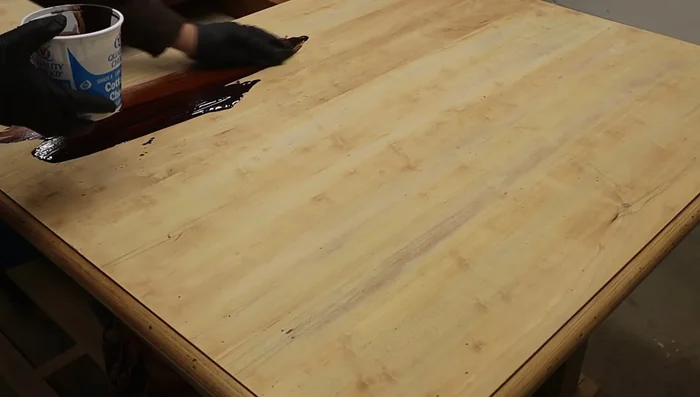
- Apply stain to the sanded table surface.
- Let the stain dry completely (at least 48 hours).
- Apply a sealer coat and allow it to dry. Sand lightly.
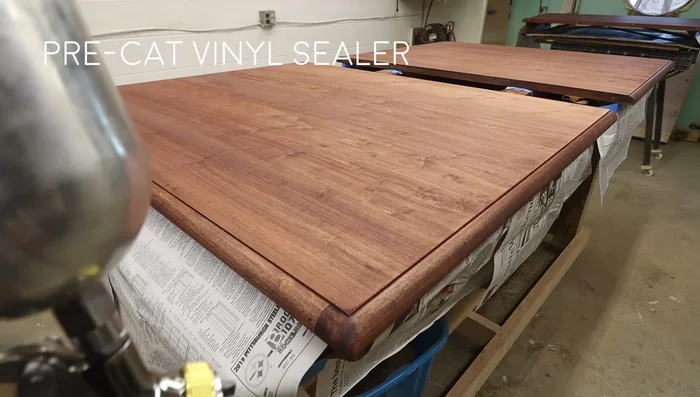
Staining and Sealing the Tabletop Top Coating the Tabletop (Optional)
- Apply a toner coat (optional) to even out the color, followed by a top coat.
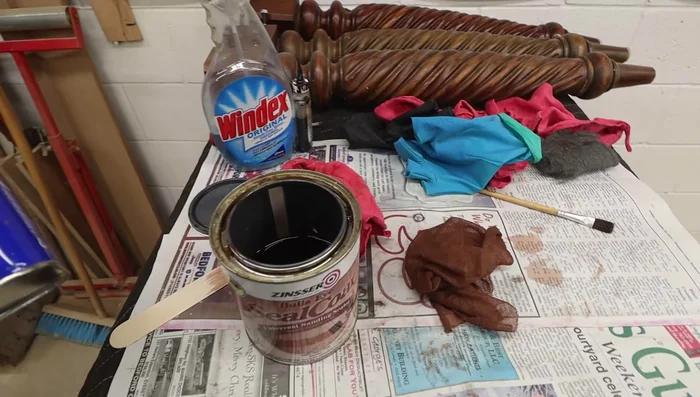
Top Coating the Tabletop (Optional) Cleaning and Touching Up the Legs
- Clean and touch up the table legs using diluted Windex (50/50), steel wool, and an air hose to remove grime.
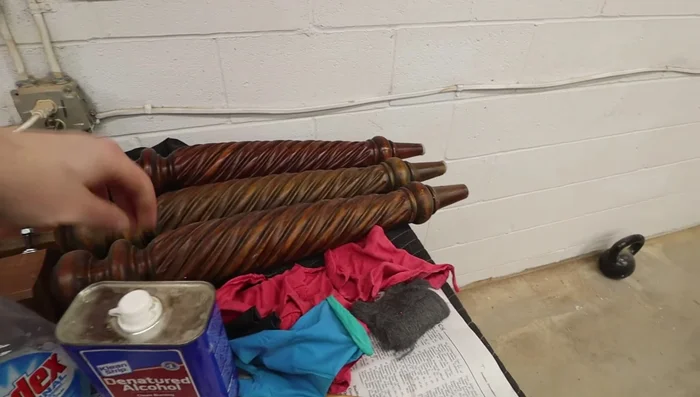
Cleaning and Touching Up the Legs Dyeing and Finishing the Legs
- Apply a mixture of thinned shellac and TransTint brown mahogany dye to the legs to match the tabletop color. This acts as a rejuvenating touch-up, not a full finish.
- After the shellac mix dries, buff the legs with fine steel wool, clean with a rag and furniture polish.
Dyeing and Finishing the Legs Reassembly
- Attach the legs to the table.
Reassembly


Read more: Silence that Squeaky Bed: A Complete Fix-It Guide
Tips
- Allow ample drying time for stain and finishes to prevent issues.
- Use a shellac/dye mix for touch-ups to match existing color, not create a new finish.