Are your favorite armchairs or sofas showing their age with unsightly cracks in the armrests? Don't despair! Replacing worn-out furniture can be costly and time-consuming, but a simple DIY repair can often revitalize your cherished pieces. This guide provides a straightforward and effective method for patching those annoying cracks using readily available materials: vinyl and silicone sealant. This inexpensive solution can breathe new life into your furniture, restoring both its comfort and aesthetic appeal. Forget about costly professional repairs or replacing perfectly good furniture.
This simple technique, using materials you can easily find at any hardware store, allows you to tackle the job with minimal tools and expertise. We'll walk you through each step of the repair process, from preparing the damaged area to achieving a smooth, durable finish. Ready to transform your cracked armrests? Let's dive into the step-by-step instructions below.
Preparation and Safety Guidelines
- Vinyl
- Silicone Caulk
- 3M Contact Adhesive
- Putty Knife
- Sandpaper
- Masking Tape
- Newspaper
- Star Ratchet
- T25 Torx Bit
- Always work in a well-ventilated area. Vinyl and silicone adhesives can release fumes.
- Protect your work surface with a drop cloth or newspaper. Silicone is very difficult to remove once cured.
- Use caution when handling sharp objects like utility knives or razor blades when preparing the armrest for repair.
Step-by-Step Instructions
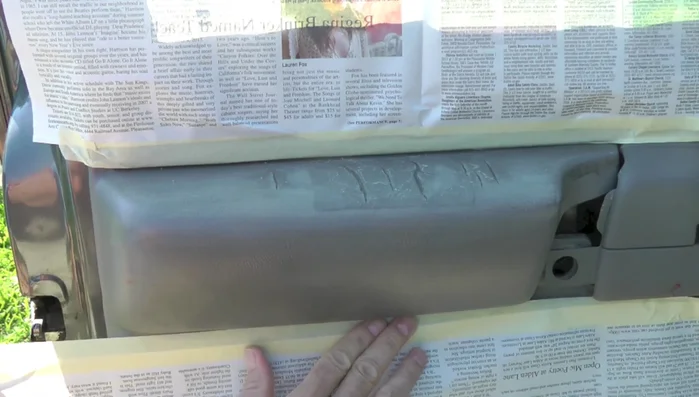
Prepare the Armrest
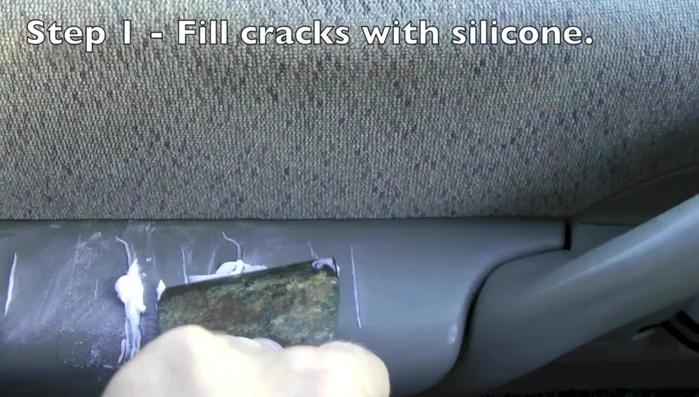
- Fill cracks with clear silicone caulk.
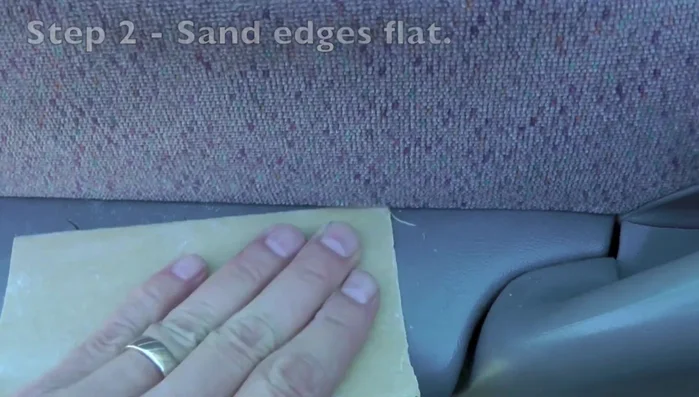
- Sand off excess silicone to create a smooth surface.
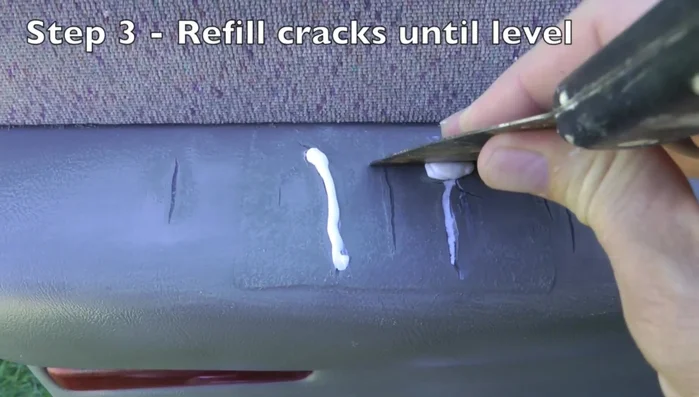
- Refill any remaining cracks with silicone caulk, ensuring a smooth surface.

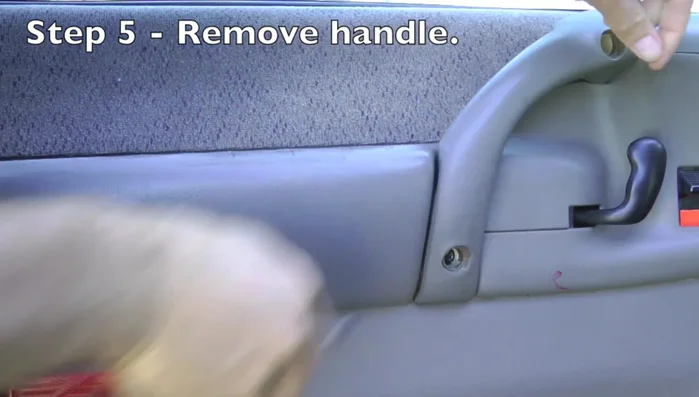
Prepare the Armrest Prepare the Vinyl
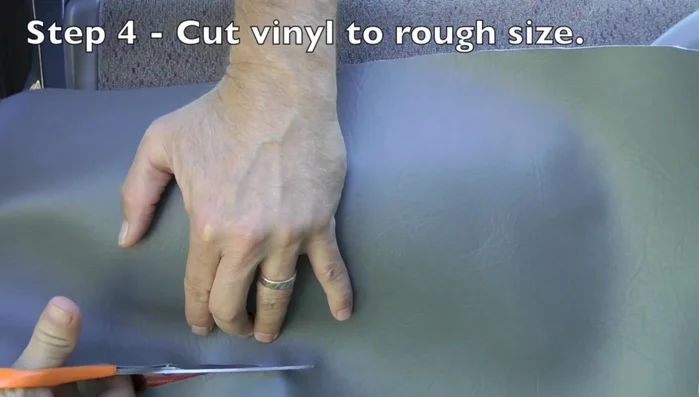
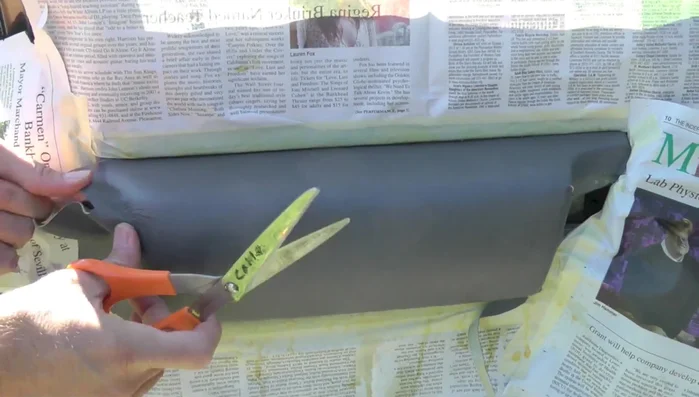
- Cut vinyl to rough dimensions, considering the armrest's shape and the door handle.
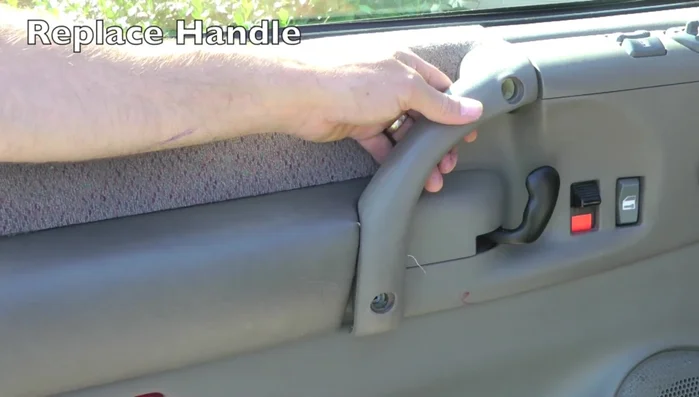
- Remove the door handle using a T25 Torx bit and ratchet.
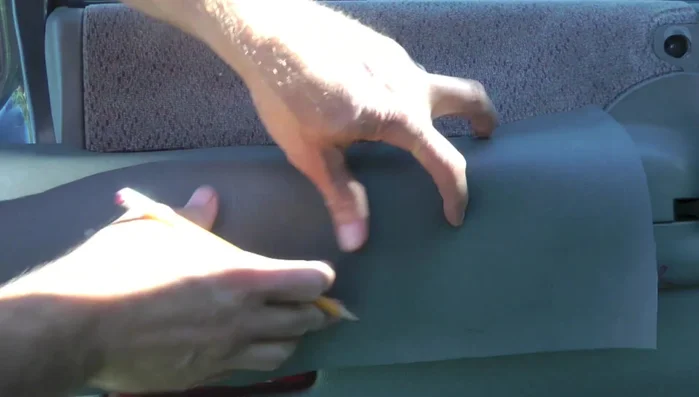
- Create the final vinyl pattern, ensuring it's tucked in at the top and stretched at the bottom. Cut to shape, slightly larger to allow for adjustments.
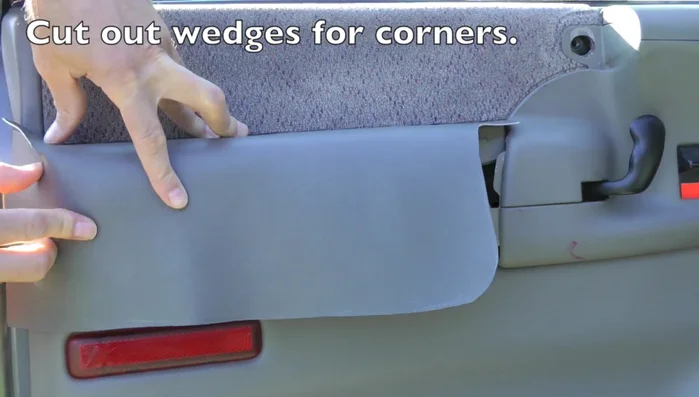
- Cut wedges in the vinyl to allow for wrapping around corners.
Prepare the Vinyl Prepare for Adhesion
- Sand between the cracks to ensure good adhesion of the adhesive.
- Mask off the surrounding area to protect it from adhesive spray.
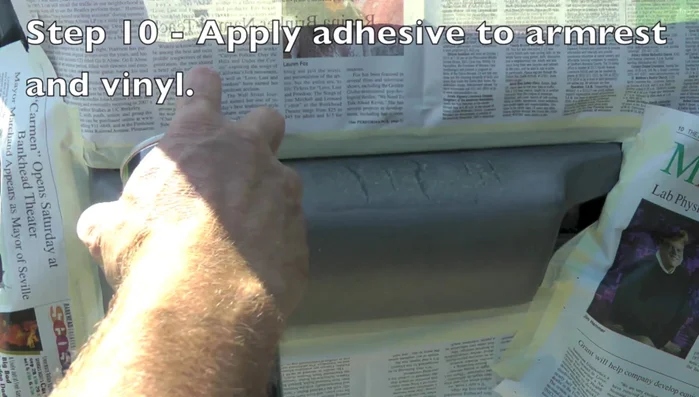
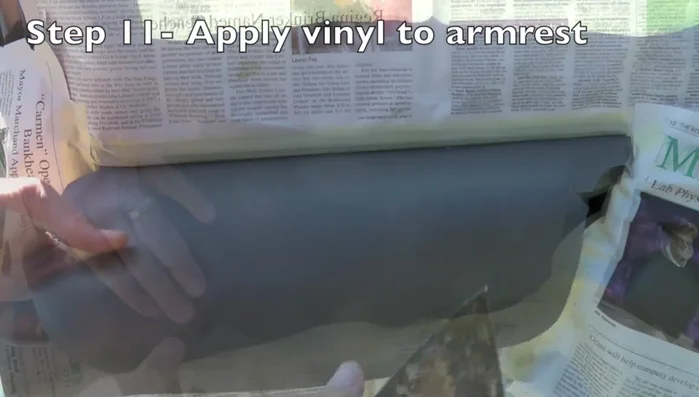
Prepare for Adhesion Apply Vinyl
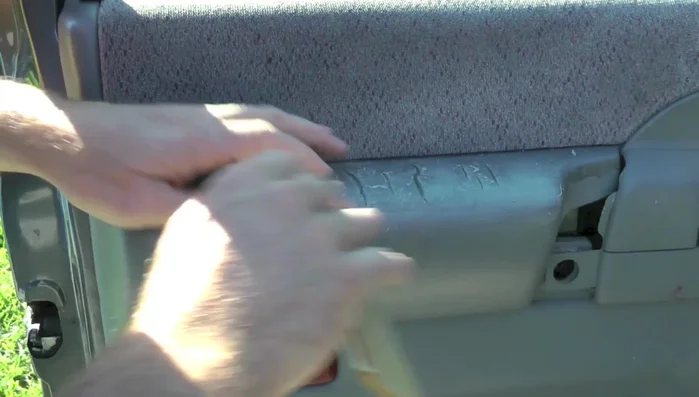
- Apply 3M spray adhesive to both the vinyl and the armrest surface, following instructions. Let it dry for about 4 minutes.
- Apply the vinyl, starting from the top, using a putty knife to smooth it out and eliminate air bubbles.
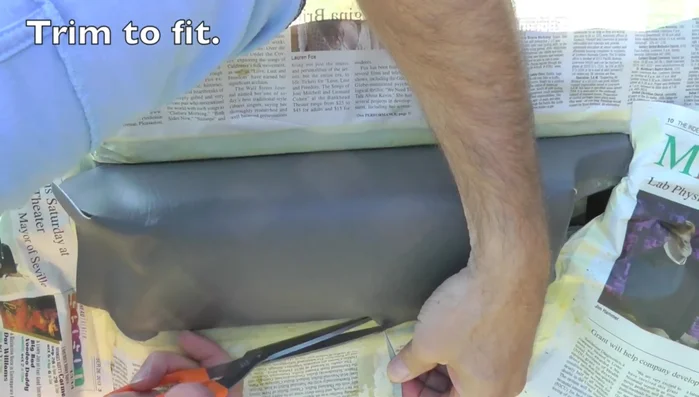
- Cut the excess vinyl and ensure a snug fit. Use the putty knife to press the vinyl into the cracks.
- Wrap excess vinyl around to hide the seam at the top, trim and achieve a clean finish.
Apply Vinyl Final Steps
- Remove masking tape and paper. Reattach the door handle.
Final Steps
Read more: Silence that Squeaky Bed: A Complete Fix-It Guide
Tips
- Use clear silicone caulk so you can monitor the drying process.
- Cut the vinyl slightly larger initially to allow for adjustments during installation.
- Thoroughly cover all surfaces with adhesive spray.
- Use a putty knife to work the vinyl into the cracks and remove air bubbles.