Sagging cushions? Don't toss them! The heart of many comfortable cushions lies in their compressed foam cores, and while these may seem beyond repair when flattened, revitalizing them is often easier than you think. Many cushions, particularly those found in sofas and chairs, suffer from the gradual compression of their inner foam, leading to a loss of support and a generally uncomfortable seating experience. This isn't necessarily a sign that replacement is needed; with a few simple tools and techniques, you can often restore your cushions to their former glory, saving money and reducing textile waste.
This article provides a practical, step-by-step guide to reviving your compressed foam cushion cores. We'll explore effective methods to plump up those flattened fillers, addressing common problems and offering solutions for various types of foam. Get ready to breathe new life into your tired cushions, and follow along as we reveal the simple secrets to a comfortable, refreshed seating experience.
Preparation and Safety Guidelines
- Foam distributor
- Custom cut foam
- UPS
- Heavy-grade Dacron
- Adhesive (K grip)
- Silk film
- Vacuum cleaner
- Always wear a dust mask when handling compressed foam. Foam particles can be irritating to the lungs.
- Use sharp, clean tools to avoid tearing or damaging the foam. Dull tools require more force, increasing the risk of injury.
- Work in a well-ventilated area to avoid inhaling fumes from any adhesives used during the repair process.
Step-by-Step Instructions
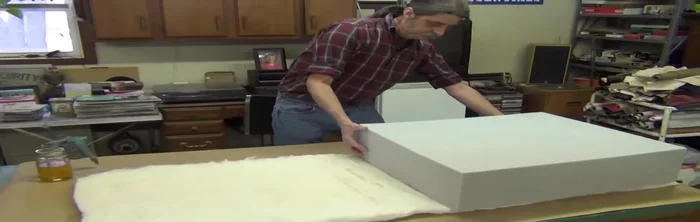
Remove Old Foam Core
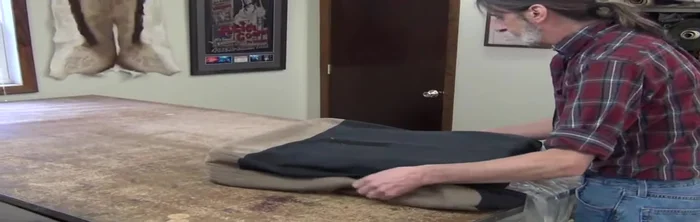
- Remove the old, compressed foam core carefully, being mindful of the zipper heads to avoid damage.
Source Replacement Foam
- Obtain custom-cut replacement foam from a foam distributor.

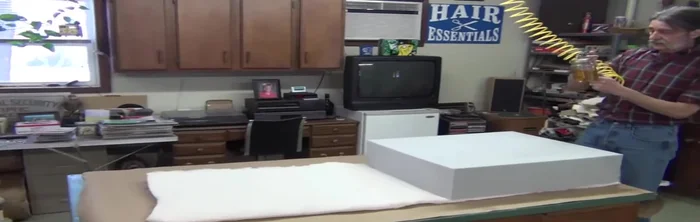
Source Replacement Foam Prepare New Foam Core
- Prepare the new foam core for insertion. If using reversible materials, consider orientation for optimal appearance.
Prepare New Foam Core Apply Adhesive
- Apply adhesive (K grip recommended) to the new foam core and the cushion's inner surface.
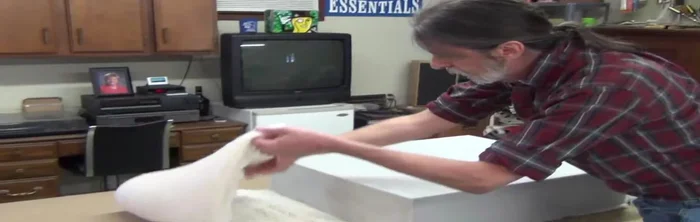
Apply Adhesive Insert New Foam Core
- Carefully fit the new foam core into the cushion, starting from the back and working towards the front, ensuring a snug fit.
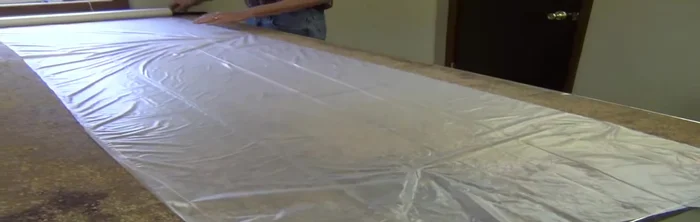
Insert New Foam Core Compress and Distribute Foam
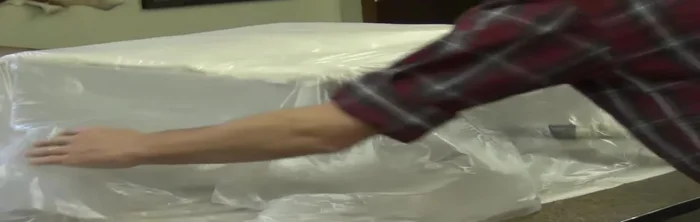
- Use silk film and a vacuum cleaner to compress the foam core and ensure even distribution within the cushion cover.
- Allow the foam to expand slightly, ensuring the cover is properly aligned before fully removing the vacuum and silk film.
Compress and Distribute Foam Remove Vacuum and Film
- Carefully remove the vacuum and silk film, ensuring the Dacron fill remains undisturbed.
Remove Vacuum and Film Close Cushion
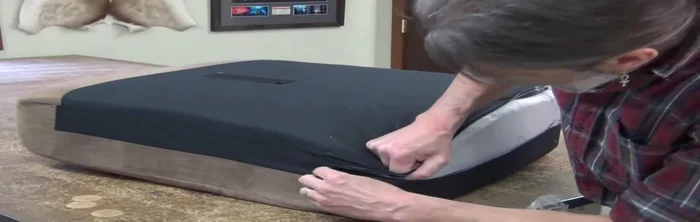
- Zip up the cushion carefully, avoiding damage to the zipper.
Close Cushion

Read more: Silence that Squeaky Bed: A Complete Fix-It Guide
Tips
- Be cautious when removing the old cover to prevent zipper damage.
- Using K grip adhesive is recommended for this type of repair.
- Work with the seams and folds of the plastic film in one direction to make removal easier.
- Take pressure off the foam and keep the Dacron out of the zipper teeth when zipping up the cushion.